workinforwood
Member
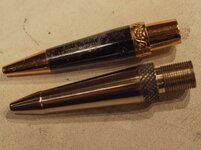
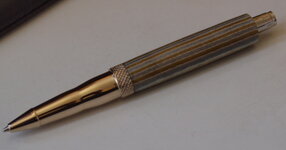
Yep..over the years the Sierra pen has really evolved into a stunningly beautiful pen. Problem is, the engineering has never evolved with the pen. I swear there is not a day goes buy that my wife isn't complaining about her sierra coupon pen laying in pieces at the bottom of her purse. I put it back together, or my daughter does, but the next day it falls apart again. Drives me nuts! In my opinion, the nib section should screw into the pen barrel. This is where all the problems occur. The pen is only held together by a little grip on the transmission, and there is not exactly a lot of bite up there as the length of the tube that holds the tranny is very short. The pen pulls itself apart in the purse, then the pieces rattle around and the tranny starts to undo itself and then the refill falls out...it's a nuisance. But I always liked the stubby pen barrel and long ballpoint nib section. You guys are always interested in the nitty gritty of what a guys doing, and although I have no idea what I'm doing, I am a profound BS'er...so I can make myself sound like I know what's up as good as the next guy!:biggrin:
No doubt there's a multitude of ways to tackle this. My way is through the limited teachings of Steve Jackson and Gary Nichols and personal playtime, so my techniques are like that of a Mutt. I'm sure there's something here ya'll can learn from though, because it never hurts to see another person's opinion on how to do things.
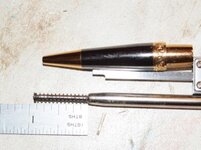
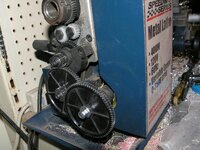
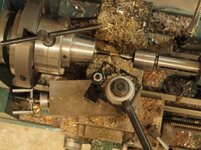
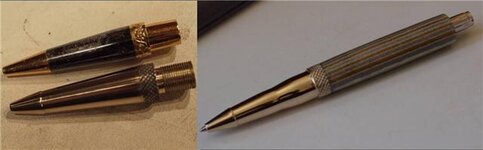
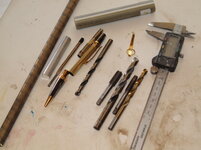
Image 1 is a majority of my parts and tool accessories.
There is a 1/2" rod of Alumibronze and a piece of Aluminum.
A 9x1.25 tap and matching 7.75 drill bit
A 10x.75 tap and matching 9.25 drill bit
Junk sierra parts for measurements
Pen clip from who knows what
Pen blank from Exoticblanks.com ..thanks Dawn.
Calipers.
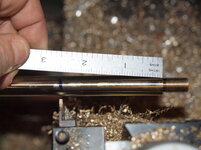
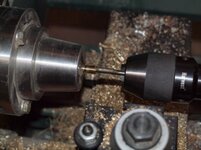
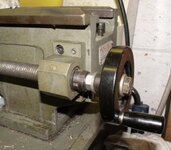
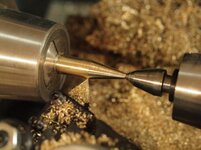
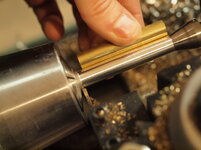
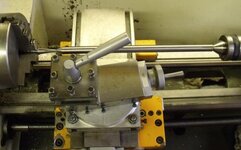
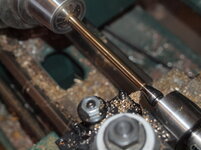
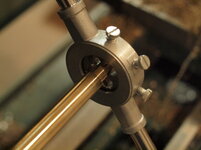
Image 2: I measure with the calipers the OD of the centerband on the sierra nib section. I will need my new pen to be slightly larger to have room for my threading. The alumibronze is chucked in the lathe real close to the collet. With a small pilot countersink bit I countersink the center of the rod. Then I extend it out about 8 inches and install a live center for support and rigidity. I spin the rod down so that it is about a 16th of an inch larger than the original diameter of the sierra nib. If it was larger than that, it wouldn't matter, long as the diameter isn't too small. I like to just go with how I feel, rather than get to many numbers in the way.
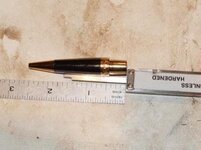
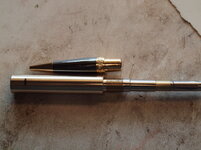
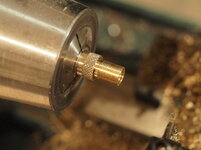
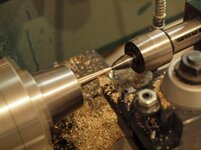
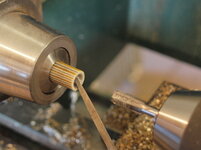
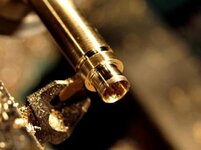
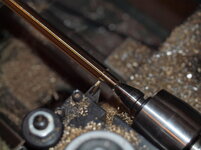
Image3: There needs to be a tennon. I am going to tap my pen blank with a 10x.75 thread. Therefore the tennon on the nib will have an OD of 10 mm. The tennon on the sierra nib is something like 7/16 long, so I just make my tennon 1/2" long because I like that number a bit better..easier on my brain. The tenon was cut with a triangle bit and then I come back and clean up the shoulder with a parting tool.
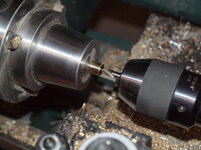
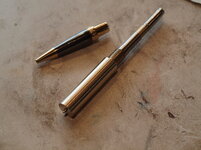
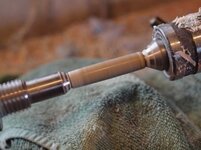
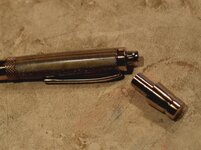
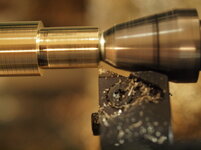
Image4: This is a thread cutter. There are a few different types of thread cutters. You can cut threads with just a single point bit, or you can use a specific cutter depending on the threads you want. A single point bit gets into tighter spaces like shoulders. A thread cutter like the one I show is specifically designed for a .75 mm thread. It will only cut to that exact width and depth. So you have a perfect thread every time, for people like me that don't know how to measure very well. Going into a shoulder like this, you have to work real fast! It only will take the lathe about 2 seconds before that cutter runs that 1/2" length and crashes into your rod. This type of cutter can't be run upside down and reverse in small shoulder like this because the design is just too bulky, so I flip the switch on and then off real fast! I do not need the threads to run right into the shoulder anyhow..I just need enough threads to hold the pen together.
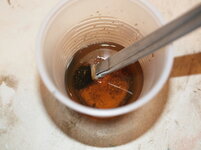
Image 5: This is a 10x.75 die. I run this die by hand over the threads. I am simply verifiying the size is correct, and chasing the threads helps clean them up even nicer too.
No doubt there's a multitude of ways to tackle this. My way is through the limited teachings of Steve Jackson and Gary Nichols and personal playtime, so my techniques are like that of a Mutt. I'm sure there's something here ya'll can learn from though, because it never hurts to see another person's opinion on how to do things.
Image 1 is a majority of my parts and tool accessories.
There is a 1/2" rod of Alumibronze and a piece of Aluminum.
A 9x1.25 tap and matching 7.75 drill bit
A 10x.75 tap and matching 9.25 drill bit
Junk sierra parts for measurements
Pen clip from who knows what
Pen blank from Exoticblanks.com ..thanks Dawn.
Calipers.
Image 2: I measure with the calipers the OD of the centerband on the sierra nib section. I will need my new pen to be slightly larger to have room for my threading. The alumibronze is chucked in the lathe real close to the collet. With a small pilot countersink bit I countersink the center of the rod. Then I extend it out about 8 inches and install a live center for support and rigidity. I spin the rod down so that it is about a 16th of an inch larger than the original diameter of the sierra nib. If it was larger than that, it wouldn't matter, long as the diameter isn't too small. I like to just go with how I feel, rather than get to many numbers in the way.
Image3: There needs to be a tennon. I am going to tap my pen blank with a 10x.75 thread. Therefore the tennon on the nib will have an OD of 10 mm. The tennon on the sierra nib is something like 7/16 long, so I just make my tennon 1/2" long because I like that number a bit better..easier on my brain. The tenon was cut with a triangle bit and then I come back and clean up the shoulder with a parting tool.
Image4: This is a thread cutter. There are a few different types of thread cutters. You can cut threads with just a single point bit, or you can use a specific cutter depending on the threads you want. A single point bit gets into tighter spaces like shoulders. A thread cutter like the one I show is specifically designed for a .75 mm thread. It will only cut to that exact width and depth. So you have a perfect thread every time, for people like me that don't know how to measure very well. Going into a shoulder like this, you have to work real fast! It only will take the lathe about 2 seconds before that cutter runs that 1/2" length and crashes into your rod. This type of cutter can't be run upside down and reverse in small shoulder like this because the design is just too bulky, so I flip the switch on and then off real fast! I do not need the threads to run right into the shoulder anyhow..I just need enough threads to hold the pen together.
Image 5: This is a 10x.75 die. I run this die by hand over the threads. I am simply verifiying the size is correct, and chasing the threads helps clean them up even nicer too.
Attachments
Last edited: