Removing the ends of CA finish

Signed-In Members Don't See This Ad

mgatten

Member
Joined
Jun 19, 2018
Messages
24
Location
Albuquerque, NM
I just started turning pens less than a week ago, but it has gone surprisingly well for a rank beginner.

I'm using CA for finish, and even that has gone great and has been much easier and less messy than I pictured.

But I do have one problem that I can't seem to find an answer for online:

As is common, the bearings tend to stick to the blank. So I use a razor to score the CA very, very close to the glue joint, and then snap them off. That works fine, without chipping the pen, but does tend to leave a tiny overhang of CA that I need to remove from each end of the blanks.

With the first pen, I figured it might just break off naturally during assembly. Instead, it caused chips at the end.

On the next pen, I ran it across some rough sandpaper. Which caused chips.

So then I tried fine sand paper. At first, I thought that worked, but once assembled I could see white rings on the ends of the parts.

Next, I tried buffing with micromesh, but it wouldn't remove the excess at all. I kept at it, and eventually seemed to make progress, but by then the CA had clouded.

So what am I missing? How do you get the end of the CA to be perfectly flush with the end of the barrel without risking chipping or clouding?
 
Signed-In Members Don't See This Ad

leehljp

Member Liaison
Joined
Feb 6, 2005
Messages
9,326
Location
Tunica, Mississippi,
I use fine sandpaper - usually 600 and then wax or polish. There are several plastic or paint polishes that work well on CA.

There are several ways to do it -
Some mount a jig on the lathe to turn the ends against sandpaper
Some have a jig with sandpaper on it and put it in a drill

I have both but at times, I will lay a piece of 400 or 600 SP on the table and do a few rotation motions on it. As you say, it leaves a white-ish ring on the end but a drop of polish/wax will smooth it out and bring the shine out.
 

Chief TomaToe

Member
Joined
Oct 6, 2017
Messages
262
Location
Bloomington, Indiana
I actually use one of the techniques that you have already mentioned. Even though I use non-stick bushings, there is usually some excess on the ends of the blanks. I see this as a positive since that CA is sealing the wood at the end of the blank.

To clean up the excess CA, I'll take a small strip of 240/320 grit sandpaper and slowly sand the ends of the blank in a circular motion with the sandpaper on a flat surface. I'll periodically check to see where I'm at to make sure I'm not sanding through to the wood - I'll stop just BARELY before I get to the wood. The key for me is to hold the blank as parellel to the ground as possible, so when I go to press the pen together there are no gaps.

It can be a little slow to do it this way, but I have had success with it!
 

flyitfast

Member
Joined
Sep 3, 2009
Messages
1,690
Location
San Antonio, TX 78247
I also use a 400 grit paper on a hard flat surface. However, when moving the blank in circular motion I had uneven sanding. Instead, I found if I move the blank vertically in a figure 8 motion while sanding the ends are much truer or square. My $.02.

Gordon
 

1080Wayne

Member
Joined
Feb 5, 2006
Messages
3,344
Location
Brownfield, Alberta, Canada.
I also use a 400 grit paper on a hard flat surface. However, when moving the blank in circular motion I had uneven sanding. Instead, I found if I move the blank vertically in a figure 8 motion while sanding the ends are much truer or square. My $.02.

Gordon


Figure 8 motion definitely the best in my opinion . Even better if you change your grip on the blank by 90 degrees every few rotations . Should be minimal whiteness at 400 grit , wet or dry . Wash ends with water or alcohol after sanding.
 

wouldentu2?

Member
Joined
Jan 27, 2011
Messages
899
Location
Oak Creek WI
When you do the sandpaper on the table method you can hear when the CA lip is gone. Light easy pressure with a figure eight pattern yields a flat surface in less than 10 seconds. You can also take the blank off every 5-6 applications of CA to eliminate the chipping.
 

Charlie_W

Member
Joined
Nov 16, 2011
Messages
5,918
Location
Sterling, VA USA
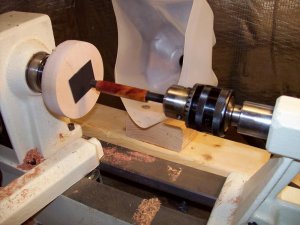
I apply my CA without the bushings...tube/blank between centers....no stuck bushings or chipped ends.
I too sand the ends on the lathe with a knock out punch and sanding disc. This sands radially and there is no chipping. I blot the ends with thin CA to remove the whiteness from sanding.
I would advise not to use water as mentioned as that would be moisture in the end grain getting under the CA finish.
 

rd_ab_penman

Member
Joined
Jun 1, 2007
Messages
1,646
Location
Red Deer, Alberta, Canada.
I smear some paste wax on the live and dead centers and do all my CA finishing between centers without any bushings.
Clean up the blank ends using my MT2 Oak sanding jig.

Les
 

Attachments

  • MT2OakSandingMill.jpg
    MT2OakSandingMill.jpg
    54 KB · Views: 265

ivel

Member
Joined
Jun 26, 2018
Messages
96
Location
Columbia,SC
I also use a 400 grit paper on a hard flat surface. However, when moving the blank in circular motion I had uneven sanding. Instead, I found if I move the blank vertically in a figure 8 motion while sanding the ends are much truer or square. My $.02.

Gordon

^^^^^^^^


Figure 8 motion definitely the best in my opinion . Even better if you change your grip on the blank by 90 degrees every few rotations . Should be minimal whiteness at 400 grit , wet or dry . Wash ends with water or alcohol after sanding.

Sheet of sandpaper on a flat clean surface and sand in a figure 8 like polishing and fiber optic connector.
 

jcm71

Member
Joined
May 5, 2011
Messages
1,660
Location
Chattanooga, TN
I use a barrel trimmer and turn the finished pen blank by hand. Make sure you use the correct shaft/barrel sleeve and that your cutter edges are sharp. Light cuts. I got that idea from this site. Works well for me.
 

MiteyF

Member
Joined
Jan 27, 2018
Messages
187
Location
Bay area
Sheet of sandpaper on a flat clean surface and sand in a figure 8 like polishing and fiber optic connector. .

You don't really do fiber optics by hand do you?

I started 25 years ago with the Unicam system, 15 years ago glue and polish, about 8 years ago I got the Corning Pretium Unicam kit. So yes, I do fiber opitics be hand. :)

I guessed I'm just spoiled with our fancy polishers... choose the proper grit, attach your fiber and 15 seconds later, viola!
 

ivel

Member
Joined
Jun 26, 2018
Messages
96
Location
Columbia,SC
Sheet of sandpaper on a flat clean surface and sand in a figure 8 like polishing and fiber optic connector. .

You don't really do fiber optics by hand do you?

I started 25 years ago with the Unicam system, 15 years ago glue and polish, about 8 years ago I got the Corning Pretium Unicam kit. So yes, I do fiber opitics be hand. :)

I guessed I'm just spoiled with our fancy polishers... choose the proper grit, attach your fiber and 15 seconds later, viola!

You obviously don't work for the State Government like I do. I thought I was in high cotton with my little boy scout kit. Lol
 

MiteyF

Member
Joined
Jan 27, 2018
Messages
187
Location
Bay area
You obviously don't work for the State Government like I do. I thought I was in high cotton with my little boy scout kit. Lol

Actually a lot of the work I do is military optics for the federal government, but all of our fiber optics are on the civilian side of the business.
 
Top Bottom