So, this has nothing to do with expense, but....
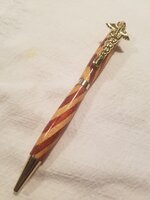
Last week I had made two pens to give to my daughter as a present. Both my wife and I had agreed they turned out pretty good, and we both were excited to give them to her. The next day.
I looked over one of them, noticed that the nib was sort of "off". Not aligned against the barrel. A little skewed.
As I had two more transmissions and nibs, I decided to try my hand at disassembling the bottom of the pen.
The upshot of all this is, I was very lucky. Because I had made the blank myself, and did not have any material left to make another one, then turn it, all with a 24 hour turnaround. But at the time, I didn't even think about that.
The first thing I did was remove the nib by grabbing it with a pair of pliers, grasping the barrel with a rubber jar lid twister thing. The nib came off with no problem, but was damaged by the pliers. Not a big deal, I had two more.
But removing the transmission...that was more problematic. I tried the same procedure, but what I accomplished was breaking the transmission off when it entered the barrel. Now I had a problem. I couldn't get the transmission out. Nothing to grab.
Good job Jeff, you just ruined the pen. So, perhaps I could drill the transmission to the point where it would just fall apart and I could pick the pieces out. No such luck, the drilling was iffy at best, the barrel was turning around, and I was afraid to clamp it lest I would crack it or mar it with pliers.
So I grabbed all of my drill bits and found the one that was closest in size to be able to fit inside the barrel, and tried to push it out from the other end. No such luck.
Finally, I put the barrel (with the transmission side down) on top of a bushing and centered it as best I could, grabbed a drill bit, stuck it through the barrel, and hit it with a hammer. It worked.
Then I reassembled the pen, but this time, for some reason, either I messed up the transmission, or it was bad. So, I had to go through the same process again.
Now I was on my last nib and last transmission.
Thankfully, this time I was able to reassemble the pen, everything lined up, it worked, and I did not damage the barrel in any way.
But I was very lucky.
Lesson learned.
Jeff