
workinforwood
Member
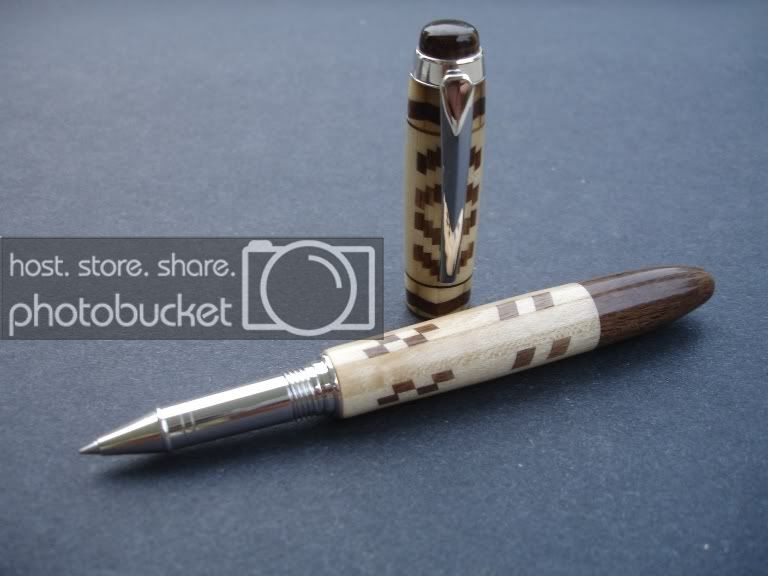
Well, I offered this blank out when I sold off all my other indian blankets, and nobody was interested so I decided to take on the challenge myself. I don't have alot of fancy equipment, never made a custom finial or a closed end pen before, never altered a JR Gent II centerband before either..it's all new to me! End result, a Quilted Indian Blanket closed end rollerball finished in straight CA. Sure wish I had a fountain end instead, but I don't and can't afford one, but could offer a trade of something with someone for one!
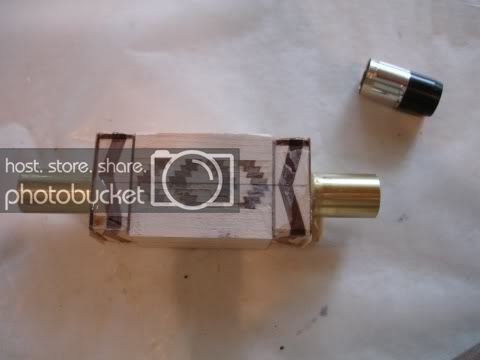
Anyhow...The cap is longer than a standard cap blank. My thought is that the centerband adds to the length, so I can reduce length by tossing out the centerband all together. Not just pop the rings, but completely remove it. I glued two cap tubes into the blank meeting in the center and then came back and trimmed them. I removed the plastic insert..gosh..I'd never get all this done without all you guy's knowledge and inspiration!!! I popped out the rings as per instructed, but it wasn't really necessary as I think the grinder would have just did if for me. I held the metal insert portion with some needlose plyers and ground off the flare with the side of the grinding wheel; it comes off real fast and easy!
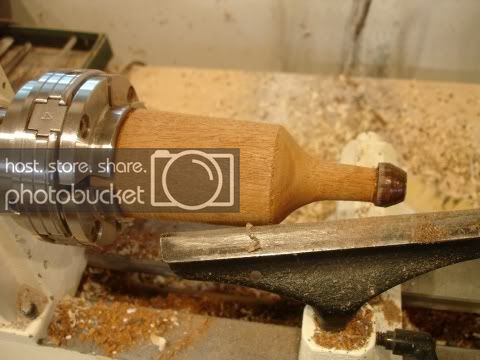
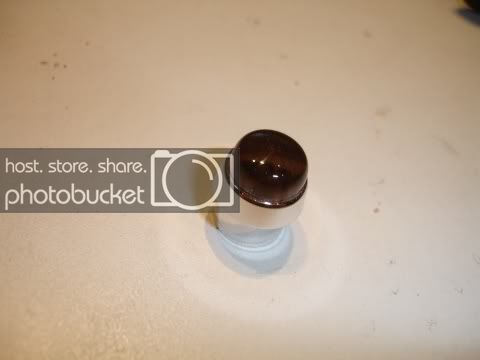
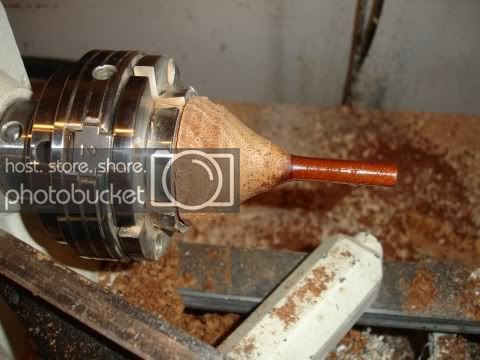
I built what my 7yr old daughter calls a "head conker". Just a chunk of wood to install into a chuck...really don't even need that, could mount on a faceplate, I don't see how it even matters! The finial is glued to the end...seems to me those instructions are on the IAP somewhere, although maybe my method is more crude, but works fine in the end. I turned the finial to size, finished it with CA, then did the parting and installed it with a bit of CA into the cap. It's nice..it's endgrain Walnut and looks just like a piece of indian gold all nice and polished..I'm patting myself on the back over this accomplishment as I was sweating pretty good before it all began!
I spun the cap with Johnny bushings just like any JR Gent cap and finished it with CA.
I drilled the pen to 2 3/4 deep, thank you for the reply on that, and thank you for being correct on the depth!!! The Johnny bushing on one end, I mark center on the other and spin it between centers like spinning a dowel.
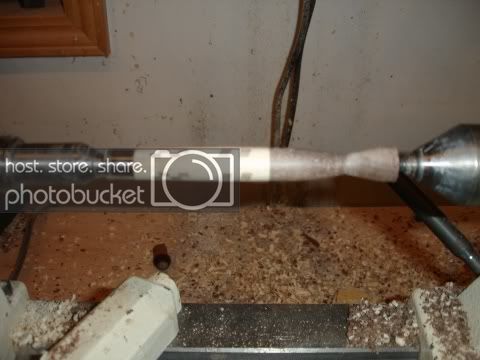
I pulled the "head conker" back out and re-mounted it. I spun the end out into a dowel that is a perfect straight tight fit into the tube. I installed the pen and parted off the end. Then I sanded out the pen. I removed the pen and shot the dowel jig with the stuff that makes the table saw slippery...this being my theory that I don't want my CA to stick the dowel into the pen! It worked too!!! I applied the finish.
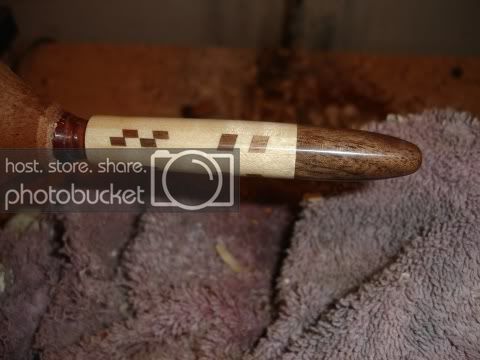
Finally, I pushed the center band completely into the cap flush to the edge. I installed the rest of the cap and pen parts ..the spring glued into the bottom of the pen so it can't fall out and get lost. I took the pen outside and shot a multitude of pictures with my terrible photo skills and equipment, and selected what I felt where the best one to brag with!
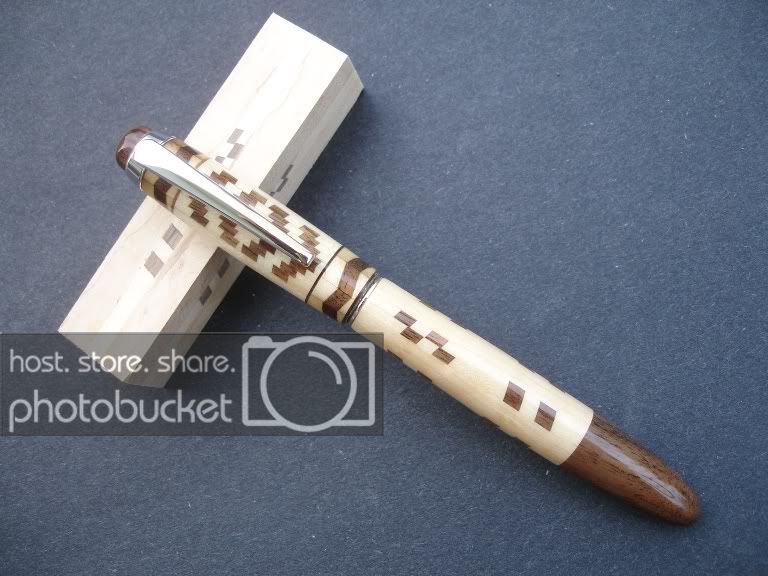
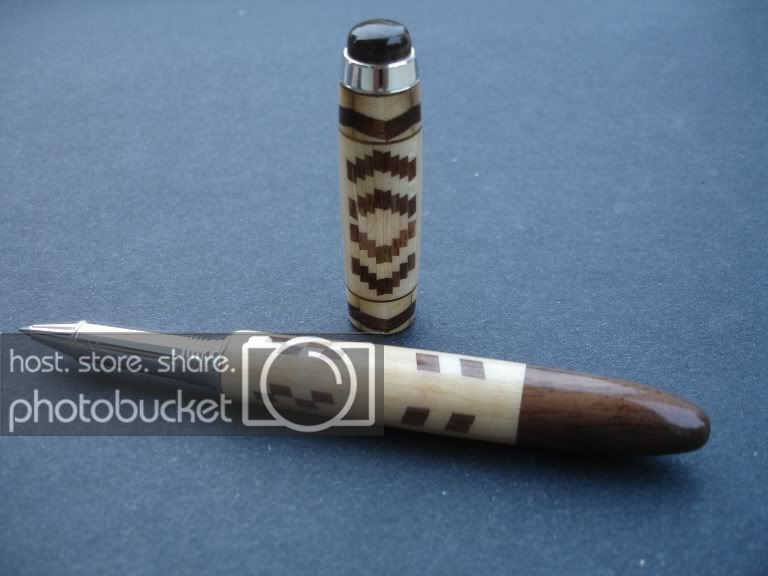
Now finally...here is the pen in the stand to display it's actual size in comparison with a Jr Gent II normal size pen. The cap is only 1/8" longer from the bottom of the clip holder to the centerband end of the pen. The entire pen is 5/8 longer than a standard JR kit.
Anyhow...The cap is longer than a standard cap blank. My thought is that the centerband adds to the length, so I can reduce length by tossing out the centerband all together. Not just pop the rings, but completely remove it. I glued two cap tubes into the blank meeting in the center and then came back and trimmed them. I removed the plastic insert..gosh..I'd never get all this done without all you guy's knowledge and inspiration!!! I popped out the rings as per instructed, but it wasn't really necessary as I think the grinder would have just did if for me. I held the metal insert portion with some needlose plyers and ground off the flare with the side of the grinding wheel; it comes off real fast and easy!
I built what my 7yr old daughter calls a "head conker". Just a chunk of wood to install into a chuck...really don't even need that, could mount on a faceplate, I don't see how it even matters! The finial is glued to the end...seems to me those instructions are on the IAP somewhere, although maybe my method is more crude, but works fine in the end. I turned the finial to size, finished it with CA, then did the parting and installed it with a bit of CA into the cap. It's nice..it's endgrain Walnut and looks just like a piece of indian gold all nice and polished..I'm patting myself on the back over this accomplishment as I was sweating pretty good before it all began!
I spun the cap with Johnny bushings just like any JR Gent cap and finished it with CA.
I drilled the pen to 2 3/4 deep, thank you for the reply on that, and thank you for being correct on the depth!!! The Johnny bushing on one end, I mark center on the other and spin it between centers like spinning a dowel.
I pulled the "head conker" back out and re-mounted it. I spun the end out into a dowel that is a perfect straight tight fit into the tube. I installed the pen and parted off the end. Then I sanded out the pen. I removed the pen and shot the dowel jig with the stuff that makes the table saw slippery...this being my theory that I don't want my CA to stick the dowel into the pen! It worked too!!! I applied the finish.
Finally, I pushed the center band completely into the cap flush to the edge. I installed the rest of the cap and pen parts ..the spring glued into the bottom of the pen so it can't fall out and get lost. I took the pen outside and shot a multitude of pictures with my terrible photo skills and equipment, and selected what I felt where the best one to brag with!
Now finally...here is the pen in the stand to display it's actual size in comparison with a Jr Gent II normal size pen. The cap is only 1/8" longer from the bottom of the clip holder to the centerband end of the pen. The entire pen is 5/8 longer than a standard JR kit.
")