Ok,
First things first. Ignore *ALL* other post above as there are many misleading and wrong info listed when it comes to the blanks in question.
Second. I do not have a big head nor dictating or a know it all but I do have extensive knowledge, first hand, in the polymer clay finishing arena and with these specific blanks.
The blanks that you have received needs no sanding.
Sanding pre-ca is *OPTIONAL* if you wish. On the site I have described how to do this. Some (names withheld here) have ruined the blanks by sanding.
The #1 reason for ruining blanks is OVER SANDING. That is when people use 100, 200 etc grit to sand the raw clay and they end up sanding off the cane slices from the blank resulting in partial seriously broken images .
I have detailed how to sand and that is with 800-1000 grit or finer, using solely finger pressure. The biggest reason to do that is to remove any blemishes that may be in the blank. The ends will need some trimming and I have an article here on IAP on how to do just that via lapping. Please
do *NOT* use a barrel trimmer on Toni's work, barrel trimmers are evil vile disgusting tools that will easily mess up clay, however it's good for some marterials.
I noted to sand left to right with the lathe OFF. This is 100% hand sanding and the reason for that is you can do a technique which is called
SPOT SANDING. That is just sand a very specific area in a very specific pattern/direction (think Japanese sand garden here ) with a very very very fine grit paper, i.e. 1,000 grit. This is also a very advanced topic and one that can be skipped with no problems at all to the end results.
That aside I would like to say that you can always PM, email or even call Toni or myself and we will be very glad to cover the process with you, or if you like you can send them to me and I will CA finish it for you and ship them back.
The easy pleasey method is as follows. ....
Step 1) Put the blank on the lathe (be it TBC, mandrel or any other method that YOU are comfie with.
Step 2) Proceed with your normal CA finishing method, be it wax the bushings, using the stick-fast coat method, the modernized CA formula's dump and smooth method or whatever.
Step 3) Remove the blank from the lathe and LAP the ends with sandpaper on the bed of the lathe or any other flat surface.
Step 4) Check the finish for imperfections as you may need to add more CA or remove some CA in some areas. The blanks as you receive them are a good 100% flush finished to the bushings with absolutely *NO* need to remove any clay.
Step 5) Assemble and enjoy your new pen.
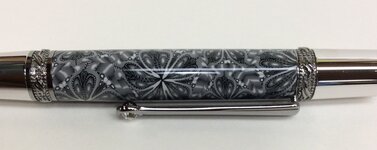
The blanks are thin laminate polymer clay cane slices, read 0.20mm thickness, yes I put that correct, that is 0.007 inches thick clay slices. Toni is world renowned for her super thin slices.
I hope this helped you greatly and please reply back with any questions, comments or concerns.
Article entry listing:
http://www.penturners.org/forum/member.php?u=10157
http://www.penturners.org/forum/f211/precision-end-trimming-tonis-blanks-k-lapping-116258/
http://www.penturners.org/forum/f14/poly-clay-testing-pen-disassembly-clay-vs-anvil-116707/
http://www.penturners.org/forum/f56/dragon-sceptre;-gent-tube-conversion-114232/
http://www.penturners.org/forum/f30/trimming-lathe-no-endmill-sandpaper-117347/
