I have no idea what your blue towels are, are they paper or fabric?
If you sand between CA coats what grit?
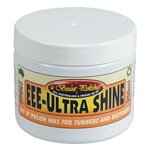
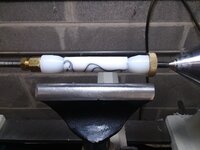
I was thinking for a CA finish on timber, I should do 400, 600, EEE? (or would EEE interfere with the CA?), Thin x3 or 5, Medium 3 or 5, then micromesh 1500 to 12000 ? any friction polish?
@DaveTas
The "blue shop towels" are a heavy duty paper ... often used in automotive shops (that's why they are called "shop" towels) for cleanup and handling parts ... they are not fabric.
I think they are a little stronger than "white kitchen towels" which you buy in the grocery story.
When I do a CA finish on timber, I would not use EEE. . In fact, I would not use EEE on bare wood, only on wood that had another "finish" applied first. . But I could very well be misunderstanding the purpose of EEE . . I know that it does have some light abrasive in it, but I would not count on that abrasive to work very well on bare wood. . I would use the EEE after first applying CA perhaps, or some other "sealer" or semi-hard finish.
But, as I said, I might not be understanding the proper use of EEE.
My routine to prepare for CA application would be sanding only ... start at 180 (if necessary), then 240, 320, 400, 600, 800, 1000, 1200, 1500, 2000.
(I might stop after 800 depending on the hardness of the wood and the surface quality of the turned surface).
Then I would apply 2 coats of thin CA and lightly sand with 400 grit; another 2 coats of thin and lightly sand ... these light sandings are just to get the high spots off the CA.
Then I would apply a coat of medium CA and sand with 320 (sometimes I will continue with thin CA and use it all the way through.
Another coat of CA and sand ... these sandings are more than "light" sandings because the thickness of CA has built up and can take more sanding.
Repeat this 3 or 4 times, until .......
Until I am getting the CA surface nice and smooth without any bumps/hollows and I am NOT sanding through to wood.
When I am happy with the surface, I will go to 400 grit, 600, 800, ....., 2000 ....
Or, I might go 400, 600, 800 and then use "Mequiar's Coarse", an automotive product with abrasive, followed by "Mequiar's Fine" and then follow that by "PlastX" (and automotive with no abrasive) for the final shine.
This is my usual routine, but it has taken several years getting to this ... there has been lots of trial and error, as I think everyone goes through.
The "Mequiar's coarse" would be classified as a friction polish, I think .... or possibly, more correctly, as a "cut polish".
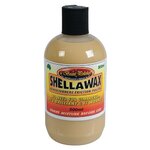
I am really not sure what a "friction polish" is ... maybe it is like Shellawax, which dries fairly quickly and gets shinier the more/harder you rub but does not contain any abrasives, but I have never used Shellawax after I have done the CA sequence.
Hope you get my meaning in all this ... feel free to ask.


") ie Tasmania.
ie Tasmania.