Need help from one of you Machinist Gurus...

Signed-In Members Don't See This Ad

Timbo

Member
Joined
Jan 4, 2008
Messages
1,188
Location
Kill Devil Hills, NC USA.
Not sure where else to post this, so I hope I'm not breking any rules.

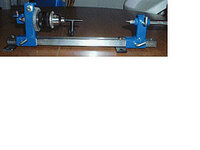
I want to create some inlayed pens using my laser engraver, which require a stationary indexing jig. The jig needs to be accurate and repeatable. The use of the automatic rotary attachment is not suitable for my needs. I basically know what I want to build, and I have a good starting point. What I don't have are metal working equipment or skills, nor a lot of the time to figure out stuff that some of you would find simple and probable enjoyable. This would be a collaborative effort. You provide most of the engineering and metalworking. I certainly can make wood parts, but can also fabricate accurate acrylic parts (e.g indexing wheels) using my laser.

I'd rather do this on the barter system. I can offer laser engraving/cutting services in return. If you're interested and up for a challange please PM me. Thanks for reading this.

Tim
 
Signed-In Members Don't See This Ad
I don't think you would need anything specifically machined. A stepper motor coupled to a pen mandrel run through a couple of bearings and you would be set up pretty cheaply. Of course that would be if your software has a way of driving a rotary axis.
 
Software driving a stepper motor, sitting inside my laser engraver...way too complicated for what I want to do. I don't need automation...just accuracy and repeatability. Basically, I'm going to send a job to the laser...let's say a little heart. It's going to engrave that onto the pen barrel. Then i'm going to rotate the pen barrel a specific amount, press the go button on the laser, it will rerun the same job. I'll repeat that as many times as needed. The indexing jig will allow me to place those little hearts evenly around the pen.
Thanks for the suggestion.
Tim

I don't think you would need anything specifically machined. A stepper motor coupled to a pen mandrel run through a couple of bearings and you would be set up pretty cheaply. Of course that would be if your software has a way of driving a rotary axis.
 
How about a nut and a long bolt through the pen barrel?
The flats on the nut and bolt could serve as your index.
 
Thanks. That could serve possibly as a limited solution. I'll want the ability to index more than 6 sides for sure. Will also want my jig to be flexible enough to handle the barrels for different pen kits...probably using the appropriate busihng sets...the cheap ones with the hole...not JohnnyCNC's that I use between centers.

How about a nut and a long bolt through the pen barrel?
The flats on the nut and bolt could serve as your index.
 
Hi Tim I ran across this article last night actually while searching for some info for a friend of mines' engraver. I shows a small indexing setup that you can make with your engraver.
http://www.epiloglaser.com/cs_kallenshaan.htm
If the link doesn't work, just google "kallenshaan" and look for the epilog laser case study. Hope this helps!

Thanks. Already saw it. Right now it's the top contender for what I want want to base by jig on.
 
Thanks. That could serve possibly as a limited solution. I'll want the ability to index more than 6 sides for sure. Will also want my jig to be flexible enough to handle the barrels for different pen kits...probably using the appropriate busihng sets...the cheap ones with the hole...not JohnnyCNC's that I use between centers.

You mentioned making acrylic parts .. those could serve as your flats to
hold position instead of the bolt head.. and you could control the number
of index positions by the number of flats on the acrylic. You could make
gears with no teeth (just flats) and the amount of rotation is controlled
by the position of the flats.

Some sort of plate that seats the acrylic parts would be needed in
order to control the positioning. A long bolt through the acrylic, bushings
and pen barrel would keep everything aligned. The plate could be very
simple.. a flat sheet that seats into the 0,0 position for repeatability and
a slot for the acrylic 'gear' to seat in to be sure of alignment.

It seems like the biggest problem with this would be keeping the parts
out of the way of the flying head. That would mean extra long bushings
to make sure you have enough clearance. The barrels would be pretty
close to the head. Making sure that the head doesn't go back to home
position could help, too. If you use a longer lens to keep the head from
hitting the parts, you risk losing resolution.. but it might eliminate the
worry of the head hitting anything.

OK, that's all I can think of right now. My brain hurts. There's a reason
I'm not an inventor..
 
Ah..I misunderstood. I thought you wanted to laser AROUND the pen body, not down a single vector along it's length.

That would be super easy then. Ken Kallashaan has about the simplest setup I've heard of.
 
Most common in milling is the 4th axis and a sherline rotary table is commonly used to with small milling systems for the 4th axis -- that works manually or CNC depending on the application.

Custom fabrication will have a hard time with costs vs something like the sherline table set on edge. Custom always focuses on the precise design objective - but usually at a cost in time -- But if there is an adequate market for the product, and sales will cover the development, then all bets are off.
 
There are several different ways to accomplish this task. The jig can range from very simple to very complex. Don't over think it. :wink:
 
index pics

Here is something I made a while back for someone. sorry for the small pics.
 

Attachments

  • index1.jpg
    index1.jpg
    8.9 KB · Views: 166
Last edited:
Back
Top Bottom