Notscottish
Member
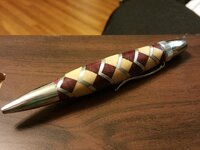
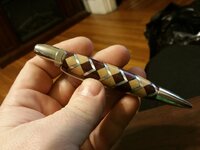
This is not my best photography, but it is one of my best segmented pens yet. It is maple, purpleheart and aluminum. I will try to get some better pictures later.

Very nice work! Did you use a carbide cutter?
Great looking pen! That aluminum looks pretty thick.. What thickness is it? Any trouble turning it?
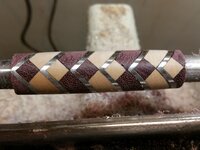
That is an exceptional piece of work Peter. The inlays look very tight, I'm interesting in your methods in especially the use of the aluminium. I have been experimenting with getting my woods perfectly flat with the use of a sanding plate, but is there something special about using the aluminium in this instance that you would be willing to share with us? I have shied away from combining different materials, other than similar forms of plastic & hardwood's when doing segmenting, that is until I have become more proficient in the process, so any little titbit of info you are willing to divulge about the different materials you are using would be of great benefit to myself & many others I'm sure.
If this is a "Ancient Chinese Secret," that you are guarding then I will understand your reluctance to share, regardless please accept my compliment on the fine job you did on that pen.
Sincerely: Ric.
"IF LIFE HANDS YOU LEMONS...MAKE MOJITO'S"
Looks great. I've done a few variations of that and the most difficult part is not turning the aluminum, but keeping the black from discoloring the light wood. I think your way of using a sharp tool for the final parts and limit sanding is best. I gave up and started using all acrylic with the aluminum angle to avoid the hassle.
Another way of holding the blank together during the initial turning is wrap it in cheese cloth and coat it with CA.
These are double tough to do, so congrats on keeping it together. I made one for Mr. Brooks about 4 years ago, but I don't think he ever turned it. Your pen looks amazing! Thank you for sharing.


Interested in creating a tutorial for our library. I've seen posts on similar pens, but it would be great to have one.This is not my best photography, but it is one of my best segmented pens yet. It is maple, purpleheart and aluminum. I will try to get some better pictures later.
Interested in creating a tutorial for our library? I've seen posts on similar pens, but it would be great to have one.
If I remember there was one.Any chance I could encourage you more?