
hologram_3d
Member
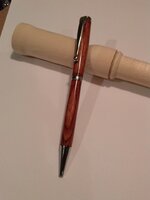
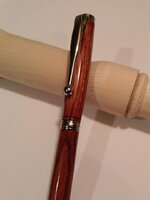
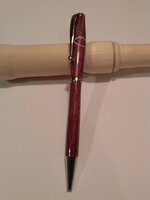
Pen #1 - Slimline, Bubinga (with barrel grooves)
Lessons learned: Don't rush the sanding after applying the CA coats. Apply enough CA coats to fully fill the grooves in the barrel before sanding. It is quite difficult to get the CA dust out of the grooves. Had to recut the grooves several times and re-finish.
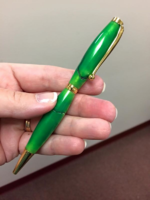
Pen #2 - Slimline, Acrylic (green)
Lessons learned: Don't make the upper barrel of the Slimline too fat, or the clip won't fit on. Completely sanded and finished it, but then had to put it back on the mandrel and shave off a few millimeters so the clip would fit.
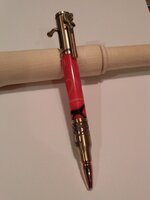
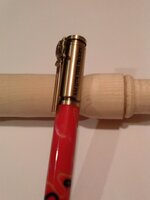
Pen #3 - "Salute to the Troops" pen kit, Acrylic (red, black, gold)
Lessons learned: Use a drill press when drilling out acrylic blanks. First drilling ended in disaster when the entire blank exploded in the vise. Hand held drills don't have the torque at low speeds to cut through the acrylic. Fortunately I had 2 sections of this color, Marine Corps colors (for my son), and had access to a friends drill press.
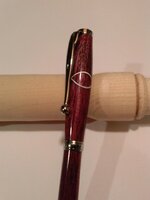
Pen #4 - Slimline, Purpleheart (with inlay)
Lessons learned: I now understand why it is important to use an inlay material the same width as your saw blade kerf. The intent was to do a celtic knot, but after the second cut, I realized that the inlay material was too thin, and wouldn't line up with the first cut and stopped with just 2 crossing inlays. The pattern continues to the other side, but is about half the size of the pattern pictured.
Lessons learned: Don't rush the sanding after applying the CA coats. Apply enough CA coats to fully fill the grooves in the barrel before sanding. It is quite difficult to get the CA dust out of the grooves. Had to recut the grooves several times and re-finish.
Pen #2 - Slimline, Acrylic (green)
Lessons learned: Don't make the upper barrel of the Slimline too fat, or the clip won't fit on. Completely sanded and finished it, but then had to put it back on the mandrel and shave off a few millimeters so the clip would fit.
Pen #3 - "Salute to the Troops" pen kit, Acrylic (red, black, gold)
Lessons learned: Use a drill press when drilling out acrylic blanks. First drilling ended in disaster when the entire blank exploded in the vise. Hand held drills don't have the torque at low speeds to cut through the acrylic. Fortunately I had 2 sections of this color, Marine Corps colors (for my son), and had access to a friends drill press.
Pen #4 - Slimline, Purpleheart (with inlay)
Lessons learned: I now understand why it is important to use an inlay material the same width as your saw blade kerf. The intent was to do a celtic knot, but after the second cut, I realized that the inlay material was too thin, and wouldn't line up with the first cut and stopped with just 2 crossing inlays. The pattern continues to the other side, but is about half the size of the pattern pictured.
Attachments
-
 Pen_1_bubinga_full.jpg120.1 KB · Views: 325
 -
 Pen_1_bubinga_close.jpg129.6 KB · Views: 292
 -
 Pen_2_acrylic_full.png451.7 KB · Views: 332
 -
 Pen_3_acrylic_full.jpg124 KB · Views: 305
 -
 Pen_4_purpleheart_full.jpg114.4 KB · Views: 303
 -
 Pen_3_acrylic_close.jpg120.4 KB · Views: 276
 -
 Pen_4_purpleheart_close.jpg126.8 KB · Views: 337
Last edited: