
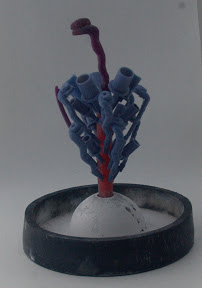
The first picture is of the carved wax snake on top of a larger sprue wax with other waxes attached ready to be invested. The next pictures are of the silver casting. This one went real well. No air bubbles or pits in the metal, a nice clean cast.
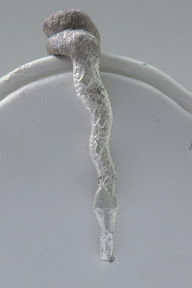
IN the next picture of just the snake you will notice the darker metal on the top. This is caused by carbon soot from wax that didn't melt and flow out but was trapped and burned in the flask. A light brushing or tumbling will remove the stain without damaging the pattern on the snake.
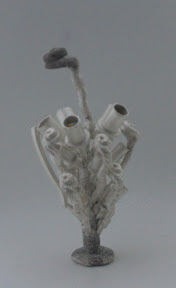
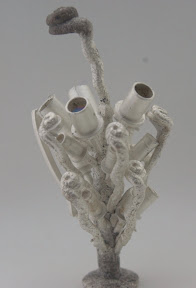
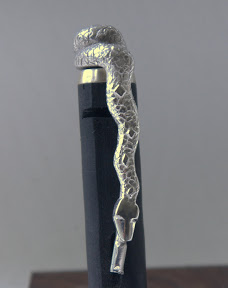
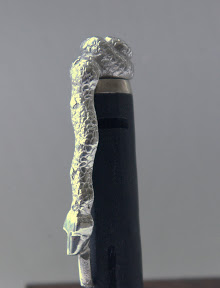
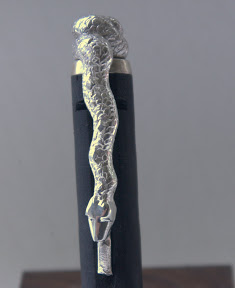
Next we have 3 views of the snake after it has been lightly polished.
Since the next step is to make a rubber mold of the snake and put it into production. I need to have it as clean and ready to go as possible when I mold it, but you don't want to polish off details . After molding I may final finish it and use it on a pen or I may leave it as is in case I have to use it to make a new mold. If you have any question be sure to ask. I hope you enjoyed the process.
I already know there are two more variations to be made. One is a snake in between this one and the originals size. Kind of a medium sized not as large or heavy. the second is for a click pen with the click button coming up through the middle carved to look like the end of the tail.
Mike
IN the next picture of just the snake you will notice the darker metal on the top. This is caused by carbon soot from wax that didn't melt and flow out but was trapped and burned in the flask. A light brushing or tumbling will remove the stain without damaging the pattern on the snake.
Next we have 3 views of the snake after it has been lightly polished.
Since the next step is to make a rubber mold of the snake and put it into production. I need to have it as clean and ready to go as possible when I mold it, but you don't want to polish off details . After molding I may final finish it and use it on a pen or I may leave it as is in case I have to use it to make a new mold. If you have any question be sure to ask. I hope you enjoyed the process.
I already know there are two more variations to be made. One is a snake in between this one and the originals size. Kind of a medium sized not as large or heavy. the second is for a click pen with the click button coming up through the middle carved to look like the end of the tail.
Mike