BradG
Member
Hey guys
Figured id share my SE entry here
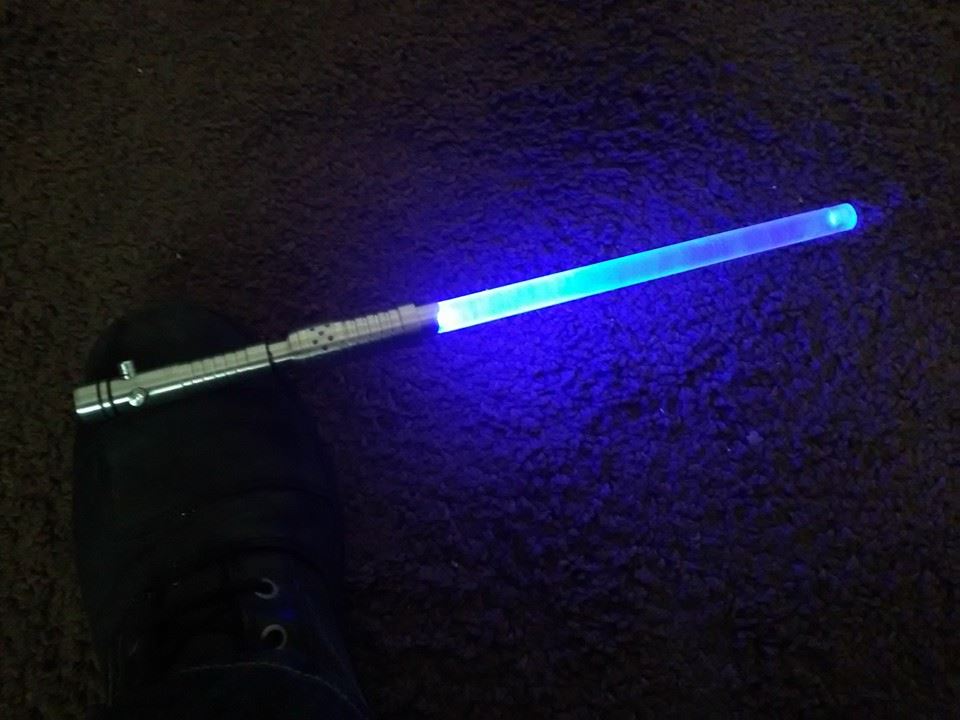
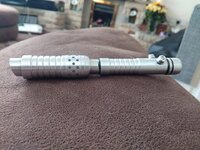
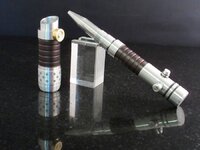
The pens body & lid were made from aluminium bar, along with the controls which protude acting as a roll stop. The roll stop on the lid I turned from brass as I thought the colour was a nice subtle touch.
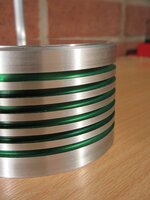
The dot matrix pattern going around the lid was a little challenging. as I don't have a rotary table or indexing setup I decided to etch the pattern. Because of the shape of the lid, it would have been very difficult to protect the remainder of lid while going through the etching process. Because of this I decided to etch the aluminium bar before doing any machining, and then turning the lid around the etched piece.
I didn't want to use any colouring on the etched pattern out of fear it would have looked a little tacky... so I skipped desmutting the piece after etching and heated it with a blow torch in the hope it would bake the smut onto the surface, which it seems to of nicely. This gave the etch a well handled & used look.
The black infill you can see in the lines was airbrushed on, again to simulate a used look. Still looks like paint in my opinion rather than a buildup of dirt in the creases, but guess I need to work on my Airbrushing technique.

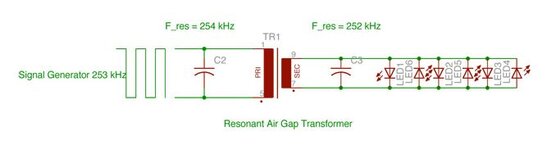
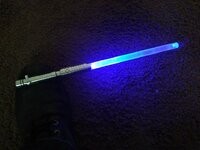
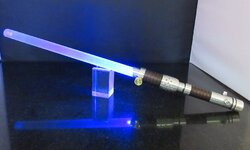
First test of the light effect! trying to fit two LR44 batteries into a pen lid is a tight squeeze! let alone trying to fit an LED or other light source in there too.
My solution was to mount an ultra bright LED into the end of the Acrylic rod which push fits into the end. The legs of the LED which protude from the Acrylic were formed into the shape of sprung contacts. one which goes straight down to the positive side of the battery, and the other curved around to the side of the acrylic to make contact with the metal of the pens body which acts as the ground, just how a flashlight is designed.
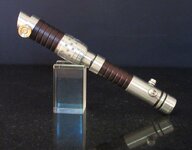
The two batteries can be removed and replaced with a rare earth magnet so that this pen will levitate on my Maglev display stand, or simply left out if you are intending on using it as a carry pen. In the end of the cap, not pictured (sorry) You will find a terminal machine from brass which covers the top of the battery and accepts the connection from the LED.
For the finishing touches I airbrushed the grips with Acrylic enamel and left to cure for 48 hours. Pretty durable but likely to scratch if man handled. Anodising them would be a better approach.


-------------------
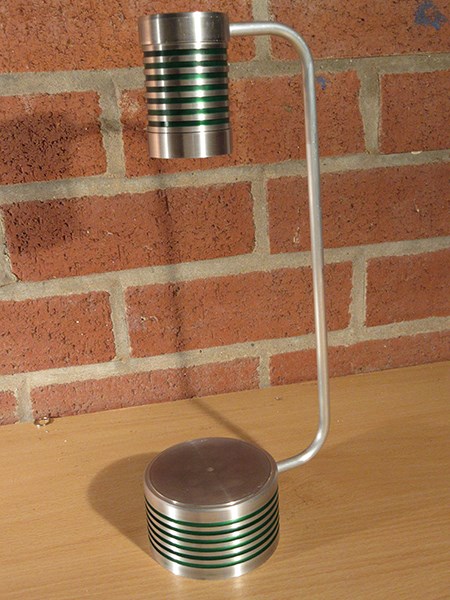
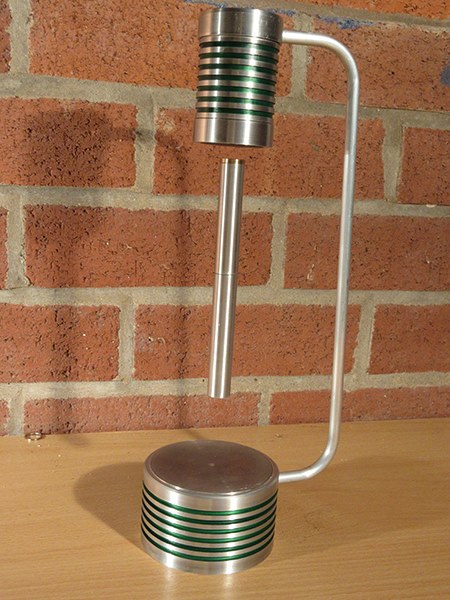
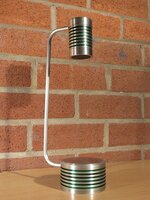
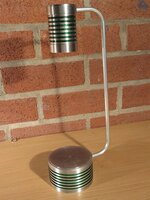
Maglev Pen Stand
I will start off by saying this was nearly thrown at the wall a couple of times and caused a little worry if I would manage to finish it on time for the competition!
Probably the largest piece of aluminium I have purchased. Quite a lump!

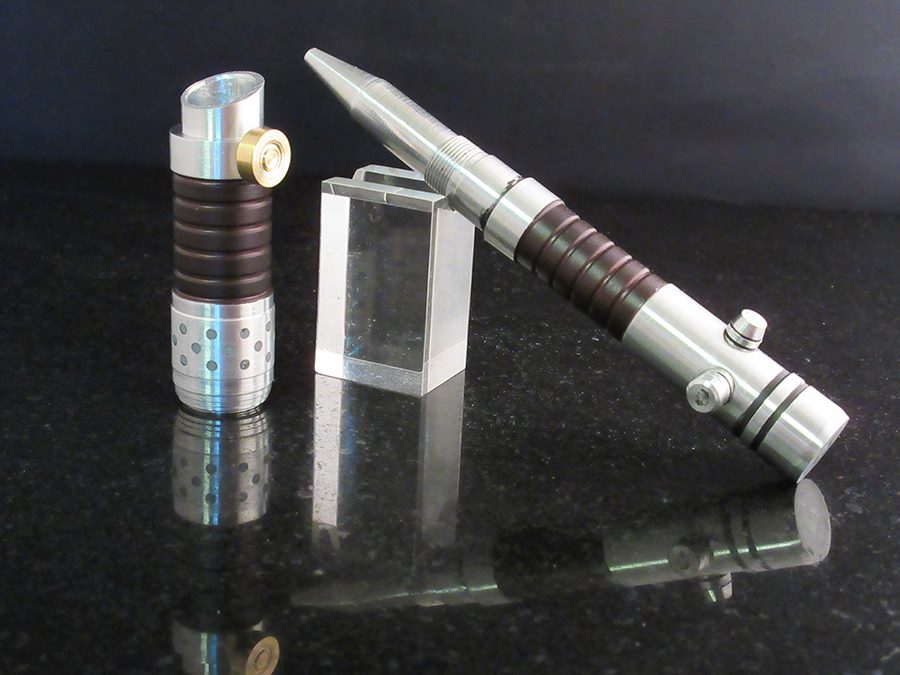
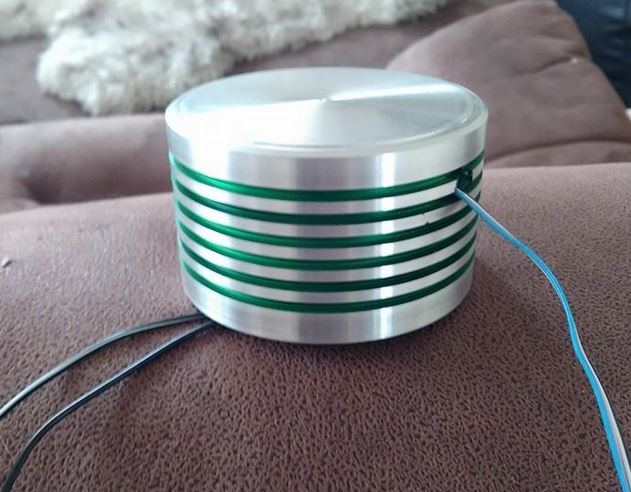
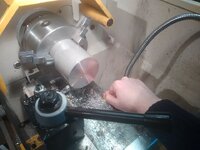
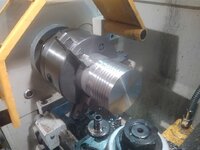
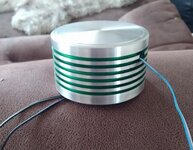
All groves were cut into the piece with a parting tool, and then the piece was hollowed out an inch deep to accommodate the printed circuit board I made.

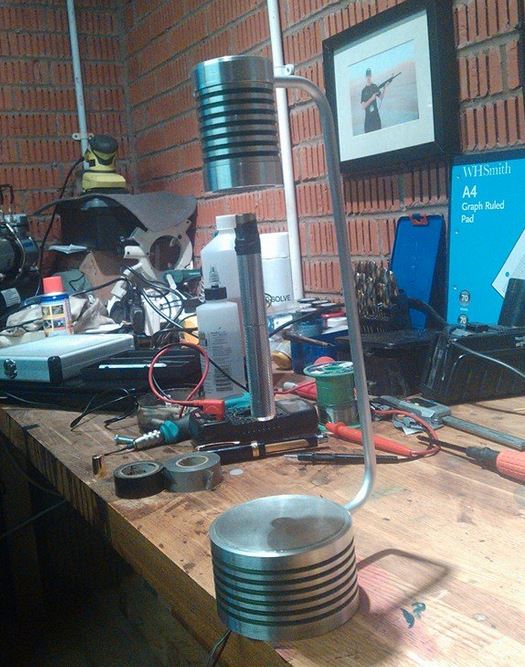
I drilled a hole through the side for the supporting arm, and as a cable entry point to the base. five cores run through the arm. the other two wires protuding are for the power supply. 7.5V 1A
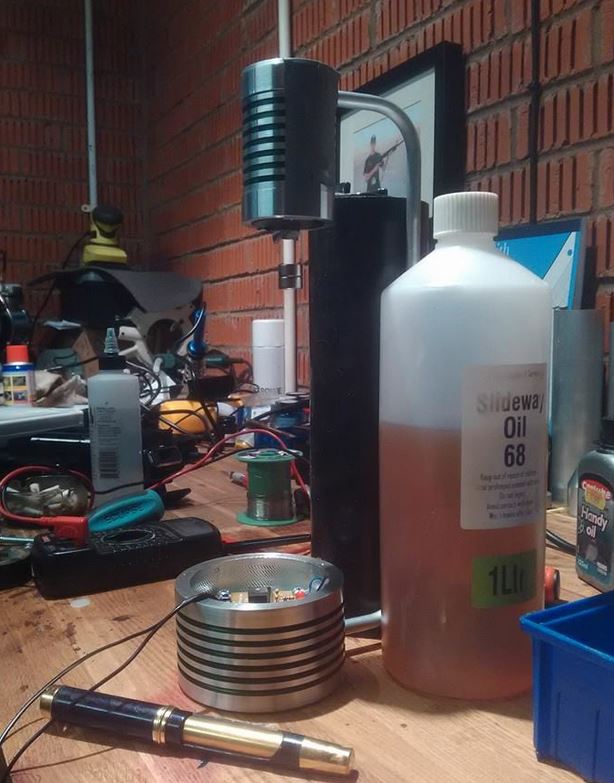
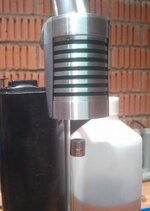
Here you can see the base is flipped over which reveals where the circuit board is hidden. inside here is three buttons for adjusting the power of the electromagnet to accommodate objects of different weight upto around 80 grams. at this stage bottles and things are propping it up as the supporting arm is not yet fixed in place. If you look closely, you can see there is two magnets levitating there with quite an impressive air gap.
The top was machined from aluminium scaffolding, and the end pieces from solid bar. I wish I photographed the bottom end cap as that was quite intricate. the inside profile was made to cause the bottom cap to wrap around the height of the electromagnet to act as a heat sink. the endplug is also hollowed out so that the electromagnet is sitting on a 1mm layer of aluminium, just behind the black foam pad you can see in later pictures. This was done to maximise the air gap, as further into the enclosure the electromagnet goes, the further away from your pen it will be.
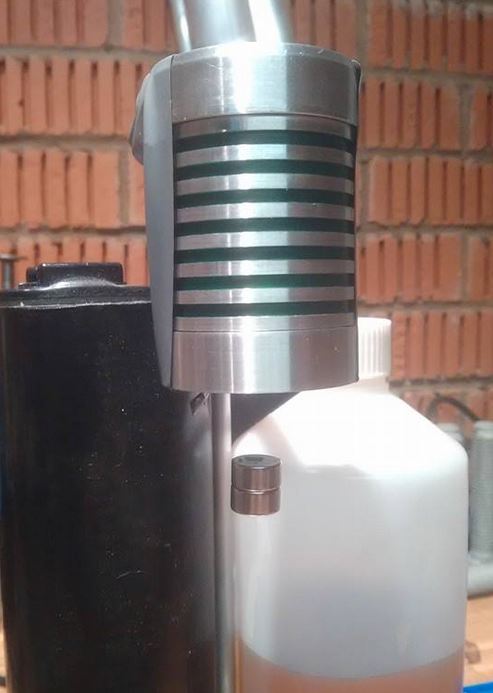
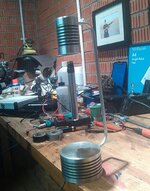
The make or break test. I sellotaped a couple of magnets onto the end of one of my pens to test it out, and was relieved that after a little bit of tweaking, the pen was levitating.


Techie stuff:
I programmed a PIC microprocessor to take a reading from a hall effect sensor which is placed in the end of the electromagnet. This sensor measures the electromagnetic field and adjusts the current of the electromagnet to compensate. Basically as the pen moves towards or away from the electromagnet the field changes, and the microprocessor compensates to either pull the pen closer, or let it move away, causing it to levitate.
I feel like I've missed something... but C'est la vié
Figured id share my SE entry here
The pens body & lid were made from aluminium bar, along with the controls which protude acting as a roll stop. The roll stop on the lid I turned from brass as I thought the colour was a nice subtle touch.
The dot matrix pattern going around the lid was a little challenging. as I don't have a rotary table or indexing setup I decided to etch the pattern. Because of the shape of the lid, it would have been very difficult to protect the remainder of lid while going through the etching process. Because of this I decided to etch the aluminium bar before doing any machining, and then turning the lid around the etched piece.
I didn't want to use any colouring on the etched pattern out of fear it would have looked a little tacky... so I skipped desmutting the piece after etching and heated it with a blow torch in the hope it would bake the smut onto the surface, which it seems to of nicely. This gave the etch a well handled & used look.
The black infill you can see in the lines was airbrushed on, again to simulate a used look. Still looks like paint in my opinion rather than a buildup of dirt in the creases, but guess I need to work on my Airbrushing technique.
First test of the light effect! trying to fit two LR44 batteries into a pen lid is a tight squeeze! let alone trying to fit an LED or other light source in there too.
My solution was to mount an ultra bright LED into the end of the Acrylic rod which push fits into the end. The legs of the LED which protude from the Acrylic were formed into the shape of sprung contacts. one which goes straight down to the positive side of the battery, and the other curved around to the side of the acrylic to make contact with the metal of the pens body which acts as the ground, just how a flashlight is designed.
The two batteries can be removed and replaced with a rare earth magnet so that this pen will levitate on my Maglev display stand, or simply left out if you are intending on using it as a carry pen. In the end of the cap, not pictured (sorry) You will find a terminal machine from brass which covers the top of the battery and accepts the connection from the LED.
For the finishing touches I airbrushed the grips with Acrylic enamel and left to cure for 48 hours. Pretty durable but likely to scratch if man handled. Anodising them would be a better approach.
-------------------
Maglev Pen Stand
I will start off by saying this was nearly thrown at the wall a couple of times and caused a little worry if I would manage to finish it on time for the competition!
Probably the largest piece of aluminium I have purchased. Quite a lump!
All groves were cut into the piece with a parting tool, and then the piece was hollowed out an inch deep to accommodate the printed circuit board I made.
I drilled a hole through the side for the supporting arm, and as a cable entry point to the base. five cores run through the arm. the other two wires protuding are for the power supply. 7.5V 1A
Here you can see the base is flipped over which reveals where the circuit board is hidden. inside here is three buttons for adjusting the power of the electromagnet to accommodate objects of different weight upto around 80 grams. at this stage bottles and things are propping it up as the supporting arm is not yet fixed in place. If you look closely, you can see there is two magnets levitating there with quite an impressive air gap.
The top was machined from aluminium scaffolding, and the end pieces from solid bar. I wish I photographed the bottom end cap as that was quite intricate. the inside profile was made to cause the bottom cap to wrap around the height of the electromagnet to act as a heat sink. the endplug is also hollowed out so that the electromagnet is sitting on a 1mm layer of aluminium, just behind the black foam pad you can see in later pictures. This was done to maximise the air gap, as further into the enclosure the electromagnet goes, the further away from your pen it will be.
The make or break test. I sellotaped a couple of magnets onto the end of one of my pens to test it out, and was relieved that after a little bit of tweaking, the pen was levitating.
Techie stuff:
I programmed a PIC microprocessor to take a reading from a hall effect sensor which is placed in the end of the electromagnet. This sensor measures the electromagnetic field and adjusts the current of the electromagnet to compensate. Basically as the pen moves towards or away from the electromagnet the field changes, and the microprocessor compensates to either pull the pen closer, or let it move away, causing it to levitate.
I feel like I've missed something...
but C'est la viéAttachments
-
 ls1.jpg101.6 KB · Views: 908
 -
 ls2.jpg71.9 KB · Views: 860
 -
 ls3.jpg85.4 KB · Views: 863
 -
 ls4.jpg65.3 KB · Views: 871
 -
 ls5.jpg75.3 KB · Views: 887
 -
 ml1.jpg85.2 KB · Views: 854
 -
 ml2.jpg82.4 KB · Views: 850
 -
 ml3.JPG60.3 KB · Views: 853
 -
 ml4.JPG78.7 KB · Views: 855
 -
 ml5.JPG41.7 KB · Views: 886
 -
 ml6.JPG86.2 KB · Views: 857
 -
 ml7.jpg39.5 KB · Views: 864
 -
 ml9.jpg83.4 KB · Views: 859
 -
 ml10.jpg76.4 KB · Views: 866
 -
 ml11.jpg76.4 KB · Views: 877
 Pretty damned cool stuff there Brad.. !!