Last 2 "Section" 7mm Pens For A While

Signed-In Members Don't See This Ad
See more from DrD

DrD

Member
Joined
Jun 26, 2019
Messages
1,104
Location
Columbus, Mississippi
Here are the last 2 of these modified 7mm ballpoints I'm going to turn for a while. Both pens have Chrome Furniture, and use End Caps and Clips from BHW Streamline 7mm Flat Tops. The larger pen on the left is in BHW AA23 Translucent Blue with a BHW AA25 Black section. The more contoured pen on the right is in BHW AA 25 Black, with a BHW AA22P Translucent green section. Both pens were wet sanded off the lathe through all 9 of the MM grits, 1500 thru 12000, hand polished with Micro-gloss, and hand waxed with Ren Wax.

Thanks for looking; questions/comments appreciated as I'm always trying to improve.

DrD
 

Attachments

  • IMG-0458.jpg
    IMG-0458.jpg
    317.5 KB · Views: 240
  • IMG-0461.jpg
    IMG-0461.jpg
    278.4 KB · Views: 204
  • IMG-0462.jpg
    IMG-0462.jpg
    301.8 KB · Views: 212
  • IMG-0463.jpg
    IMG-0463.jpg
    285.9 KB · Views: 203
  • IMG-0464.jpg
    IMG-0464.jpg
    333.6 KB · Views: 225
Signed-In Members Don't See This Ad

magpens

Member
Joined
Feb 2, 2011
Messages
15,913
Location
Canada
I like these pens very much, Don !!! . I think you should keep going with these styles.

How about a short ( 2 or 3 mm ) ornamented metal band between the two materials ? . Must be possible to buy such.

How, exactly, do you sand "off the lathe" ... how do you hold the work piece ... and why must it be OFF the lathe ... ??
 
  • Like
Reactions: DrD

DrD

Member
Joined
Jun 26, 2019
Messages
1,104
Location
Columbus, Mississippi
Thanks Mal.

I sand off the lathe so I can easily inspect the progress. I hold the piece in my hand. I wear a lighted head-band magnifier. I sit out in my screen-in deck with all my sanding supplies and a16 oz butter tub filled with water and 1 drop of Dawn soap.

I wet sand in the length-wise direction, rotating the barrel as I go. Next, I rinse off the remaining sanding dust - there's a term for that stuff, dry the barrel and carefully inspect it with the lighted magnifier. Of course the whole objective of progressive sanding is to remove the marks lefts by the previous more coarse - or less fine - sandpaper or MM pad/cloth - I use both - so one must be able to distinguish among the sanding scratches to ensure what one is observing is from the current paper used. If deeper, more coarse marks are observed, then it's another go-round with the same grit as just used. This whole process may take 10 minutes or so per grit. I go from 1500 to 12000 - 9 pads or cloths - and when I like what I see under 6x, I then apply a drop or so of Micro-gloss and vigorously hand rub the barrel. Inspect with 6x and go again if needed. Finally I apply a thin coat of Ren Wax, allow it to dry and the vigorously hand buff with a cotton -old tee shirt - rag.

I have tried doing all this on the lathe, and the results just don't suit me.

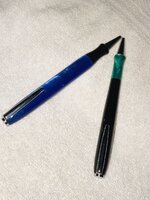
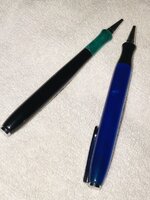
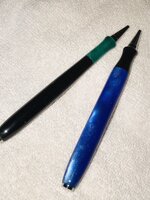
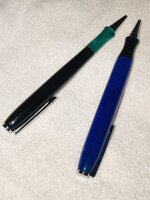
As to the metal band , that is something I purposefully omitted. Just for grins, I took out some of my old pens. My Mont Blanc Meisterstuk No. 149s has no metal band between the section and the barrel, black resin section to black resin barrel. Same with the pre-war Parker Duo-Folds and Vacumatics - no band between the cellulose sections and the cellulose barrels. That's the look I was going for when I started experimenting with this design. I think the band is a good idea if one wants that look, it's just not what I was trying to achieve.

Thanks, I appreciated your compliments and comments.

Don
 

magpens

Member
Joined
Feb 2, 2011
Messages
15,913
Location
Canada
@DrD - Thank you, Don, for your comprehensive reply.

That is a very lengthy sanding/MMing process, with up to 10 minutes per grit.

I thought mine was lengthy but nowhere near as long as yours ... and I don't even use any MM. . I do it on the lathe (unpowered).

Your finished work does have a very special look to it, so maybe I should try MMing in addition to the sanding. . Also the Ren Wax.

Thanks again.

Mal
 
  • Like
Reactions: DrD
Top Bottom