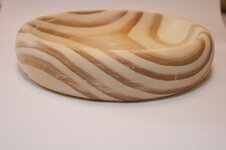
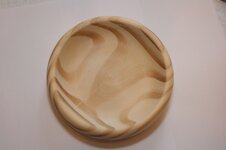
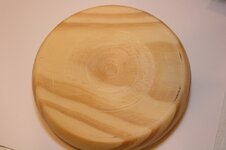
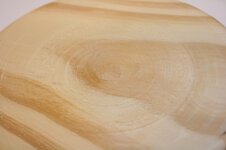
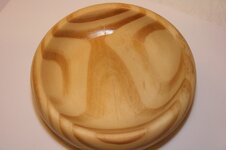
I found a piece of 2 x 12 pine and though I would try a small plate or bowl or??. Here is what I came up with. I mounted it to my face plate. Kind of fun to do. This is my first try on a project like this. I sanded but did not finish this bowl. I think I may get a book on bowl making and projects like it so I have a better idea of how to do it. Any and all comments welcome
You are using an out of date browser. It may not display this or other websites correctly.
You should upgrade or use an alternative browser.
You should upgrade or use an alternative browser.
Just Playing around
- Thread starter Band Saw Box
- Start date
Signed-In Members Don't See This Ad
See more from Band Saw Box
Signed-In Members Don't See This Ad
stonepecker
Member
Just have fun. That is what it is all about. Looks like you are doing well. I like that.
Before spending any money..........check out the local library.
Take a look at what is there. Also, used book stores are a great place to hunt.
Never buy what you can get on the cheap......LOL.
Before spending any money..........check out the local library.
Take a look at what is there. Also, used book stores are a great place to hunt.
Never buy what you can get on the cheap......LOL.
Joe S.
Member
a cedar 2x6 has turned into a lot of similar projects for me. It's fun!
Allen_B
Member
That's a nice piece of wood. It would look good on the counter or wherever. I like it a lot.
Thanks for the comments and suggestions. Wayne that's good idea about check our local library or used book store. Jim I did find DVD by both people by doing a quick search I'll have to take a closer look at them.
Fishinbo
Member
It looks great, like the shape and those grains and colors are pretty. Great job!
Charlie_W
Member
Great start Dan! Slap some finish on it!
My mom still had several of my bowls from high school shop class. A little furniture polish and they still look pretty good considering how old they are and the fact that I didn't really know what I was doing then!
My mom still had several of my bowls from high school shop class. A little furniture polish and they still look pretty good considering how old they are and the fact that I didn't really know what I was doing then!
walshjp17
Member
There are also thousands of how-to-make-a-bowl videos on YT.
triw51
Member
I really like the grain pattern you did a great job on your first bowl.
cestmoi
Member
I had no idea pine could look so interesting. Great job!
Thanks for all the nice comments, I did not think it would look as nice as it does when I started. I like that aspect of turning.
SDB777
Member
Pine has got to be one of the harder types of timber to turn. The tear-out and amount of sanding has got to be on a top five list somewhere?!?!?!?
If you are going to do many more, you might think about sanding sealer(DAMHIKT)....
Still trying to think of how you turned this using just a faceplate....happen to have a photo of the bottom? I might learn something....
Just think, 'plain' pine can be stained, oiled, painted, or whatever!! And you are now on the way to have bigger piles of chips on the floor and having a LOT of FUN!!!!! Well done!
Scott (what you gonna do next) B
Scott I guess I should have gone in to more detail on how I mounted the blank. I screwed a piece of 3/4" plywood to my face plate, then a epoxied a 2 1/2" x 2 1/2" block to the plywood, I then epoxied the blank to the block.
I turned the out side first and sanded as best as I could. I then used a parting tool to start parting the bowl from the block until I got to about 1/2" I then used a back saw to fully cut it off then I used s chisel to cut off the excess. Here are the photo's of the back and one of the front after I shot it with 3 coats of shellac.
I turned the out side first and sanded as best as I could. I then used a parting tool to start parting the bowl from the block until I got to about 1/2" I then used a back saw to fully cut it off then I used s chisel to cut off the excess. Here are the photo's of the back and one of the front after I shot it with 3 coats of shellac.
Attachments
Last edited:
Very nice, Dan.
Very impressive for your first bowl - especially with pine.
Thanks for the mounting details too. I need to try a bowl sometime soon.
Very impressive for your first bowl - especially with pine.
Thanks for the mounting details too. I need to try a bowl sometime soon.
Fatdawg
Member
Pretty good looking first bowl Dan! As others have mentioned pine can be a bear to turn and sand with the tear out, but it a fun and inexpensive material to use for skill building. When I glue up to a face plate for a flat bottom project, I have a waste block attached to the face plate, then glue a piece of craft paper between the waste block and the turning blank using wood glue. After the bowl is turned to your liking , just use a chisel to separate the bowl from the waste block and sand the paper off the bottom.
Thanks for all the nice comments. I'm glad I inspired some of you to try a bowl. Fred thanks for the tip of using craft paper I'll give that a try.

