
TurnaPen
Member
Ok, here are the pictures for the invisible clip, I use this principle on all my invisible clips. The idea of the invisible clip comes from our IAP library that has two excellent articles in it, my main difference is that I use a laser engraver to cut the hole cleanly. I may have to use two posts to fit all the pictures in. Amos
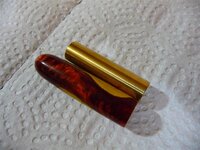
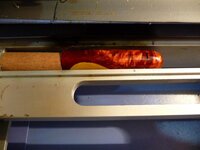
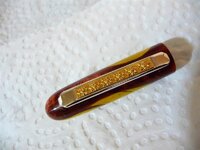
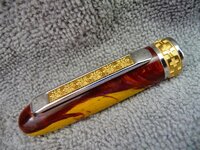
1. First picture, I "weigh up" where the clip may go, in this case the clip is gold and putting it on the "gold" portion of wood would not suit, but against the red portion of the blank there is an effective contrast.
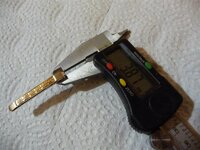
2. Ok, I know WHERE the clip is to go, so measure up the width of the clip and set up the lasers software to suit.
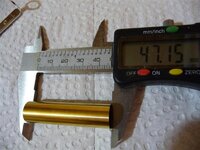
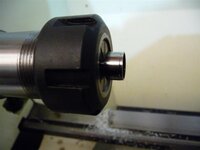
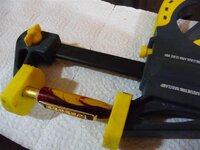
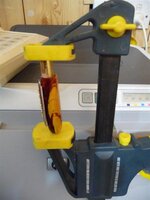
3 and 4, measure the length of the cap tube and set my laser to cut just after that length, example here it measured 47mil, so I set my laser for 48 mil and did a test run then put the tube against it and the cut is just above the tube. PS This PRESUMES that I knew that when I initially drilled my cap for the tube that I drilled an extra 1.5mil to allow for the clip!!!-worth remembering!!!)
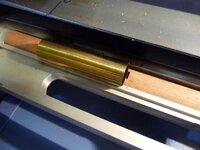
5.The laser cut the "hole" (you have to get to know your engraver to know how much power to apply--too much and you can go to the next layer maybe, especially if you do a second cut. NOT SHOWN HERE -I did another cut at 48.5mil so i could have a slightly larger opening for the thicker Jnr. Emperor clip.
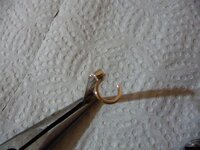
6 Onto the clip it needs cutting
7 Used heavy pliers because the clip seemed hefty
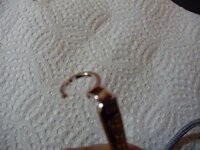
8 The Clip with a portion cut out
9 BEWARE this edge-this is the first cut I made
10 and 11 this time I cut more off that corner, look closely at this; if the edge sticks out and is too ragged you WILL have TROUBLE putting it in and it could tear or crack the blank.
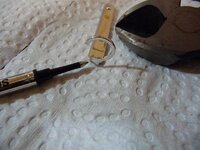
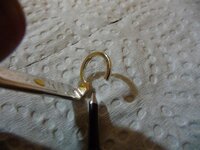
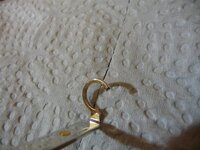
12, 13 and 14, I have cut a little more off the circle of the clip, then with a pair of long nose pliers I have twisted the ring inwards slightly
15 Now fit the clip this way and rotate inwards CAREFUL now, try not to let that inner edge touch the blank!! that eadge mentioned in photos 9, 10 and 11
GO TO MY SECOND POST BELOW FOR CONTINUATION please
16 The clip is in.
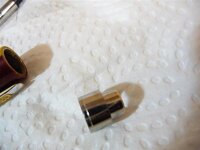
17 The piece that normally fits in the clip and holds it in position, it needs to fit in easily and smoothly so
18 Remove a little on the lathe OR just sandpaper it until it slides easily.
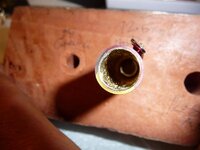
19 A view of the clip inside the cap, the ring is visible
20 Using a cotton bud carefully put a decent dolop of 5 minute expoy right down on the clip
21 and 22 put epoxy on the small end of the clip holder and insert right down into the tube.
23 I used a tube that was covered with wax and pushed the clip holder right down and then lightly clamped it, then POSITIONED the clip to look right, then slightly more pressure.
24. Set it to harden in an upright position for a while, after about 15 min release the pressure and pull out the holding tube before it becomes part of the blank!!! even though it was waxed. then put it back in and hold it firmly but gently in the vice and let it set for another few hours, preferably until epoxy fully hardens.
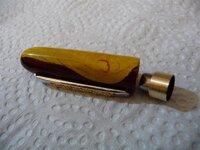
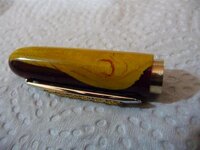
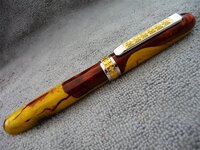
25 and 26 the finished cap and the pen.
Any questions please just ask. thanks Amos
1. First picture, I "weigh up" where the clip may go, in this case the clip is gold and putting it on the "gold" portion of wood would not suit, but against the red portion of the blank there is an effective contrast.
2. Ok, I know WHERE the clip is to go, so measure up the width of the clip and set up the lasers software to suit.
3 and 4, measure the length of the cap tube and set my laser to cut just after that length, example here it measured 47mil, so I set my laser for 48 mil and did a test run then put the tube against it and the cut is just above the tube. PS This PRESUMES that I knew that when I initially drilled my cap for the tube that I drilled an extra 1.5mil to allow for the clip!!!-worth remembering!!!)
5.The laser cut the "hole" (you have to get to know your engraver to know how much power to apply--too much and you can go to the next layer maybe, especially if you do a second cut. NOT SHOWN HERE -I did another cut at 48.5mil so i could have a slightly larger opening for the thicker Jnr. Emperor clip.
6 Onto the clip it needs cutting
7 Used heavy pliers because the clip seemed hefty
8 The Clip with a portion cut out
9 BEWARE this edge-this is the first cut I made
10 and 11 this time I cut more off that corner, look closely at this; if the edge sticks out and is too ragged you WILL have TROUBLE putting it in and it could tear or crack the blank.
12, 13 and 14, I have cut a little more off the circle of the clip, then with a pair of long nose pliers I have twisted the ring inwards slightly
15 Now fit the clip this way and rotate inwards CAREFUL now, try not to let that inner edge touch the blank!! that eadge mentioned in photos 9, 10 and 11
GO TO MY SECOND POST BELOW FOR CONTINUATION please
16 The clip is in.
17 The piece that normally fits in the clip and holds it in position, it needs to fit in easily and smoothly so
18 Remove a little on the lathe OR just sandpaper it until it slides easily.
19 A view of the clip inside the cap, the ring is visible
20 Using a cotton bud carefully put a decent dolop of 5 minute expoy right down on the clip
21 and 22 put epoxy on the small end of the clip holder and insert right down into the tube.
23 I used a tube that was covered with wax and pushed the clip holder right down and then lightly clamped it, then POSITIONED the clip to look right, then slightly more pressure.
24. Set it to harden in an upright position for a while, after about 15 min release the pressure and pull out the holding tube before it becomes part of the blank!!! even though it was waxed. then put it back in and hold it firmly but gently in the vice and let it set for another few hours, preferably until epoxy fully hardens.
25 and 26 the finished cap and the pen.
Any questions please just ask. thanks Amos
Attachments
-
 1 Invisible Clip size up tube and choose where.jpg64 KB · Views: 325
 -
 2 measure clip width.jpg62.7 KB · Views: 320
 -
 3 measure tube length.jpg60.7 KB · Views: 274
 -
 4 set up lazer.jpg47.1 KB · Views: 313
 -
 5 set laser to required power and cut.jpg43 KB · Views: 312
 -
 6 cut to suit cap.jpg55.7 KB · Views: 320
 -
 7 cutting clip ring.jpg38.3 KB · Views: 291
 -
 8 looks like this.jpg62.4 KB · Views: 302
 -
 9 beware this edge.jpg56.2 KB · Views: 295
 -
 10 edge trimmed more.jpg56 KB · Views: 294
 -
 11 another look at the newly trimmed edge.jpg59.8 KB · Views: 299
 -
 12 note more cut off the ring.jpg54.4 KB · Views: 302
 -
 13 pliers to turn ring inwards making it smallerr.jpg51.2 KB · Views: 325
 -
 14 see ring diameter smaller.jpg60.9 KB · Views: 304
 -
 15 fitting the clip.jpg33.2 KB · Views: 416
Last edited:


 :biggrin: