Culprit
Member
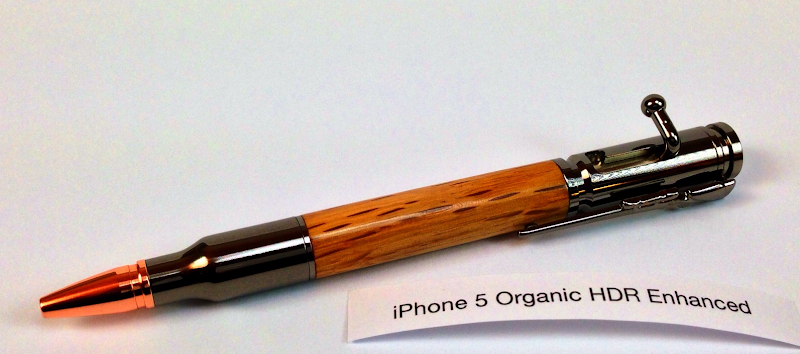
Last week I read up on HDR here in Scott's thread and tried it with my Canon point and shoot SX130is with hacked firmware to do the auto bracketing, then download the 3 pictures to my computer and process them through the Photomatix software.
The results were pretty good, but it was time consuming, required my laptop, and I still needed to improve some things, including my white balance and other settings on the camera.
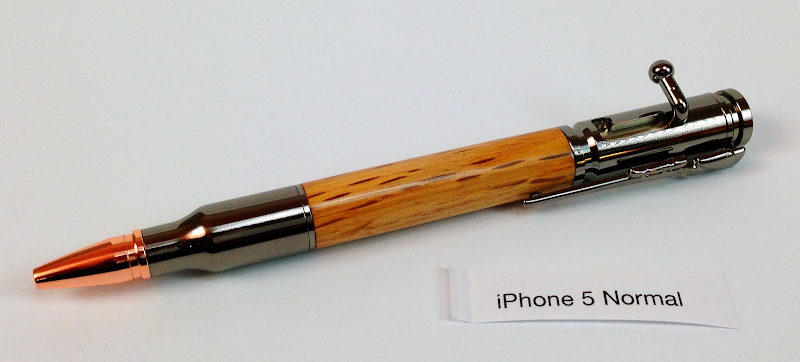
So today, I took a different approach: iPhone 5 on a tripod with the Pro HDR app for $1.99. My photo tent/light box idea came from mmayo's thread using a $10 light diffuser from a fluorescent light fixture, but I spent even less time putting mine together than he did. You'll see what I mean in the second picture below. Don't laugh. It's cheap and offers quick set up and take down. What you don't see in the picture is the scrap of 2x6 and strip of duct tape holding the paper up, and the two $7 clamp on lights from Lowe's, each with a $5 5000k daylight bulb aimed at the diffuser.
The tripod is one that I carried across 4 continents for over 10 years now and cost $5-10 when new. The iPhone tripod adapter is an idea from YouTube. I had the $4.50 clamp, so I replaced the pivot bolt with a 1/4-20 size, and used a coupler to attach it to the tripod. The balance is questionable, but it works.
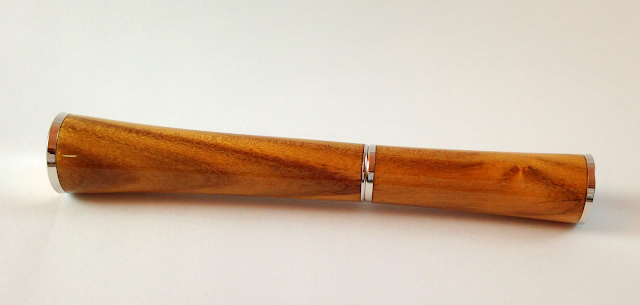
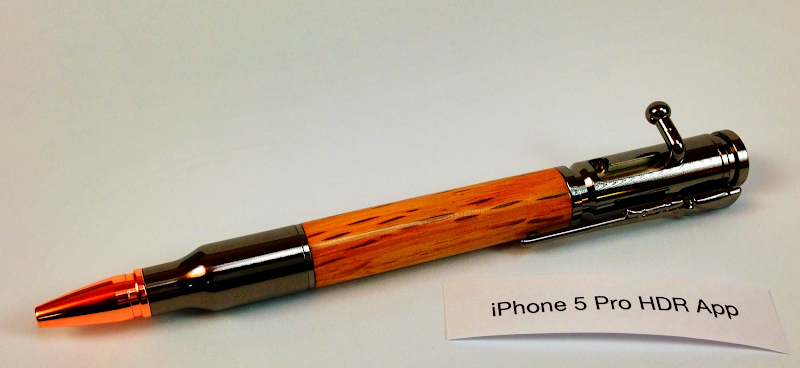
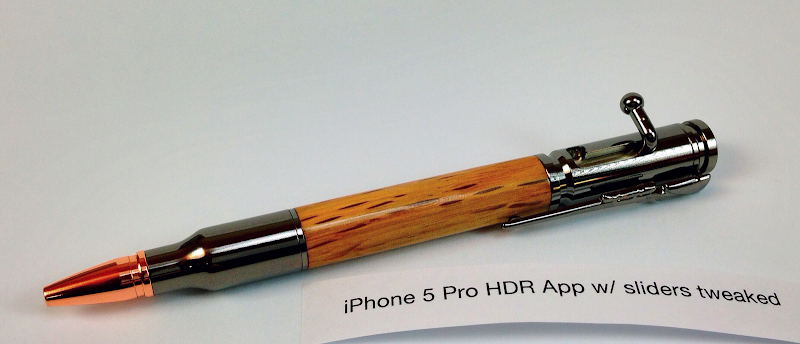
So here is the first picture I took with my fancy new setup. The exif data says it was f 2.4, 1/40 sec, ISO 64, but I wouldn't know that because the camera did it all for me. I didn't even play with the 5 or so sliders that it gives you after blending the 2 HDR exposures. I cropped the picture right in the $1.99 Pro HDR app.
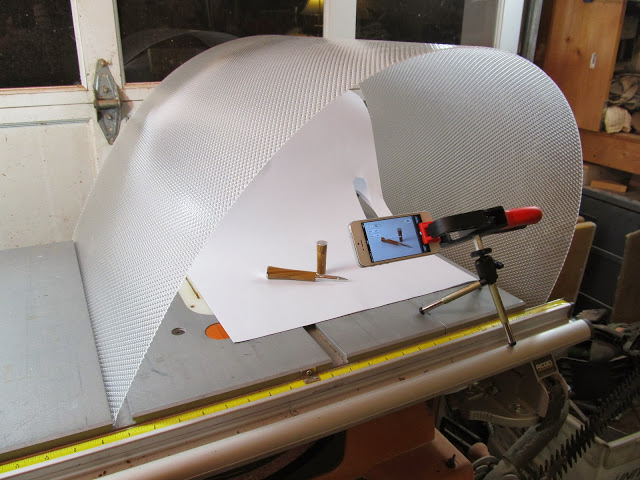
For new folks who want to get decent looking pictures cheaply, this setup cost less than $50 for the diffuser, two lights, two bulbs, tripod, clamp, bolt, and coupler. iPhone, table saw, white paper, duct tape and scrap of 2x6 sold separately.
I'm happy with the results. Please let me know what you think. The pen is a CSUSA Panache with Locust wood and CA finished with MicroMesh and Hut Plastic Polish.
The results were pretty good, but it was time consuming, required my laptop, and I still needed to improve some things, including my white balance and other settings on the camera.
So today, I took a different approach: iPhone 5 on a tripod with the Pro HDR app for $1.99. My photo tent/light box idea came from mmayo's thread using a $10 light diffuser from a fluorescent light fixture, but I spent even less time putting mine together than he did. You'll see what I mean in the second picture below. Don't laugh. It's cheap and offers quick set up and take down. What you don't see in the picture is the scrap of 2x6 and strip of duct tape holding the paper up, and the two $7 clamp on lights from Lowe's, each with a $5 5000k daylight bulb aimed at the diffuser.
The tripod is one that I carried across 4 continents for over 10 years now and cost $5-10 when new. The iPhone tripod adapter is an idea from YouTube. I had the $4.50 clamp, so I replaced the pivot bolt with a 1/4-20 size, and used a coupler to attach it to the tripod. The balance is questionable, but it works.
So here is the first picture I took with my fancy new setup. The exif data says it was f 2.4, 1/40 sec, ISO 64, but I wouldn't know that because the camera did it all for me. I didn't even play with the 5 or so sliders that it gives you after blending the 2 HDR exposures. I cropped the picture right in the $1.99 Pro HDR app.
For new folks who want to get decent looking pictures cheaply, this setup cost less than $50 for the diffuser, two lights, two bulbs, tripod, clamp, bolt, and coupler. iPhone, table saw, white paper, duct tape and scrap of 2x6 sold separately.
I'm happy with the results. Please let me know what you think. The pen is a CSUSA Panache with Locust wood and CA finished with MicroMesh and Hut Plastic Polish.