I do almost what Katsin said, but maybe a screen or two less.
I start by opening one of the images and decide what I'd like the final
dimensions to be. He used the example of 800x600, so let's use that.
I try to CROP as close to those dimensions as I can instead of resizing.
Resizing, as mentioned, can really interfere with your image sometimes.
So I'll try to get the width to HALF of that 800 (since we're sharing the
real estate) so I'll crop/resize to get the width to 400 pixels. Photoshop
will let you change by either pixels or inches by going to Image> Image Size.
You can change the pixels up top, or change the inches (or points, picas
etc.) down bottom.
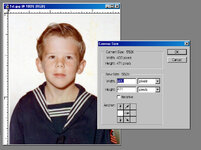
Then go to Image>CANVAS size .. make the canvas the full width you
want. Make it the height you want, too. Specify 800x600 and notice the
Anchor box at the bottom. If you leave the middle checked, Photoshop
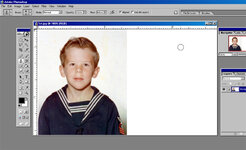
will leave your photo right in the center. If you check the LEFT box,
it will move your photo to the left (anchor it) and put the extra white
space on the right. Similarly, if you anchored at the right, the white space
would be on the left. Basically, you're saying "Put my photo HERE"

Then you can go get your second image, crop/resize to fit that white
space (which is now 400x600 .. half of the 800x600 image area) and
copy it to the clipboard. Close the second file.. you're done with it.

On your first image, you can use the magic wand to select the white
space and go to Edit>Paste Into (ie. paste clipboard image into the
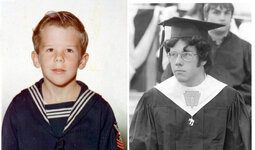
space I just selected with the magic wand) You should now have an
800x600 image with two equal sized photos side by side.

Flatten the image (Layer>Flatten Image) to put everything on one layer.
Otherwise, you can't save it as a jpeg.. jpeg won't save layers.
As Katsin said .. there are many many ways to do the same thing. You'll
get more familiar with the tools as you use them and you'll find what works
best for you.


