NT_2112
Member
Are you using the right lube?


Because I'm not a machinist and am trying to learn. Stuff that may be obvious to you isn't necessarily obvious to me. I see from the responses I've gotten that there are different ways to approach the problem and I appreciate all the help. Your post made me realize that I don't need to make a threading jig, I just need to figure out a way to attach a rotary tool to my QCTP and get a hand crank. Thanks! Not sure how to attach a dremel but I suppose I can figure it out.Fred,
Why are you putting yourself through all of this? You already have a metal lathe. Mount your live cutter to your tool post. Set your change gears for the thread pitch you want. Add a crank. Mount your blank in your 3 jaw or collet chuck. Turn on the Dremel. Turn the crank. Job done.
Somewhat oversimplified, but not much.
Bill
Stuff that may be obvious to you isn't necessarily obvious to me. Your post made me realize that I don't need to make a threading jig,

I may take a day off from this. My head hurts from trying to figure it out.Yeah. But it wasn't obvious to me either until I realized what your final goal was which was only a few posts ago. I probably should have figured it out from your previous thread.
Also, after all, what is a metal lathe (among other things) other than a precision threading jig?
Bill
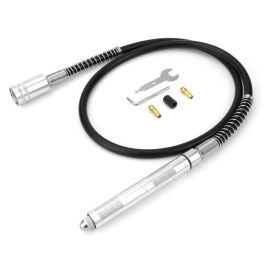
Have a link for that? It looks like it takes a 0.125 shank (like the Dremel and Proxxon tools) which is a problem when most threadmills have a 0.25" shank or larger. I was thinking of trying to reduce a short length of the shank of one of my .25" threadmills to fit a dremel collet, but I think they are all hardened steel and it may be hard or impossible to do, and given that they cost a lot not anxious to ruin them. I have the Dremel extension that looks kind of like this but the business end is much bigger and wouldn't fit in a boring tool holder.I would use something like this mounted like a boring bar to the tool post. View attachment 231615
.. most threadmills have a 0.25" shank or larger.
 www.pjtool.com
")
The normal method is to mill a "runout" groove slightly deeper than the thread depth where you can stop the lathe.I'm not sure how you stop the threading cut in the same place every time.
I 3d printed the simple banjo modification out of PLA and it works fine and is way way way way easier to adjust. The plastic isn't going to hold up forever, but since it only takes 20 minutes to print, it would be very simple to print replacements as needed. I may try printing in nylon filament to see how that holds up. The fine feed cartridge is a little more involved but I may give that a shot as well.Fred,
glad to see that it's getting easier. Here is a link to a couple of items that can improve your mini lathe, both of which you may be able to 3D print.
I had always intended to build the banjo but never got around to it, but it would certainly make your gear changes easier. The fine feed would much improve the finish of any power feed finishing.
Another suggestion. I don't know what your plans are for the threading that you're doing, but when you finally get there, don't thread raw stock. True it up before you start. That may involve buy-in oversize stock to begin with. Also, I would stay away from Big Box store material. Instead, buy some cold roll or, better yet, some 12L14 or similar. Just makes life easier.
FWIW,
Bill
You might consider (assuming you have enough gears to do it) setting up as separate banjo for each thread pitch that you use. That way you wouldn't even need to do any adjusting; just slap those suckers in and have at it.I 3d printed the simple banjo modification out of PLA and it works fine and is way way way way easier to adjust. The plastic isn't going to hold up forever, but since it only takes 20 minutes to print, it would be very simple to print replacements as needed. I may try printing in nylon filament to see how that holds up. The fine feed cartridge is a little more involved but I may give that a shot as well.
Thats a good idea. It's pretty simple to design gears in Fusion360 as well (there's an add-in that makes gear design pretty painless), so its no problem to get different gear sets. I printed out a 100 tooth gear for fun and it seems pretty tough; maybe not as strong as the ABS gears that come with the lathe, but not far from it. I think it should be possible also to print out fused stacked gears too so no worry about keying them together (I'm constantly dropping the keys on the floor).You might consider (assuming you have enough gears to do it) setting up as separate banjo for each thread pitch that you use. That way you wouldn't even need to do any adjusting; just slap those suckers in and have at it.
What am I thinking; I'm pretty sure Thingverse has all the gears available for you to print.
Bill
I bought one from this guy years ago for my old South Bend lathe. It fits in the spindle hole and expands to keep it tight. Measure the spindle hole with some calipers then turn a sample piece of any kind of scrap. Once you have a perfect fit go ahead and measure the sample piece with a micrometer, much more accurate this way. Contact this guy and give him that measurement, this is exactly what I did and I was VERY happy with his workmanship.Wow, this is so frustrating. When I put on the gear combination for 8 tpi, I think the lathe motor just doesn't have the torque to power feed the carriage. I'm going to tear down and readjust/lube the carriage to see if I can get it working, but suspect I'll need a spindle crank to just do it by hand. Rick, any chance you could make me one (Chinese 7x12)? I know LittleMachineShop has one but seems expensive for how junky it looks.
Absolutely no cleanup on the gear. It has a tiny elephant foot (small amount of spreading out where it printed the first layer), but doesn't interfere with operation. I'm pretty amazed that this worked so well. I've been using it quite a bit over the last week and the banjo and gear have held up fine.That is very nice Frederick! I'm amazed at how clean the gear turned out. Did you have to do any post print cleanup? I'm thinking of attempting the slow feed speed modification.
Also, what 3D printer are you using?
Danny
Sent from my iPad using Penturners.org mobile app
Starting to look promising.Wood threading update. After lots of false starts and frustrations with excessive runout making it impossible to accurately cut, I took a bunch of the suggestions and ideas here and came up with something that I think is going to work. Little machine shop has an tool holder block that holds a Proxxon grinder and mounts on top of the compound of the metal lathe; I don't have a Proxxon but I do have a dremel and a flex-shaft, so I machined and threaded a little piece that allows the flex-shaft to fit in the holder. I had to get a collet adapter for the Dremel to allow me to use my 1/4" threadmills (the Dremel can only manage 1/8" and smaller shaft tools); I found this on Ebay. The wood is mounted on the lathe headstock in a collet chuck, and the whole thing is powered by a hand crank. The pic shows the first attempt at threading at 16 tpi on a piece of cherry burl that I had tried to thread previously using my old failed setup. Threads are a bit rough but I'm encouraged that with the right wood I can get decent threads this way. Of course, the X-Y feeds on the lathe make setting this up a breeze.View attachment 232169
Yes, I agree. I'll have to get a little more skilled with my toolmaking and try making a square cutter. I assume that because of geometry, any square cutter would need to be pretty precisely ground and would only be useful for a single pitch, unlike a 60o cutter that can be useful over a range of pitches. Come to think of it one of those tiny boring bars might work as a straight cutter; I think I have one that may fit my setup, I'll have to measure it to see what the correct thread pitch would need to be for it to be useful.Starting to look promising.
Have you thought about trying a square cutter or an acme shaped thread, and going at a courser pitch like 10 or 12tpi. This might be a more durable thread in timber.
. . . cherry burl that I had tried to thread previously using my old failed setup. Threads are a bit rough but I'm encouraged that with the right wood I can get decent threads this way. View attachment 232169