First Post and pic

Signed-In Members Don't See This Ad
See more from SRT8invasion

SRT8invasion

Member
Joined
May 3, 2010
Messages
14
Location
Tampa, FL
I have been lurking and learning since January. Amazing talent here! I thought it was only appropriate to include a pic. Still working on the photo skills but the tutorials are great. Many thanks to all for the information and inspiration.

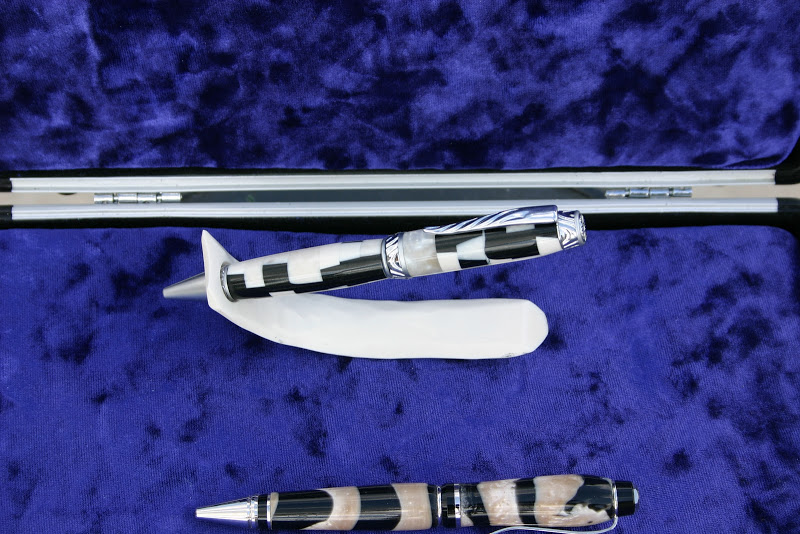
Segmented black, white and pearl on satin chrome ultra cigar. The stand was cast / carved from the pen blank.
IMG_1409.JPG
 
Signed-In Members Don't See This Ad
Second pic

Thought I would through in another...

I cast the blank and made the stand from a strip of the blank. Ulrta cigar with gold chrome upgrade.
Flag%202.JPG
 
Those are some nice looking pens, and I also like the stands. Welcome, and thanks for sharing.
 
You are learning well, shown by your work! I think the second pic would look really good if the pen didnt lay down so far, otherwise, like the concept! Nice job.

Seamus Rooney
 
Yes, stop lurking and show us what you can do...........geeeze!!!!!!!! What would it take....to make that stand go the other way..with the hole at more towards the bottom so that the pen stood upright? Duh...remember I don't know much but love to comment.hahahhahaa
 
Thanks for posting these. While the pens are nice, I really like the idea of matching custom stands. I'd love to know how you make the stands if there's more to it than just drilling a hole and heating the material.
 
WELCOME TO IAP!!

Yup, nice pens... killer stands! Can we steal your stand idea???
 
Beautiful work! Great segmenting, too. And the stand idea is cool.

btw, welcome to IAP. Glad to see your work. Following a a few links you might have "missed" while you were 'lurking.'

This link has postings by different pen turners and what they wish they had known earlier:
http://www.penturners.org/forum/showthread.php?t=46654


Here is another link - a PDF on the acronyms used here. I am sure you know many but this will help with those you don't.

http://content.penturners.org/articl...9/Acronyms.pdf

 
Thanks for the kind words. When I cast the resin I make the block a little thicker so that I can cut a strip for the stand. I drill the hole, shape, sand and polish. The pr becomes flexible at around 150 so you can shape to any angle you like.

Here is a stand I made of wood using a similar process. To get the curve I cut angles and rotated 180 before bonding. The pen is segmented padauk, ebony, and ash for the thin sections.
IMG_1404.JPG
 
Last edited:
Anybody from my home town is more than welcome here after paying your dues by sending me a Cuban Sandwich from La Tropicana and a Deviled Crab from the Seabreeze.:wink: Very nice work, now go to Ybor and get my Cuban:biggrin:.
 
Yes, stop lurking and show us what you can do...........geeeze!!!!!!!! What would it take....to make that stand go the other way..with the hole at more towards the bottom so that the pen stood upright? Duh...remember I don't know much but love to comment.hahahhahaa

You can change the angle at any time by reheating the resin. You may have to sand the bottom flat to correct the balance.
 
Back
Top Bottom