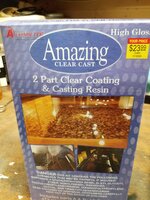
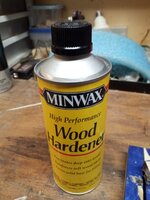
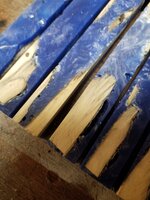
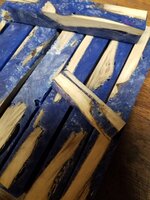
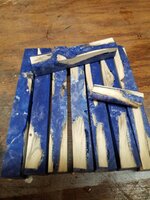
I'm new at casting and pen turning. Here is a failed casting project. I vacuum stabilized some small pieces of driftwood using Minwax wood hardener and let them set and dry for over a week. When my casting started to get hot and set it started to bubble? You see what I ended up with. Holes everywhere and the wood didn't bond to the apoxy. You can see this in the piece that I sample turned? Minwax must be incompatible? Any ides or info please.

You are using an out of date browser. It may not display this or other websites correctly.
You should upgrade or use an alternative browser.
You should upgrade or use an alternative browser.
Casting Failed Casting project
- Thread starter Lon H
- Start date
Signed-In Members Don't See This Ad

Signed-In Members Don't See This Ad
IMHO vacuum stabilizing with Minwax wood hardener is ineffective and dangerous. It contains a high concentration of acetone that will start to boil prior to achieving deep vacuum. This is similar to vacuum stabilizing wet wood - the water in the wood turns to gas and makes it difficult to remove all of the air. Also, water boils at a higher temperature (lower pressure) than acetone, so the MW wood hardener will behave even worse. Also, the acetone that boils off will travel through you vacuum pump and may pose a fire/explosion hazard.
Did you dry the wood completely prior to applying the MW? Like bone-dry --> heat to over 212 degF for several hours (I do 12 hrs). Moisture in the wood can cause casting resin to foam, but in your case it looks like air bubbles rather than foaming. I think that it is recommended to dry wood completely prior to any kind of stabilization as it will allow the wood to soak up more of the stabilizer. Note - cool blanks in a plastic bag prior to stabilizing.
I have had success casting small quantities of unstabilized wood with epoxy without using a pressure pot. Doing only a single blank at a time. I used the method described in the video below, using Art-N-Glow resin, which has an extremely long pot life. This makes it easier to mix without bubbles because you can go slow, which reduces the need for a pressure pot.
I think you might be able to save your castings by applying CA as you turn to fill the holes.
Hopefully I gave you some food for thought. Welcome to the forum, and best of luck with your projects!
JohnU
Member
I can't offer much because I don't use epoxy or minwax to stabilize but i do make hybrids and cast often. I'm wondering about your moisture content in the wood prior to both of your steps. When I cast wood pieces I make sure they are as dry as possible by putting them in the oven for a few hours. This removes the moisture to allow your stabilizing juice to penetrate the wood pours. Then I warm them again to remove any humidity moisture prior to pouring the resin. This gives better adhesion between the two materials. I know epoxy doesn't need pressure but if you are set up for it, I recommend using it with your resin pours also. It will compress the air helping to eliminate bubbles In your final results. I'm sure others will jump in with more for you. Hope it helps and good luck!
hooked
Member
I have been getting into stabilizing recently with cactus juice. It is my understanding from reading about it, Minwax wood hardener has acrylic in it. It is also my understanding that Alumilite does not bond well with acrylic. It also contains acetone in which case the vacuum pump would be exhausting acetone gas which is very flammable.
From my limited experience, your blanks look similar to my first couple of hybrid burl batches that I did not dry properly before stabilizing.
.
From my limited experience, your blanks look similar to my first couple of hybrid burl batches that I did not dry properly before stabilizing.
.
My wood was dry and very light. I did ruin my pressure pot and pump during the stability process due to the acetone in the MW hardener. $100 lost in the process. (Learning process) I may just stick to colored blanks and away from stabilizing wood. I wonder about adding super glue to these blanks, before turning?
Attachments

Bats
Member
Yup - I ruined the lid on my vacuum chamber the same way when I first got it and was still experimenting with the Minwax hardener. Bad idea - although in my case at least the pump survived for another couple years. Still not sure why the next two replacement lids for the vac chamber have almost immediately spiderwebbed, though.My wood was dry and very light. I did ruin my pressure pot and pump during the stability process due to the acetone in the MW hardener. $100 lost in the process. (Learning process)
If you're going to vacuum stabilize (which, if you get your pump & chamber online again, is really the way to go for turning), I'd stick to Cactus Juice. It works wonderfully, and Curtis has always been great about answering questions (even when they haven't actually related to the product). And, as the others have said, thoroughly drying the wood first (I cook it for 12-24hrs at 220°F and then let it cool in a sealed bag) is essential.
You'd probably have to do it progressively as you turn it down - or after getting it closer to the finished size - since a lot of the holes aren't going to be exposed right now. It's likely to be a better solution for the tiny bubbles than the larger voids, though - CA doesn't cure very well in large volumes. For those you might want to try a low(ish) viscosity epoxy - I haven't worked with it, but more of your Amazing Clear Cast (matching or contrasting pigments optional) might do the job. If you're dealing with a void with overhanging material, you might want to consider cutting or drilling it away first - to avoid trapping new air bubbles - but that's a judgement call.I wonder about adding super glue to these blanks, before turning?
(bear in mind, I've never done any hybrid casting - this is just based on my experience with epoxy inlays)
Bats
Member
Just a nitpick here - Lon looks like he's using Amazing Clear Cast, which, while it's made by Alumilite, is actually an epoxy resin (which should bond with acrylic - or at least people use epoxy to glue tubes into acrylic blanks), while regular Alumilite itself is a urethane.It is also my understanding that Alumilite does not bond well with acrylic.
MRDucks2
Member
Wife uses a lot of Amazing Clear Cast and actually pours it over acrylic on a routine basis ending up with bubble free clear pours. Occasional depending on what she adds to it it may get tiny bubbles which I can make disappear in the pressure pot.Just a nitpick here - Lon looks like he's using Amazing Clear Cast, which, while it's made by Alumilite, is actually an epoxy resin (which should bond with acrylic - or at least people use epoxy to glue tubes into acrylic blanks), while regular Alumilite itself is a urethane.
She says you ended up with a "fast cure" or "quick cure" (she forgets) which is the resin getting hot and curing way to fast. Different things can cause it from improper ratios to how it is mixed to adding to high a ratio of colorant to the resin (overloading it). The epoxy is much more tolerant of moisture/humidity than the urethane.