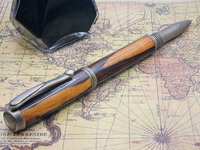
First off, pen is a great combination. The wood and the antique silver are great together.
It is worth trying starting at a higher grit. If you start out with a smooth enough finish, you don't necessarily need to start at the coarsest grit in the set of zona papers. You just need to start at one that is just coarse enough to level out the surface. That may be two or three grits finer than the coarsest.
IMO, I like to dry-sand the first grit or two regardless. I feel that with the first grit, water lubricates too much, and makes it harder to bring down the bumps and ridges, especially if you start at a finer grit than the coarsest possible. Once you have leveled out the surface, then wet sanding through the rest will usually work just fine.
Also, you don't necessarily need to use a lot of pressure when sanding. Sandpaper is a cutting tool, designed to cut through the uneven bumps and ridges on a surface. I use small snips of zona paper, longer than wide, so I can hold onto them, but otherwise I try to make it go as far as possible (last as long as possible). You don't want to reuse sandpaper. The cutting capabilities of each piece wear down pretty quick. A small 3/4" wide, 1 1/2" long piece should work well enough to sand through on one end, then flip it around and sand through with the other end (maybe with a lighter touch). After that, throw that piece away. Use a new piece for the next pen, or if you still need more sanding at the same grit with the current, get a new piece. Same for each grit. Don't skip grits, use EVERY single grit in the series until you get down to the finest. Grits are separated by a 50% grit size reduction. Each grit is designed to cut through half the size of the scratches left by the previous grit. Eventually, you cut through all the scratches to the point where the remaining scratches are so fine, you cannot see them.
Even after you get down to 1 micron, if you are using resins (CA on wood, or any resin blank), you can then continue to polish with high grit finishing polish compounds. Those are usually sub-micron grit, if you feel you still need to polish out any ultra fine scratches (depending on the light, you may find that even 1 micron scratches can be visible with the right glint.)


")