budnder
Member
I tried a closed end mod to a Presimo Fountain pen and took some pix along the way for sharing. Note, this is not a tutorial... as you'll see there is a bit of trial and error and I didn't take the straightest path to where I ended up.
I'll put my comments after the photos they apply to.
One flavor of the Presimo has an etched cap and I thought that might pair nicely with a piece of Cholla I had cast recently. I had previously turned the Cholla round between centers to about 22mm or so, to see what it looked like. You'll see there's still a bit of the painters tape from the casting that didn't get completely turned off.
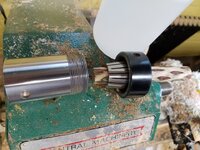
Collet up the blank to get ready for drilling.
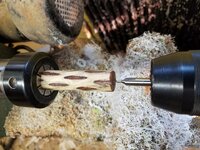
I usually start with a center drill.
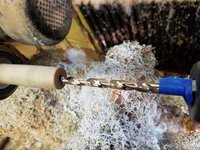
Then follow that with a quarter inch or so to get a hole all the way through. I need a depth of 67mm to accommodate the converter comfortably - I marked that on the drill bit with blue tape. Maybe added another millimeter or two figuring I'll sand off a little of the end when I square it with the glued in brass tube.
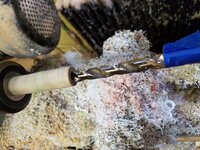
Now drill the 10mm final hole.
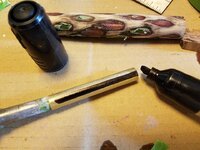
Let's paint the tube black with a sharpie. I went with black because there will be a part of the closed end that isn't hollow and black is the best match for that.
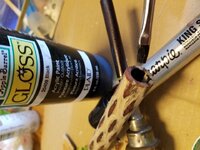
Now paint the inside of the tube black.
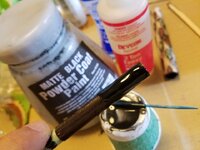
Now mix up and apply some black epoxy to glue the tube in place. I pushed the tube just a hair below the end of the blank so I can sand it flush with the blank when it dries. Now do something else for an hour or two...
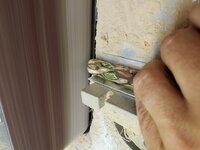
I use a belt sander with a right angle guide to square blanks and manually spin the blank with my fingers. Super fast and easy to control how aggressive the sanding is and continually check for the complete shiny brass circle that tells you you're good.
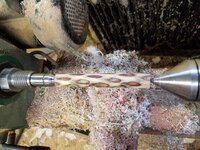
Mounter 'er up between centers. I don't have Presimo bushings, so we'll just go dead center into the tube and I still have a center marked in the other end from when I turned the casting down initially.
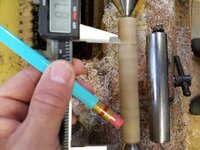
I calculated I wanted the body to be 87mm long (keep reading... I changed my mind later and made it 81mm... now commences the error port of trial and error), so I'll mark that.
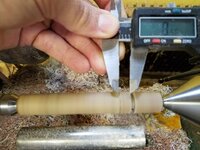
For the Presimo cap to post, I need the last 9mm of the body to be 11mm wide. Use a parting tool to mark that.
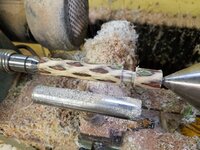
Use a parting tool to turn that end of the body to 11mm.
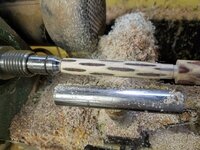
I calculated 13.25mm for the nib end of the body, so turned that down and then just shaped the rest of the body to meet the 11mm on the bottom. I tried to let it curve a bit.
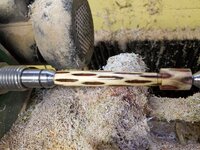
While everything is good and stable and square, I'll finish what I can now, which is everything except the end.
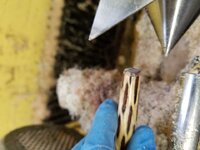
My plan was to use a parting tool to get down pretty thin, and then cut the end off, but I guess I got too thin and it mostly came off. I hit the end with the belt sander to clean it up the end after it separated.
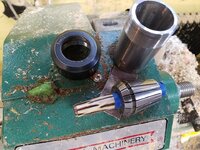
Into the collet so I can finish the end.
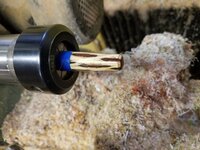
Now the end is finished. It doesn't turn exactly true and square in the collet, but close enough for finishing.
I'm pretty happy with what the body looks like - now to assemble and see what it looks like all together.
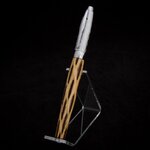
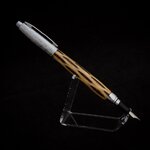
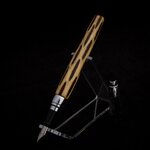
:frown:Well... that's pretty fugly. The worldest longest fountain pen. It looks like somebodys pants are way too big and long and they hiked them up to make them wearable.
I get out some fountain pens I like and start doing some measurements... not sure where I got that 87mm body number from... looks like it should be more like 81mm body. And that fat curvy profile makes the cap look weird - I think the profile should mirror the cap. Doh! Oh well, it shows promise, I'll improve on the next one.
Then it dawned on me that since all my errors were on the "too big" side, I could just pop the nib out and try turning my new profile. So the new profile is 13mm wide at the nib end to mirror the cap, and keep that 13mm going for a length of 24mm or so, again to mirror the cap, then descend down to that 11mm i need for the last 9mm I need for posting.
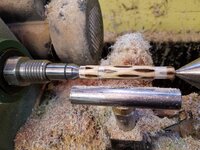
Back to between centers and the new improved profile marked.
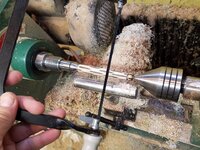
This time, I'll part it off properly with a saw and not risk loosing the blank when it comes flying off.
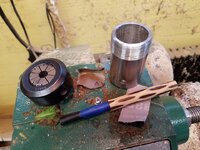
Oops... I forgot that part where you're supposed to finish what you can before you part. Oh well, find a close punch and a little tape for a good friction fit and away we go for finishing.
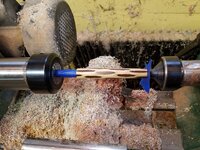
A little support on the end helps. I backed this off to finish the very end.
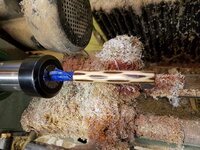
All finished.
Now... assemble again and see if the new profile works better.
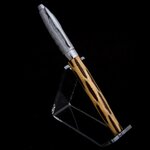
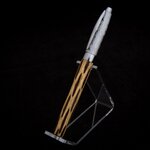
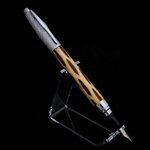
 Much better... definitely a keeper! Now to tune the nib up and see how it writes.
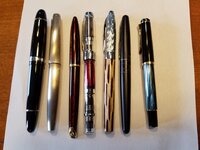
Just for grins, here's how it compares to a variety of other fountain pens I had laying around.
I'll put my comments after the photos they apply to.
One flavor of the Presimo has an etched cap and I thought that might pair nicely with a piece of Cholla I had cast recently. I had previously turned the Cholla round between centers to about 22mm or so, to see what it looked like. You'll see there's still a bit of the painters tape from the casting that didn't get completely turned off.

Collet up the blank to get ready for drilling.

I usually start with a center drill.

Then follow that with a quarter inch or so to get a hole all the way through. I need a depth of 67mm to accommodate the converter comfortably - I marked that on the drill bit with blue tape. Maybe added another millimeter or two figuring I'll sand off a little of the end when I square it with the glued in brass tube.

Now drill the 10mm final hole.

Let's paint the tube black with a sharpie. I went with black because there will be a part of the closed end that isn't hollow and black is the best match for that.

Now paint the inside of the tube black.

Now mix up and apply some black epoxy to glue the tube in place. I pushed the tube just a hair below the end of the blank so I can sand it flush with the blank when it dries. Now do something else for an hour or two...

I use a belt sander with a right angle guide to square blanks and manually spin the blank with my fingers. Super fast and easy to control how aggressive the sanding is and continually check for the complete shiny brass circle that tells you you're good.

Mounter 'er up between centers. I don't have Presimo bushings, so we'll just go dead center into the tube and I still have a center marked in the other end from when I turned the casting down initially.

I calculated I wanted the body to be 87mm long (keep reading... I changed my mind later and made it 81mm... now commences the error port of trial and error), so I'll mark that.

For the Presimo cap to post, I need the last 9mm of the body to be 11mm wide. Use a parting tool to mark that.

Use a parting tool to turn that end of the body to 11mm.

I calculated 13.25mm for the nib end of the body, so turned that down and then just shaped the rest of the body to meet the 11mm on the bottom. I tried to let it curve a bit.

While everything is good and stable and square, I'll finish what I can now, which is everything except the end.

My plan was to use a parting tool to get down pretty thin, and then cut the end off, but I guess I got too thin and it mostly came off. I hit the end with the belt sander to clean it up the end after it separated.

Into the collet so I can finish the end.

Now the end is finished. It doesn't turn exactly true and square in the collet, but close enough for finishing.
I'm pretty happy with what the body looks like - now to assemble and see what it looks like all together.


:frown:Well... that's pretty fugly. The worldest longest fountain pen. It looks like somebodys pants are way too big and long and they hiked them up to make them wearable.
I get out some fountain pens I like and start doing some measurements... not sure where I got that 87mm body number from... looks like it should be more like 81mm body. And that fat curvy profile makes the cap look weird - I think the profile should mirror the cap. Doh! Oh well, it shows promise, I'll improve on the next one.
Then it dawned on me that since all my errors were on the "too big" side, I could just pop the nib out and try turning my new profile. So the new profile is 13mm wide at the nib end to mirror the cap, and keep that 13mm going for a length of 24mm or so, again to mirror the cap, then descend down to that 11mm i need for the last 9mm I need for posting.

Back to between centers and the new improved profile marked.

This time, I'll part it off properly with a saw and not risk loosing the blank when it comes flying off.

Oops... I forgot that part where you're supposed to finish what you can before you part. Oh well, find a close punch and a little tape for a good friction fit and away we go for finishing.

A little support on the end helps. I backed this off to finish the very end.

All finished.
Now... assemble again and see if the new profile works better.


Just for grins, here's how it compares to a variety of other fountain pens I had laying around.
