davinci27
Member
Closed End mandrel idea - Photos Added
I may not be the first to post this, but I haven't seen it so I thought I would put it up here.
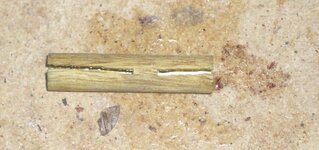
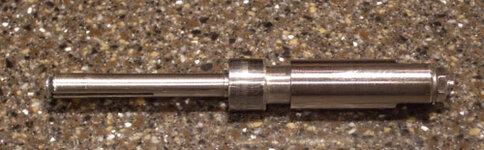
So I wanted to make a closed end pen, but I didn't want to buy a bunch of closed end mandrels, so I had an idea to make some shims. I purchased a 7mm mandrel from Arizona Silhouette, then I glued up a scrap piece of wood to a standard 7mm tube. I then turned the blank down to the same diameter as the pen kit I wanted to use. My first one was a Jr Gent. After I had the blank turned down to fit inside the tube, I split it in half with the band saw. I then had a set of shims I could use with the 7mm mandrel.
--Edit For More Details--
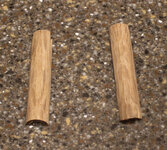
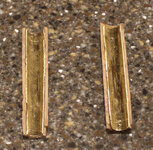
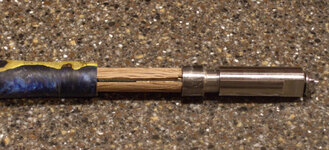
So I added some more pictures. Basically you start buy gluing up and turning a blank into a sleeve so that it just fits inside the tube you are using for the closed end. I turned until I was close, then finished the sleeve to size with sand paper. You also want to trim the sleeve so it is shorter than the actual tube you will be using for the closed end pen.
Next you split the sleeve in half. I used a bandsaw to do this, but be careful you've got to get those fingers pretty close to the blade. It would be much safer to use a scrap of wood and make a jig to hold the sleeve.
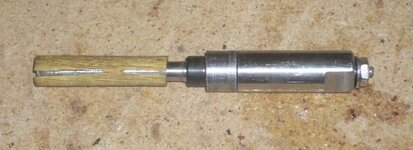
Now you should have 2 shims. You are ready to put everything together. first take your standard bushing, flip it around and slide it on the mandrel. Next put the shims on the mandrel. Make sure the shims are put together so they match the split in the mandrel. When the mandrel expands, you want the shims to be able to spread apart. Then you just slide it all together.
If this still isn't clear, let me know. These shims were just my initial test. I'm going to make new set sometime in the next few days, and I can take pictures along the way to put together a more complete tutorial.
--End Edit For More Details--
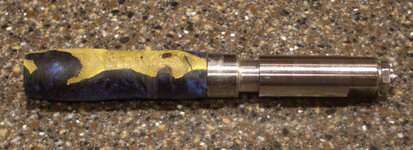
The nice thing about using the shims and the 7mm mandrel is I can flip my bushings around and continue to use them as well. So now I have one mandrel that i can use with any kit. You can see my first closed end using this idea in the show off your pens section.
http://www.penturners.org/forum/showthread.php?t=40198
I may not be the first to post this, but I haven't seen it so I thought I would put it up here.
So I wanted to make a closed end pen, but I didn't want to buy a bunch of closed end mandrels, so I had an idea to make some shims. I purchased a 7mm mandrel from Arizona Silhouette, then I glued up a scrap piece of wood to a standard 7mm tube. I then turned the blank down to the same diameter as the pen kit I wanted to use. My first one was a Jr Gent. After I had the blank turned down to fit inside the tube, I split it in half with the band saw. I then had a set of shims I could use with the 7mm mandrel.
--Edit For More Details--
So I added some more pictures. Basically you start buy gluing up and turning a blank into a sleeve so that it just fits inside the tube you are using for the closed end. I turned until I was close, then finished the sleeve to size with sand paper. You also want to trim the sleeve so it is shorter than the actual tube you will be using for the closed end pen.
Next you split the sleeve in half. I used a bandsaw to do this, but be careful you've got to get those fingers pretty close to the blade. It would be much safer to use a scrap of wood and make a jig to hold the sleeve.
Now you should have 2 shims. You are ready to put everything together. first take your standard bushing, flip it around and slide it on the mandrel. Next put the shims on the mandrel. Make sure the shims are put together so they match the split in the mandrel. When the mandrel expands, you want the shims to be able to spread apart. Then you just slide it all together.
If this still isn't clear, let me know. These shims were just my initial test. I'm going to make new set sometime in the next few days, and I can take pictures along the way to put together a more complete tutorial.
--End Edit For More Details--
The nice thing about using the shims and the 7mm mandrel is I can flip my bushings around and continue to use them as well. So now I have one mandrel that i can use with any kit. You can see my first closed end using this idea in the show off your pens section.
http://www.penturners.org/forum/showthread.php?t=40198
Attachments
Last edited: