Changing A Jet 1642 On/Off Switch

Signed-In Members Don't See This Ad

JD Combs Sr

Member
Joined
Jan 30, 2010
Messages
767
Location
Owingsville, KY
I recently saw a couple posts about problems with On/Off switches so I thought I would post some pics of a recent change-out of the On/Off switch for my 2Hp Jet 1642. I am pretty sure the procedure will work for the 1.5Hp Jet 1642 as well as some of clones such as the Grizzly G0632 and G0698. I believe there is also an older Laguna lathe that was also a clone of the Jet. In any case if what you see here looks like your lathe On/Off switch then the procedure should work for you.

FIRST THING I DID WAS - UNPLUG THE LATHE

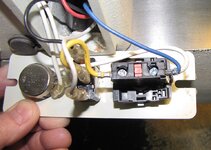
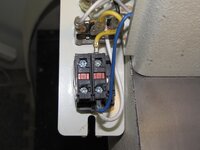
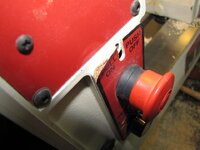
I then removed the switch mounting plate from the lathe.
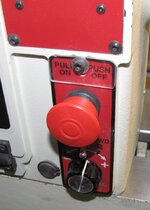
JetOnOffRpl (1).jpg JetOnOffRpl (2).jpg

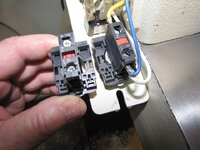
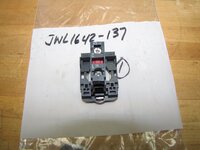
I disconnected three(3) wires from the On/Off switch, a yellow to the left(bottom) and a blue and a white to the right(top) of the switch.
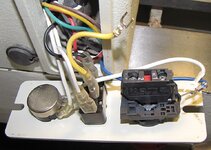
JetOnOffRpl (3).jpg

There is no need to remove the actuator knob, it is not likely to be the problem. As long as it can be snapped in and out and it stays in place it is probably OK.

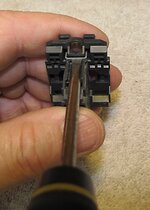
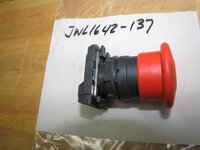
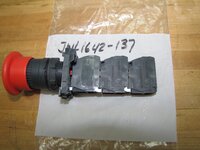
By inserting a small Philips screwdriver into a small slot and prying slightly on the release mechanism I released the switch "base"(my terminology) from the actuator.
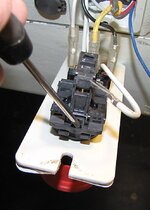
JetOnOffRpl (4).JPG

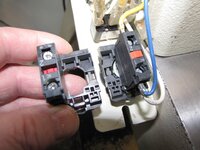
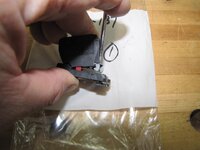
The actual switch is attached to the switch base by a spring loaded hook mechanism. A small flat bladed screwdriver inserted into a slot in the mechanism and a slight prying releases the switch from the base.
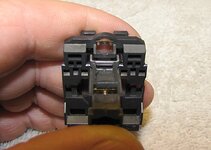
JetOnOffRpl (5).JPG JetOnOffRpl (6).JPG

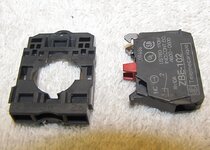
With the hook released the switch will tilt up and out of the base.
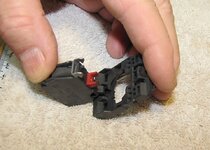
JetOnOffRpl (7).jpg JetOnOffRpl (8).jpg

(will continue in the next post)
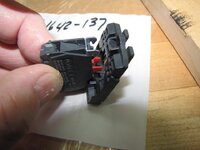
 
Signed-In Members Don't See This Ad
Jet 1642 Start Switch Replacement Continued

BTW I forgot to mention the reason for replacement, my switch started failing to work frequently, had to keep jostling with it so I call Jet and they replaced it under warranty. My initial fix while waiting on the replacement was to flush it a couple times with alcohol and air hose it out. That corrected the problem until I go the new switch. It wasn't long after I got the switch that it started acting up again so I went ahead and replaced it.

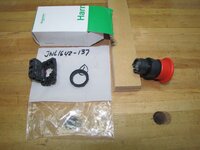
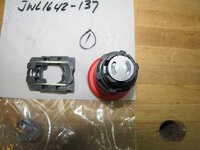
When I received my warranty replacement switch it included the entire switch with actuator and switch base. It also came with the switch mounted on one side of the base instead of in the center.
JetOnOffRpl (10).jpg JetOnOffRpl (12).jpg

It probably doesn't matter about the location but to avoid any problems with getting the complete assembly back into the hole in the head stock I moved the switch to the center like the original.
JetOnOffRpl (16).jpg JetOnOffRpl (18).jpgJetOnOffRpl (20).jpg

I did not use the actuator and base that came with the switch but it will go into my spare parts drawer "just in case".
JetOnOffRpl (22).jpgJetOnOffRpl (24).jpg

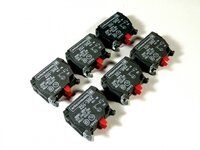
I still have a couple years warranty on the lathe but I found these on eBay at six for $21 so I ordered them, now I should be set for about any On/Off failure situation.
JetOnOffRpl (9).jpg

(one more post coming)
 
Last edited:
Jet 1642 Start Switch Replacement Continued

I just reversed the above process when I reinstalled the new switch. The switch just snaps into the base without the aid of tools and the base snaps back onto the actuator again without the aid of tools. I reassembled the wires back to their original locations on the new switch and then reinstalled the whole switch speed control assemble back into the headstock. After pluging it back in everything worked like a charm, no more intermittent problems.

Some additional thoughts.

In the previous posts we saw that the switch could be mounted in the center or off to the side(either side) of the base.
JetOnOffRpl (26).jpg

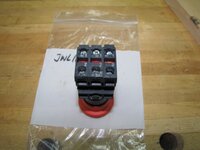
The design of the actuator/base also allows multiple switches to be mounted to it.
They can be mounted side beside or stacked on top of each other.
JetOnOffRpl (27).jpg JetOnOffRpl (28).jpg

Here is what mine would look like if it had two switches on it. With a little bit of thought the second switch could be used to start a secondary/associated piece of equipment when the lathe is turned on, perhaps a dedicated dust collector or such.:wink: Lots of possibilities.
JetOnOffRpl (29).jpg


A minor issue:
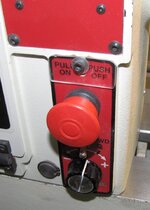
Over time the adhesive backed decal on my switch/speed control plate assembly has started peeling off.
JetOnOffRpl (30).jpg

I kept it from getting worse by cutting a piece of clear acrylic(scrap from the glass cutting area at Lowe's) and drilling it to fit under the plate retaining screw. One of these days I am going to cut a bigger piece and cover the whole plate.:rolleyes:
JetOnOffRpl (31).jpg

That concludes my switch replacement post, I hope it is helpful for someone.
 
Last edited:
Great tutorial JD!
Neat that the base has expansion slots! Some thinking ahead there!
When the switches were in stacked mode, was there space to get the leads in to each switch? I guess when you hit the main switch actuator, these would domino effect by switching all of them in the stack.
Again. Nice that some thinking went into the design.
Now, if they would last longer would be helpful.
 
Hey ... room for 3 switches all in one spot?


I'ld say ... workstation light, dust collector, and lathe. :)
 
Mmmm ... I'ld have the light for the room itself wired separately, and a nice bright workstation light right over the lathe so I can see fine detail as I work.

Sort of like my current situation .... the room light is a standard yellowish light (spiral bulb), and the lathe's workstation light is an aluminum reflector work light with a dayglow bulb positioned less than a foot over my lathe. It gives me a better idea of what the blank will look like out in sunlight.

The reason I wanted it up that close is because the light from the ceiling is right behind my HEAD, which put the lathe in shadow ... I couldn't see anything I was working on, lol!

The round aluminum reflector keeps the light from shining in my eyes, so I can see. :)
 
If you're going to be changing out the switch, you might consider another mod to your lathe. Some people with Powermatics put the controls on a magnetic base so it can be moved around the lathe. Not really important for pens, but anyone with a 1642 probably is doing some projects larger than pens. It would be nice if you do any turnings off the end of the lathe. Here's a link to what I'm talking about: http://www.weebly.com/uploads/3/6/4/1/3641005/remote_switch_for_powermatic_3520b.pdf
I've not done it, but it may be something I consider down the road.
 
After ordering a switch from Jet for $60 found hardest part of changing my switch seeing instructions printed inside box after unfolding. So went to Schneider Electric and downloaded instruction sheet which helped me.

Went to Schneider today and cannot find those same instructions using these numbers ZB5AT84BA, came on the box these numbers wrote down on the box XB5AT42, XB5A OR ZBFA. during my research year or so back. Why cannot remember!

You might want to save James (OP) instructions & photos
 
The only thing about making the remote switch is remembering that the wire in the machine is rated for the proper voltage and amperage. I would worry that trailer cord would only carry a 12 VDC rating and not sure of the conductor size. I would make sure you are not creating a hazard with the mod. I would also put something metal over the opening in the back rather than wood. Something that is non flammable.

But I REALLY REALLY like the idea of having the control handy
I agree. If and when I do this mod, I'll do a little more research. I just thought it was a really useful mod if you know what you're doing. I'm lucky that I have a friend who's an electrician.
 
Back
Top Bottom