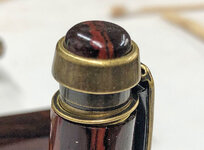
Caballero with Cocobolo

Signed-In Members Don't See This Ad
See more from egnald

egnald

Member
Joined
Jun 9, 2017
Messages
3,105
Location
Columbus, Nebraska, USA
Greetings from a very Cold and Windy Nebraska.

This is an Antique Brass Caballero kit from Exotic Blanks made with Cocobolo and finished using my standard CA regimen. I pressed out the factory finial and installed a custom one turned from the same piece of Cocobolo.

My goal was to take pictures at every step along the way so I could make up my own Instruction Sheet for the Caballero incorporating my standard regimen which includes some very wise assembly instructions that I got from one of Ed's (Exotic Blanks) YouTube videos on how to assemble for the best grain pattern matching when the pen is both open as well as closed.

Here are the pictures. The open and closed views were rotated to show the grain and pattern matching from multiple sides.

Regards,
Dave

IMG_2719 Cropped.jpg


IMG_2726 Cropped.jpg

IMG_2720 Cropped.jpg
IMG_2723 Cropped.jpgIMG_2721 Cropped.jpgIMG_2724 Cropped.jpg
IMG_2722 Cropped.jpg
IMG_2725 Cropped.jpg
 
Signed-In Members Don't See This Ad

Brian G

Member
Joined
Jul 2, 2013
Messages
1,571
Location
Bloomington, MN
Well done, David. Your choice of plating perfectly complements the cocobolo. I'm a fan of the Caballero, and your choice to replace the "cabochon" makes a big difference.

I can't describe this feeling very well, but I enjoy seeing pens that evoke a soothing/calming effect. Your pen does that.

Consider one more photo like the first one, but with the cap oriented so we see the cabochon. Then I'll lobby to make it a front page pen.
 

Todd in PA

Member
Joined
Feb 16, 2021
Messages
658
Location
Port Matilda, PA
Nice pen, David. Your sharing and comments were very helpful in my recent attempts to make a custom finial, and so I've had my first few successes. I turned one down recently and then realized it was END GRAIN because I didn't rotate the blank. 🤪

In this case you have not only used the right orientation, but also managed to actually line up the wood grain with the cap of the pen! Really nice work! I imagine that takes some planning, or maybe it just worked out that way. Perhaps you could share some of your technique.
 

Kcimdrib

Member
Joined
Nov 1, 2020
Messages
1,375
Location
UK
David
Well done great choice of wood and nicely turned and polished. Don't care what others say you can't beat wood when making a pen.
No glitz just.quality in my book.

Mike
 

jrista

Member
Joined
Aug 12, 2021
Messages
2,241
Location
Colorado
Perfect combination of wood and plating. Really love the custom finial cap. Heck of a piece of wood, too!
 

egnald

Member
Joined
Jun 9, 2017
Messages
3,105
Location
Columbus, Nebraska, USA
Nice pen, David. Your sharing and comments were very helpful in my recent attempts to make a custom finial, and so I've had my first few successes. I turned one down recently and then realized it was END GRAIN because I didn't rotate the blank. 🤪

In this case you have not only used the right orientation, but also managed to actually line up the wood grain with the cap of the pen! Really nice work! I imagine that takes some planning, or maybe it just worked out that way. Perhaps you could share some of your technique.

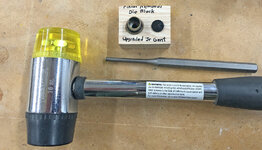
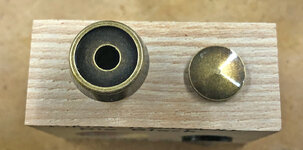
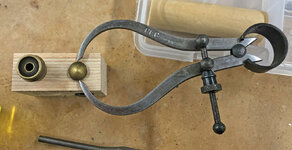
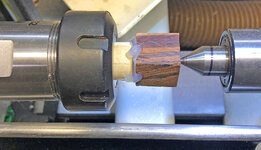
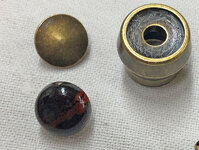
First, I use a small block of Maple with a hole drilled in it and a pin punch to punch out the factory finial/cabochon. I drop it in a small hole and set my small calipers to the diameter of what I punched out.

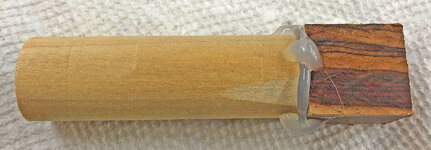
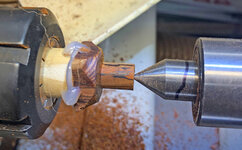
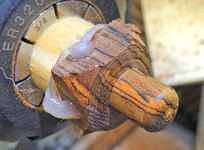
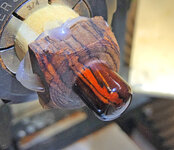
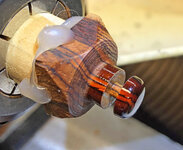
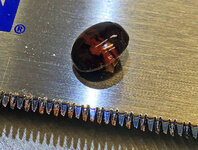
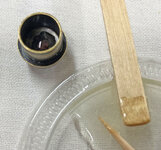
I turn the finial / cabochon from end grain. I simply glue the scrap end of the blank onto a 3/4-inch dowel using hot melt glue. Then I hold the dowel in a 3/4-inch collet chuck for turning. I use my skinny live center to stabilize the piece while I turn it down to the measured diameter then I back the tailstock off and clean up the dimple from the live center and round over the edge. I apply my CA finish next. Finally, I use my parting tool to part almost all of the way through, leaving just the little post that will fit into the hole in the cap. I part it off the rest of the way using a pull saw and glue it in to the cap by putting a little dab of epoxy on the hole. I glue it in before pressing the cap on so that I can line up the grain before pressing it in.

Here is the story in pictures:

Dave

IMG_2654 Cropped.jpg

IMG_2655 Cropped.jpg IMG_2656 Cropped.jpg

IMG_2659 Cropped.jpg

IMG_2660 Cropped.jpg IMG_2662 Cropped.jpg

IMG_2671 Cropped.jpg IMG_2675 Cropped.jpg

IMG_2676 Cropped.jpg IMG_2678 Cropped.jpg

IMG_2682 Cropped 1.jpg IMG_2702 Cropped.jpg IMG_2705 Cropped 1.jpg
 

mark james

IAP Collection, Curator
Joined
Sep 6, 2012
Messages
12,750
Location
Medina, Ohio
Superb pen Dave! I agree with the comments above. The choice to do a custom finial; the choice of components; the actual turning; and your finish is just very well executed. I also agree with Brian G, this pen has a very comfortable appearance. Be proud of this one. 👏 👏 👏
 

KMCloonan

Member
Joined
Jun 13, 2017
Messages
1,480
Location
Round Lake, Illinois
I LOVE the finial, and I really love your photos showing your process. I am definitely going to give this a try, and as luck would have it, I have a couple Caballero kits in my stash. I can't always tell which caps/Finials you can do this to, so now that I know about the caballero, I'm on it.

Thanks again!
 

montmill

Member
Joined
Jan 26, 2008
Messages
644
Location
13528 Old Hwy. G Montfort, Wisconsin
That's about as nice as it gets. Have you listed your CA regime anywhere that I could see it? Beautiful combination of wood and hardware. Glad it's windy and cold so it's keeping you in the shop. We all benefit from that. ;)
 

RGVPens

Member
Joined
Oct 4, 2021
Messages
408
Location
Mission TX
Beautiful pen David!!! Classic, simple design with beautiful components and outstanding craftsmanship!
Thanks for sharing with us...and keep warm.
 

Kcimdrib

Member
Joined
Nov 1, 2020
Messages
1,375
Location
UK
Great Pen David love the finish although I am rapidly going off CA. The finial looks great.
 
Top Bottom