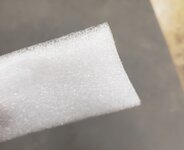
CA finish issues - white cloudy in specific spots

Signed-In Members Don't See This Ad

vavavallay

Member
Joined
Jun 21, 2020
Messages
8
Location
Norcal
Hey folks! My name is Ilyssa - I am new to turning and this is my 7th pen. I was hoping my first post could be to show off a pen... however I have been running into a repeated issue since the 3rd pen or so: I am getting white cloudy spots in the same spots consistently, seems to be always around the edges close to the bushings and even a bit further into the pen from there. I always notice it right before or immediately after starting micromesh (see photos below)

My basic protocol is to add 1-2 layers of thin CA, then 5-7 layers of medium CA. I use skew to clean up high spots, sand with Abranet 400 grit until 90% shiny spots gone (lathe on), sand longitudinally to remove circular sanding marks until all clear spots gone, spray with alcohol and wipe down, start micromesh from 1500-12000.

I am using StickFast thin and Medium. I am not using white/normal paper towels.

Here is how I have tried to mitigate:

1a. Sanding all the way back down to the wood and restarting the CA process. This gives similar results
1b. Sanding down until I can no longer see the white spot and recoating with a few layers CA, and clean up with skew and sanding down to 400 grit again. This seems to make the issue actually worse.
2. Using less Activator spray.
3. Slowing the lathe speed down to ~600 for sanding and CA application. This seems to help distribute glue more evenly but nothing more.
4. Increasing the ratio of Thin:Thick layers (went from 1:8 to 2:6). Didn't notice a difference here.
5. Using a small poly bag to spread the wax instead of blue shop towels. This makes each layer thicker (Less absorbent), but still didn't help.
6. Taking longer times in between each layer (~3 minutes). Can't tell if this helped or not.

So far nothing gives... It almost seems to be happening more frequently with each pen - I have altogether thrown away some blanks cause I wasn't able to fix after 3 rounds of CA application.

I thought this may be from over sanding (I tend to get aggressive to get the circular scratches out in the last steps), but I have been careful not to do that and am still seeing this issue. Not sure where to go from here and hoping someone can provide a tip or insight to try!

Thank you so much ahead of time and sorry if this has been discussed before - some of the ideas I tried came from reading other posts about this. Let me know if I've missed something! Hope to contribute more to these forums in the future.

15F7F78D-4F80-49AB-A269-41B1AF0A4976.jpeg
0B0FF9A7-4998-460A-BC08-1491FEEA7F67.jpeg
6AFE7FB6-7C09-4647-8390-212D39EAC9F7.jpeg
1084C242-89A2-4B7D-8A62-EB7E0DC5E655.jpeg
442546E1-5E27-443E-8BD2-3A9FBB23AAEE.jpeg
 
Signed-In Members Don't See This Ad

tomas

Member
Joined
Jul 12, 2010
Messages
482
Location
Rio Rancho, NM
Welcome Ilyssa. Be aware that everyone has their own method of applying CA. After turning my blank, I sand at high speed through all levels of Abranet, I stop the lathe and wipe it with a liberal amount of DNA. I set the lathe a slow speed for applying the CA. I use only medium applies with a Brawny paper towel and 2 spritzes of accelerator between the 12 - 15 coats I apply. I then wet sand at high speed through all the colors of MicroMesh. Good luck and show us how you do.
 

Dieseldoc

Member
Joined
Oct 28, 2017
Messages
1,509
Location
Livermore, Ca 94550
Clouding most likely caused from moister.
Suggestion is to after squaring up blanks plug tube and put CA around the end of blank and tube, that will help seal up tube to blank. Some turners will just wet paper towel. With CA and dab it on the end to get same results.
 

KenB259

Member
Joined
Dec 24, 2017
Messages
3,537
Location
Michigan
If the wood you are using has a higher oil content like Purple Heart, cocobolo, ebony,etc, make sure you clean the blank off thoroughly with acetone, of course you can't do that with a segmented blank, before you apply a ca finish. Also, I know I'm in the minority here when it comes to those delrin finishing bushings, but they cause me more grief than anything else. I dont use them anymore.


Sent from my iPad using Penturners.org mobile app
 

leehljp

Member Liaison
Joined
Feb 6, 2005
Messages
9,314
Location
Tunica, Mississippi,
That is what you call "sand through". You are sanding through the CA back down to the wood. I can't tell you the number of times this has happened and it seems impossible to the pen maker, considering how many coats they put on. I am guessing you are using paper towel to apply the CA. You are not getting as much of a build up of CA as you would think.

Several cures for this - the easiest is to buy a set of calipers (Harbor Freight has them on sale for $10 at least every other month. But do not buy the composite material calipers, buy the digital metal ones.)

With calipers, measure your blank after you have turned it and sanded it. Apply the CA and sand it; then measure; you will find that you did not have any build up of CA. You sanded through. The calipers do not lie. But, Main reason for calipers is to measure the center bands, nib end and clip end and turn the pen to those sizes, measuring each end of the turned blank as you progress.

PART 2: I can tell by looking that you probably used a mandrel, and it is possible that your tool might be a bit dull.
The "white spot" is wider on one side and narrower on the other. The blank is not turning precisely round; too much pressure with a slightly dull tool can cause one side to be turned more or sanded more than the other side. Either way, something is not quite round.
 
Last edited:

jttheclockman

Member
Joined
Feb 22, 2005
Messages
19,082
Location
NJ, USA.
I agree with Hank. What you showed us is lack of CA which means too aggressive sanding. You are sanding right down to wood in those areas. The finish part will come with practice. As mentioned if using oily woods then wipe down with acetone before finishing. Let this dry before starting on CA. 3 to 4 coats of thin CA will seal the wood and go right into med CA. I use 4 to 5 coats of med. What ever method you choose to wipe on just make sure you make 1 to 2 passes and that is all. Do not try to level out and get fancy. After that you should never have to drop below 600 to 800 grit paper to sand. Anything lower will sand very quickly through your finish. I suggest this all the time when doing any sanding of a round object such as a pen blank, take a block of wood about 2 to 3" wide and about 6 to 8" long and wrap your sandpaper around it making sure not to overlap it. May have to cut to size. Now use this to sand the blank. What this does is will sand all high spots first and level off the blank. When the blank looks dull all around stop you are done. When you sand with your fingers, they form to every nook and crevice and cause you to sand in certain areas more than you should. Try it you will be surprised. Good luck. By the way not my choice of CA. Too many problems show up here with that CA.
 

wouldentu2?

Member
Joined
Jan 27, 2011
Messages
897
Location
Oak Creek WI
You are sanding thru the CA because you put the CA coats on to heavily.

To get better results don't put the CA on too thick. 1 drop per coat. 2 if it's a long blank.


After 5 coats of CA wet sand lightly to smooth the high spots with 1000 equivalent sandpaper. Dry with rag.

If you need a skew to even the surface it is being applied too heavily.

Apply the next CA coat. At this point you should be thinking " Hey, this is almost perfect. Do 4 more coats. Wet sand to finest grit you have and polish.

Remember this , no where on a spray paint can does it say spray till it sags or runs.

This should help.
 

studioseven

Member
Joined
May 6, 2014
Messages
793
Location
Wisconsin
Ditto, you have sanded through the CA. I know some have been able to apply fresh coats to the bare spots but I've always had to sand the whole blank down and start over. You're not alone in this. Many of us have done the same thing. I do recommend a product called glu boost. I think it is a little easier to obtain a nice CA finish with it. While pricier, it doesn't take as many coats. You tube has videos you could watch. many of our vendors do sell it. Good Luck

Seven
 

Dehn0045

Member
Joined
Mar 19, 2017
Messages
1,533
Location
US
+1 for calipers. Use the calipers to estimate how thick your CA is prior to sanding/polishing. It's natural to try to compare methods by comparing the number of coats, but with all of the factors involved the number of coats is not a very valuable metric. I shoot for total added blank diameter of 0.005 and 0.010 - so CA thickness is 0.0025 to 0.005 (this is after sanding/polishing. Taking frequent measurements will give you an idea how much CA you're removing with different steps of your finishing process.

Another thing that I don't think has been mentioned yet is different types/brands of CA have different hardness. I use only Bob Smith Thin, it is quite hard. Medium CA tends to be softer and Flex CA is softer yet, naturally the softer CA will respond faster to sanding. I tried Flex for a while and hated it because I kept sanding through, rather than adapt my method I went back to BSI thin and my problems were solved.
 

leehljp

Member Liaison
Joined
Feb 6, 2005
Messages
9,314
Location
Tunica, Mississippi,
Not mentioned yet but possibly helpful: Since you are not getting much CA buildup, try using a smooth foam applicator, or a piece of flexible nylon/margarine tub top cut to squares. A 2" by 2" (or 1 1/2" square) and apply the CA on it and let it rub the CA in lightly as the blank turns. In this case, 75 to 90% of the CA will go onto the blank instead of into the paper towel - for a Faster and thicker build up.
 

Bob in SF

Member
Joined
Feb 15, 2016
Messages
1,762
Location
San Francisco
Good advice above!

These tiny foam brushes work well for me - nice for touch ups - and nice for color appication (acrylics, inks, pastels, dyes, etc) - and I occasionally reuse them after an acetone soak:
1593873936038.png
 

EdM

Member
Joined
Dec 24, 2018
Messages
130
Location
Boynton Beach, Fl.
I would immediately change from StickFast to GluBoost.
Much better finish with less product, and it rarely clouds up...
When you sand after applying your CA, it's only to improve the CA finish by smoothing it, and needs to be done gingerly with multiple grades of sandpaper or micromesh. As a new turner, don't shortcut this function by skipping grades, and always sand manually in line with the blank between sanding steps with the lathe on.

Keep it up, and you'll get results like a pro soon !
Have fun !
 

magpens

Member
Joined
Feb 2, 2011
Messages
15,913
Location
Canada
Hi Ilyssa,

It seems to me that if one were to total up the number of CA techniques that we have heard about over the years, they would come to a number roughly equal to the number of members on IAP. ... LOL ! 😀

Examining the pictures that you have presented in this thread, it does indeed seem that you are showing CA finish coatings which have been sanded through to the underlying wood. . Well .... perhaps not quite right through but nearly so. . I have the feeling, that as one sands the CA almost down to the wood, the layer of CA becomes extremely thin, of course, but its adherence to the wood gives way and what you are seeing is an extremely thin layer of CA. . I could be wrong, but it doesn't really matter that much ... it is too thin to be effective. . The extremely thin layer could possibly be induced to "flake off" by scraping over it with a sharp Exacto blade held perpendicular to it. . In fact, I have done just that just to convince myself that it is still a layer. . It SHOULD be taken off where it is that thin, but you don't necessarily have to take off all the CA .... where it does not appear that thin, you can get away with leaving it as long as it does not appear "milky".

So .... what I try to do, using Very Thin CA on a SLIGHTLY OVERSIZED (by about 0.002" on the diameter) wood blank, is apply about 3 coats in a way that encourages the CA to soak into the wood (or at least get into any tiny grain crevices), and then lightly sand the CA down ... almost to correct size. . I repeat that preliminary process again, after which the blank could even be a very little undersize. . I sometimes repeat this process yet a third time. . It does not really matter if these early CA-and-sanding operations take you right down to wood (in fewer and fewer places as your work up these layers).

My theory is that, by this time, there is sufficient CA incorporated into the surface fibers of the pen blank that this CA bonds to and supports further applications of Very Thin CA. . CA does not seem to bond all that well to the nice woods we use for pens.

I then add further layers of Very Thin, then Thin, and perhaps Medium CA ... two to three layers at a time.

After each two or three layers I then sand LIGHTLY, but only to take off the high spots and ridges (of which there are always some).
Examine the surface as you do these layers and sandings and use your judgement as to how much sanding to do to take off just the high spots, and allowing the low spots to gradually build up to meet the highs.

Eventually, you build up CA to a thickness which is "acceptable", by alternately applying 2-3 layers and sanding lightly.

After you get 12 or so of these further layers (it does not take all that long ... maybe 15-20 minutes), you can then start sanding a LITTLE more aggressively but still carefully in order to get a smooth surface.

When you get a smooth surface that you "like", you can add one further CA application, sand to smooth, and polish.

As I said, everybody develops an individual process, but this method has worked quite consistently for me.

When it comes right down to it, it does not matter if your final finished layer is a tiny bit proud of the pen kit hardware (maybe about 0.002"-0.005") .... that's my opinion, of course. . But the finished surface must not be below the kit hardware to any extent.

..... just my method ..... seems to be working for me these past few years after several years (about 10) of working with CA.

I hope you will persevere .... don't give up .... (I know the temptation !) .... and I hope you will keep us informed of your progress.

One other thing about my process .... I use blue paper shop towels to apply the CA. . For the first two or three applications, I put the CA on the blue paper. . But then, I start drizzling/applying the CA in small drops directly to the top surface of the blank (turning VERY slowly on the lathe), and at the same time have the blue towel (double thickness) under the blank and in contact with the bottom.
During each cautious application of CA in this way, I move the blue towel "pad" quite rapidly back and forth, end to end. . You don't do this oscillatory motion for very long because you want to avoid the CA going sticky. . It takes some trial and error to get the timing right for your particular situation (including "your" particular brand of CA ).

One more peculiarity of my method ... I have said that the blue shop towel is in the form of a double-layer pad (about 3/4" wide and 2" long ... whatever size suits your hand and motion). . Being double-layer, it is folded over. . Between the layers of blue paper (in the fold-over) I put TWO layers of cellotape , one on each side of the fold-over). . The purpose of this tape is prevent the CA from soaking completely through and sticking to my finger (some of that is inevitable, however, so you need to keep on hand a release agent for occasional use). . The cellotape layers also tend to increase the amount of CA that actually gets applied to your blank, rather than being largely wasted by soaking through the blue shop towel (and remaining there), or/ and onto your fingers.

As others have said, develop a sanding technique that includes all grades of paper (actually, I only use sandPAPER, not other abrasives, but the choice is yours).
 

sorcerertd

Member
Joined
Sep 30, 2019
Messages
2,655
Location
North Carolina, USA
It does look like sand through to me also. I've seen it too many times on my own work. I've even had to just take all the finish off and start over to get it to look right after that, which is a pain in the but, but certainly a learning experience.

As for CA application, I typically use the little ziplock bags that the pen parts came in. I will say, though, that the best applicator I have found (for me anyway) is closed cell foam used in packaging (see pic). The CA doesn't stick to it as easily and I can just wipe it on a shop towel after an application and use it multiple times. When it gets a little crusty, I can cut a little off the end with a pair of scissors and I have a new surface again. Something about 1/8" thick works perfectly, but whatever is on hand does the job.

ccfoam.jpg
 

egnald

Member
Joined
Jun 9, 2017
Messages
3,061
Location
Columbus, Nebraska, USA
Greetings from Nebraska. The first couple of pictures looks like sand through to me too; however, I have had issues that are more reminiscent of the picture of the blank in your fingers. I used to have occasional problems with adhesion of the CA on the very ends of some blanks where poor adhesion between the CA and the wood caused almost a fingernail type appearance on the ends. Perhaps your situation is from both sand through and maybe an adhesion problem on the ends.

The fix for sand through is obvious and has been expounded upon by the other contributors. I adapted my regimen to solve my adhesion problem, but I don't think I can point to any specific step that made it go away for me. Sorry for being so verbose, but anyhow, here are the steps I take:

- Sand the bare wood using successive grits. I usually start at 400 and go to 600, and 800. First with the lathe on at low speed then across the length of the blank turning it by hand for each grit. (I don't sand very long, nor do I apply significant pressure).
- Use compressed air (computer duster) to blow out any sanding dust from open pores in the grain (lathe off).

- Replace the standard turning bushings with non-stick (HDPE) cone shaped bushings.
- Wipe with Denatured Alcohol starting with the lathe off, then wipe with the lathe on paying special attention to cleaning and removing any surface oils on the ends. I give the blank 3 or 4 minutes to let the alcohol evaporate completely.

- I apply 4-5 coats of thin using a new paper towel applicator pad for each. Glue on the paper towel, no more than 2 wipes back and forth, lathe on 500 RPM. Make sure the wipes go off the blank and onto the non-stick bushings. I use my 90 second hourglass to give each coat a minute and a half to dry.
- I apply 8-12 coats of medium again using a new paper towel applicator for each. Glue on the paper towel, no more than 2 wipes, etc. etc. however I give it one short burst of aerosol accelerator with the can held no closer than 1 foot, then on to the next coat. I only apply light - thin coats and I'm sure that more CA goes into the trash than on the blank.

- Typically this produces a small bump / buildup of CA on the ends of the blank that I very carefully remove by very lightly sanding the ends. I place a piece of 400 grit on my bench and make very light figure 8 motions to remove any build up. If there is poor adhesion between the CA and the blank this is the step where it might be aggravated if the CA is pulled away from the blank by sanding the end.
- Then for good measure I put a few drops of thin CA on a paper towel pad on the bench and dab (dab and twist) to seal up any end grains that were exposed from my buildup removal. I think this step has helped me more than anything. First it helps seal down the CA finish at the very edge of the blank as well as seal the end of the wood to prevent water from micromesh from being absorbed by the wood on the ends. Moisture infiltration would potentially swell the wood, raise the wood grain fibers, and aggravate an adhesion problem between the CA and the wood.

- I put the blank back on my lathe using the standard turning bushings for micromesh. I wet sand with a couple drops of dish detergent in the water. I use light pressure, semi-swirling motion, on each side of the blank (center to end) for about 10 seconds with the lathe on at about 500-800 RPM. Then sand the length with the lathe off, essentially one pass on the entire surface as I turn the spindle by hand. Remove the excess water and junk with a paper towel. Then repeat through all of the grits. (Sanding with the turning bushings helps prevent me from sanding to aggressively and rounding the edges thus helping helps prevent sand through. I think it also helps block off the ends to further prevent the possibility of water absorption into the ends from the wet sanding).

Hopefully you can try some of the things that have been mentioned by everyone to adjust your regimen to something that works consistently for you.

Regards,
Dave (egnald)
 
Last edited:

EdM

Member
Joined
Dec 24, 2018
Messages
130
Location
Boynton Beach, Fl.
Thoughts on GluBoost by Mark Dreyer, an impressive 20 yr (?) veteran of this site and penturning...
Following Mark's process with get you impressive results !
His YouTube videos are very helpful for beginners as well !


vavavallay

Member
Joined
Jun 21, 2020
Messages
8
Location
Norcal
Everyone - thank you all so much for your tailored help! The tips were helpful and assuring - I have poured over the replies many times and am still processing all the collective tips and trying things out as I go... I was hoping to have some groundbreaking results, but so far - GluBoost has really stolen the stage. Still experimenting, looking forward to finding other finishes to add to the list!
-I
 

erichardson

Member
Joined
Dec 13, 2015
Messages
200
Location
Moundsville, WV
Try using Gluboost. It's CA but it is designed for musical instruments. I started using it a little over a year ago and I apply 3-4 coats and done. Wet sand with 1k then all 6 Zona paper levels, polish, buff and assemble.
 
Top Bottom