Best practices for transparent ribbon blanks.?

Signed-In Members Don't See This Ad

duderubble

Member
Joined
May 9, 2020
Messages
133
Location
Missouri
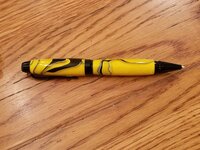
I wasted two blanks I was looking forward to. I reverse painted and painted the tube, even drilled extra wide but any little flaw in the reverse painting is glaringly obvious and it's nearly impossible to get the tube in without marring the paint. I've got another blank of the same style I'd like to be able to use. Translucent is fine but transparent is tough.
 
Signed-In Members Don't See This Ad

TonyL

Member
Joined
Mar 9, 2014
Messages
8,915
Location
Georgia
i have "successfully" polished the inside; it was not much fun. However, I had unintentionally expanded the inside diameter of the barrel, and the tube fit too loosely. I gave up.
 

mick

Member
Joined
Mar 13, 2005
Messages
2,608
Location
Decatur AL, USA
Most drill sizes listed for certain kits aren't always written in stone.
One example is the slimline. They call for a 7mm bit but if it's an acrylic blank you can use a 9/32" bit. This gives you plenty of room for a coat or two.
How sharp your drill bits are can be another factor. Sharp bits and clearing often makes for a much smoother hole. A rough hole also makes it hard to get a good consistent coat plus this is where the worst scratching up of the paint comes from.
If you're using a blank that you know won't leave much meat on the tube you're almost guaranteed the tubes will show. Sometimes even if the blank is painted. This is where it gets interesting. You'll need to pick a paint as close to the color of the blank. You'll need to paint the hole, which you've smoothed up as best as possible. Then you'll have to paint the tube itself.... and mix the color in your glue.
Lots if work but you've made a phenomenal pen! 1
This is a very transparent blank from EB called Lucitylic. Tangerine color. These aren't the best pictures but I think you can see the difference in the blank, the unturned half and the one turned. The best part I didn't change the color any, which was what I was after.
b02848088af2fe43c7e3b115df5425ba.jpg


Sent from my SM-G955U using Tapatalk
 

jjjaworski

Member
Joined
Feb 22, 2012
Messages
914
Location
Las Cruces, NM
After struggling with these kind of blanks and using the process Mick has outlined, I have gone to using a reamer to make the final pass that removes about .015 of material. I run the reamer at a slow sped and lubricate with soapy water. The results are a very smooth hole in the blank which is key to the process.

It can be frustrating sometimes but the results are well worth it in the end.

Don't give up.
 

mark james

IAP Collection, Curator
Joined
Sep 6, 2012
Messages
12,750
Location
Medina, Ohio
In addition to the suggestions noted above, I have also tinted 2 part epoxy with a drop of matching paint. Just a small drop is usually sufficient for the epoxy to match the paint (I also over drill the blank slightly, paint the tube, paint the inside of the hole). I have not noticed any less adhesion due to the drop of paint. I mix my epoxy on a 2" x2" cereal box cardboard, then let the toothpick sit in the leftover epoxy - I can evaluate when the epoxy is set (usually overnight) by testing the adhesion of the toothpick.

Good luck!
 
Top Bottom