Jerald,
I understand your penchant for not liking the looks of them. With experience of different kinds of wood, you will probably drift to certain kinds or types and leave others off of your inventory. There are a few woods that I don't like the looks of because they look bland to me but there are those that love that very characteristic of it.
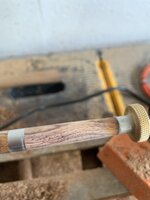
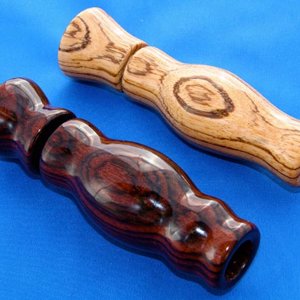
As to cocobolo, not all cocobolo has those dark capillary spots on them, so if you get a chance to inspect some blanks at a store, look for some blanks without them.
Below is a cocobolo duck call that I made some years ago that does not have the capillary tubes in them:
Imported Photo from leehljp. Please edit title and description.
www.penturners.org
Imported Photo from leehljp. Please edit title and description.
www.penturners.org
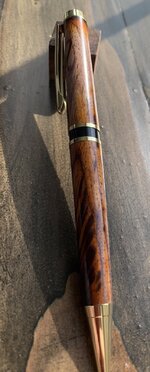
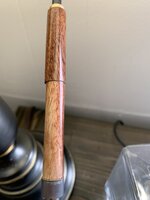
As to your finish: You are progressing fine. The finished pen does have a very fine sanding finish on it, almost like it is polished. If one cannot see sanding marks, then that is excellent. That is the good part. Critiquing some - on the upper barrel, the finish was sanded through to the wood. I don't know your finishing techniques or more specifically how many coats of CA or other that you put on. It is common early on to "sand through" the finish, thereby leaving dull spots on it. With experience you may learn to "build up" a thicker layer of finish. Some people like that, some don't. That is a personal choice. I personally like it myself.
Mark Dryer has a great set of "10 Minute" Videos that help with different aspects of finishing.
IN that link, he is demonstrating the adding of a finish to an acrylic blank that does not shine much.
The application of that method can and will work with wood pens also. Several people use that method and it works well for them. I don't use that method personally, because I learned a different method early on. But the point is, I am not saying mine is the best. Mark took the time to make some great videos and they work!
I add layers of CA / Glue boost by turning the blank on slow speed on the lathe and wiping a layer onto the turning blank with a pouch that small pen parts come in. I put my finger in the small pouch, add a couple of drops onto the plastic pouch and gently rubbed it across the turning blank.
Which every way works best for you is what you should use. But the point is to build up layers or enough thickness so that you do not sand through to the wood. And then you can polish the fine outer coatings of CA or other finish that you use.