Thanks
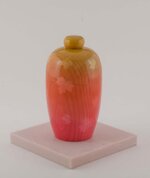
The steps to turning one of these (more detail that many will need, it's not as complicated as the number of steps suggests);
1) Start with square stock, say 3"x3"x7", choose one end to be the top, and cut a 1" slice off the top. Mark it's orientation relative to the rest of the piece. Have some scrap wood to make a jamb chuck with later.
2) Turn the remaining 6" piece between centers, just turn a tenon at either end, keeping the middle square. Draw a line 1 1/2" down from the upper shoulder. The goal is to have the lid 1/2" the height of the base.
3) Go to bandsaw and cut a curve centered on that line. Keep the curve +/- 1/4" of that line. Don't worry about symmetry, you only want the lid to fit one way so the grain lines up.
4) Put bottom piece in a chuck, and bring up tailstock to hold the top in place. The curves will lock the top in place. Turn the whole thing to a cylinder.
5) Remove the top, and using the largest Forstner bit you have that will leave you a 1/4" wall thickness, drill a hole that stops around 1/4" to 3/8" below the lowest point on the curve of the bottom piece. Once you start this drilling operation, do not remove or insert the Forstner bit with the lathe running, it will give you joinery problems later if you do. If you need to remove to measure, turn lathe off, slide tailstock out, measure, insert bit in hole, almost bottomed and turn lathe back on.
6) Using a smaller Forstner that is about 1/2 smaller then the intended base diameter of the box, drill close to final depth. Whether you want a flat bottom or a round bottom influences how deep to drill.
7) Swap out the bottom for the top in the chuck, and drill a matching mortice in the lid, this time, just go 1/8" to 1/4" past the deepest part of the curve.
8) Hollow out the lid a bit for weight reduction, keeping in mind a planned final outer form. Do any sanding on the inside of the lid now.
9) Clean up any saw marks on the curve with sandpaper by hand. Be careful as the joint can have odd angles, and you don't want to ruin the final tight joint.
10) Remove chuck and turn the remaining 1" piece between centers to be a nice snug, but not super tight fit for both the top and bottom.
11) Keeping grain orientation in mind, glue the insert into the base, making sure that you get really good glue coverage on that part below the curve. That 1/4" to 3/8" will be your principle glue joint.
12) Once glue cured, back to the Forstner bit and drill a hole that gives a 1/4" wall thickness on the insert until you hit the old small hole.
13) Put lid on and adjust the height of the insert to let the two curves mesh.
14) Bring up the tailstock, and work on turning the joint area until you have 1/8" shoulder from the outside to the insert. Then form the outer profile of the box. Get as much of the lid done with the tailstock in place as possible. Sand as much as possible, especially in the joint area. If the joint is not as clean as you want, you could use a veiner and follow the joint making a very shallow V to hide the defect.
15) Use painters tape in the joint area to ensure that the top stays on, then finish the top with light cuts. Do any external sanding on the lid now. Remove lid and set aside.
16) Now focus on hollowing out the base. Get the wall thickness of the insert to 1/8" which will give you around 1/4" of wood in the joint area. Try to get the rest of the wall consistent, just under 1/4". Use scrapers or whatever hollowing tool you prefer. Do any internal sanding now. Remove the base from the chuck.
17) Make a jamb chuck with the scrap wood that the insert will just barely fit over. You could be brave and try the first Forstner bit, and hold on the outside of the insert, but there is so little wood above the curve you are asking for trouble.
18) Clean up the bottom with the tailstock in place as long as possible before removing it to clean up the last little bit with light cuts.
19) Remove the bottom from the jamb chuck, slide the lid on and admire the result! You can loosen the fit of the top now by hand sanding the inside of the mortice in the lid.
20) Apply finish of choice.


