HamTurns
Member
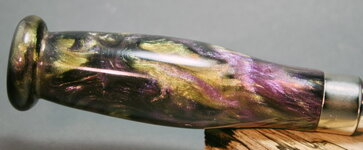
I cast this handle yesterday morning, then turned the handle last night and this morning I found it Cracked. Has anyone had this happen to them using Alumilite?
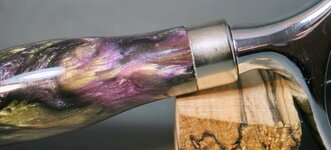
I glued the pizza cutter & ferrule with 2 part, 15 minute epoxy that I'd colored with Alumilite purple powder. Both the pizza cutter and ferrule went together by hand, with no pounding, I was able to insert both and give them a twist to smear the glue. I'd cut two glue grooves for the ferrule, and drilled about 1/4" deeper then needed for the pizza cutter so glue would have a home.
I took the picture of the non-cracked handle last night while the glue was still drying, I took the cracked handle picture this morning.
- Has anyone had this happen to them using Alumilite clear?
- Got any guesses as to why this happened (and how to avoid it)?
- Do you have any suggestions of how to fix it, or do I need to start over?
Thanks for any help with this.
Tom
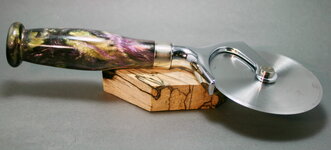

 Now what?