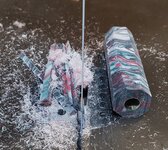
Acrylic blanks shattering when turning

Signed-In Members Don't See This Ad
Joined
Nov 28, 2020
Messages
45
Location
Knoxville, TN
I've sharpened my tools before going at the blank but since it is square it catches and chips often. Then as it turns down I get comfortavle but there are still slightly flat sides and catching on them are detrimental. Normally they completely blast apart if that happens. Any suggestions on how to turn square acrylic blanks? Possibly other tools than HSS chisels? I'd really love to get proficient with acrylic.
 
Signed-In Members Don't See This Ad

magpens

Member
Joined
Feb 2, 2011
Messages
15,912
Location
Canada
To get started with turning a square blank to round, it helps to partially round the square corners on a belt or disc sander.

This helps in the initial phase but may not be the cure-all for your problem. . Other pen turners will probably comment also.

You need to take very light cuts throughout the process of rounding and turning acrylic blanks.
 
Joined
Nov 28, 2020
Messages
45
Location
Knoxville, TN
To get started with turning a square blank to round, it helps to partially round the square corners on a belt or disc sander.

This helps in the initial phase but may not be the cure-all for your problem. . Other pen turners will probably comment also.

You need to take very light cuts throughout the process of rounding and turning acrylic blanks.
What grit would you suggest for the sand paper?
 

MRDucks2

Member
Joined
Jul 17, 2017
Messages
3,227
Location
Bristow, IN
Acrylic blanks are few and far between so I expect you are referring to Inlace Acrylester or the like by the way you speak of your experience. These are some of the more brittle PR blanks and the tend to be "chippy". If the blanks are blasting apart you should take care of three things first:
- sharpen your tools
-use a shearing cut not a peeling or scraping cut
-slow down

After those 3 try riding the bevel of your tool more and taking lighter cuts until you get a feel for it. You may still get a few chips as you round them but they will clear up as you get round. You can turn them fine with HSS tools.

You can also use carbide approaching with more of a shear cut or use one the negative take carbide cutters.
 
Joined
Nov 28, 2020
Messages
45
Location
Knoxville, TN
Acrylic blanks are few and far between so I expect you are referring to Inlace Acrylester or the like by the way you speak of your experience. These are some of the more brittle PR blanks and the tend to be "chippy". If the blanks are blasting apart you should take care of three things first:
- sharpen your tools
-use a shearing cut not a peeling or scraping cut
-slow down

After those 3 try riding the bevel of your tool more and taking lighter cuts until you get a feel for it. You may still get a few chips as you round them but they will clear up as you get round. You can turn them fine with HSS tools.

You can also use carbide approaching with more of a shear cut or use one the negative take carbide cutters.
I think youre right acrylester sounds like it. I got them from PSI in a bundle.

I'll slow down the lathe. I sharpen the tools before each project and sometimes during them. As for shearing cuts, I'll have to look that up. I was unaware of that type. I always laid the chisel flat.

Thank you for the helpful hints and I'll try it out.
 
Joined
Dec 22, 2017
Messages
3,053
Location
Wolf Creek Montana
I'm new to non-wood but the few I've turned have all been with Carbide tools. Are you using Carbide? Also, I've found that using the rounded tools, like 20 degree etc (? could be wrong on the degree), work best. Take your time, not too much pressure, keep it at a 45 degree angle to the blank and hopefully that will solve your problem. I've never "rounded" my blanks although Mals @magpens has some great info. It takes me 2-3 times as long to turn Acrylic blanks vs. wood. It takes me maybe 5-7 minutes to turn a wood blank. I will say though that's there's a lot more turners with experience than me, so heed their word (s). Good luck!
 

duncsuss

Member
Joined
Jun 29, 2012
Messages
2,160
Location
Wilmington, MA
As for shearing cuts, I'll have to look that up. I was unaware of that type. I always laid the chisel flat.

Let's talk about this for a minute.

"Laid the chisel flat" - what do you mean? That the shaft of the tool and the handle are horizontal, rather than angled with respect to the ground?

Because if that's what you are doing, you are using the tool as a scraper, not as a cutter, and you are not using a cut that "rides the bevel".

Turning fundamentals with a gouge (such as a spindle roughing gouge or a bowl gouge): With the handle LOW and held against your side, rest the tool shaft on the tool rest. Slowly lift the end of the handle until the back of the tool starts to touch the spinning blank. Pull the tool backwards and lift the end of the handle slightly to engage the cutting edge, and stop. Slide your body to the left or the right, taking the tool with you, and you'll shave the edge of the workpiece.
 

MCCABER

Member
Joined
Dec 13, 2020
Messages
7
Location
Kitchener, Ontario, Canada
I've sharpened my tools before going at the blank but since it is square it catches and chips often. Then as it turns down I get comfortavle but there are still slightly flat sides and catching on them are detrimental. Normally they completely blast apart if that happens. Any suggestions on how to turn square acrylic blanks? Possibly other tools than HSS chisels? I'd really love to get proficient with acrylic.
I recently started turning acrylic blanks, ran into the same problem. My son gave me a set of small carbide tools from Lee Valley, problem solved, gentle touch no more chipping!!
Cheers Bob McCabe
 

jttheclockman

Member
Joined
Feb 22, 2005
Messages
19,135
Location
NJ, USA.
A couple things. Yes sanding off the ends is one way but way too dusty. You can cut them off using the bandsaw. There are jigs shown in the library for this. Not hard to make. Just basically a 45 degree tilt. Next is do not slow the lathe but slow your presentation of tool to the blank and work from the ends inward. No need to skate across the entire blank ant once. It will turn easier when round so that is when you can go end to end. Any tool will cut HSS or carbide. Needs to be sharp. Also as mentioned do a shearing cut and ride the bevel and not a scraping cut and you will have better success.
 

Martin G

Member
Joined
Jul 19, 2011
Messages
124
Location
Austin, Texas
I had a problem with exploding blanks a number of years ago. I finally figured out it was too cold in my garage. When the temps get low that stuff gets fragile. I used heat lamps near the lathe and kept the blanks in the house until I was ready to turn them.
 

mmayo

Member
Joined
Jan 12, 2013
Messages
2,959
Location
Tehachapi, CA
I turn in a shop that can be 40-50 degrees, not cold compared to some shops but chilly. Acrylic acetate and alumilite turns easily with sharp tools. I've learned that just because I've sharpened them it DOES NOT always end up sharp. If not I sharpen until it is right and cuts well.

Negative rake Carbide cutters can make almost anyone good with acrylic.

All above comments are on point and helpful. Take lighter cuts at first and slow down you hand action, be more gentle. I use very fast lathe speeds over 3000 rpm
 

maxwell_smart007

Lead Moderator
Staff member
Joined
Aug 4, 2007
Messages
6,710
Location
middle of nowhere in the great, white North
sharp tool - very sharp, even grind. Ride the bevel at first without cuttingand gently move until it just starts to cut. The edge should just barely be making contact at this point. Take your sweet time. Don't ever push into the blank - and make sure you have even, full glue coverage on the tube.

Plastics need shaving, rather than cutting...we're talking about the lightest cuts you can think of..
 

donwae

Member
Joined
Feb 11, 2007
Messages
74
Location
Gulfport, MS, USA.
Use a negative rake carbide cutter tool. Works very well. Before these things came out I would use a negative rake bottom scraper on acrylic to avoid blow outs.
 

LK&T

Member
Joined
Dec 1, 2020
Messages
139
Location
Sedro Woolley, WA
I wanna says thanks to all the replies here, because I'm dealing with the same issue. Based on responses here, my basic problem is treating the blanks like wood and being too aggressive. I blew up a $17 blank yesterday and about lost it......
 

TonyL

Member
Joined
Mar 9, 2014
Messages
8,915
Location
Georgia
This may have been mentioned above. When I am teaching a new turner, whether with wood or acrylic, I have to break him out of the habit of "stabbing" (presenting the cutting edge to the barrel perpendicularly and on the same plane) the barrel. Wood may just dent, but plastics are likely to shatter. The NRSs overcome this to some degree.; I have several brands. However, when turning the most brittle materials, I use HSS skew and sharpen frequently. I would work on slowly laying the cutting edge of the chisel from above the barrel with the tang/stem resting on the tool rest.
 

LK&T

Member
Joined
Dec 1, 2020
Messages
139
Location
Sedro Woolley, WA
This may have been mentioned above. When I am teaching a new turner, whether with wood or acrylic, I have to break him out of the habit of "stabbing" (presenting the cutting edge to the barrel perpendicularly and on the same plane) the barrel. Wood may just dent, but plastics are likely to shatter. The NRSs overcome this to some degree.; I have several brands. However, when turning the most brittle materials, I use HSS skew and sharpen frequently. I would work on slowly laying the cutting edge of the chisel from above the barrel with the tang/stem resting on the tool rest.
Tony, thanks for the help. One question: if I'm imagining it right, you're doing a scraping cut with the skew. Or am I getting it wrong, and you're using the skew to make a peeling cut? Hard to tell from your description.
 

TonyL

Member
Joined
Mar 9, 2014
Messages
8,915
Location
Georgia
I only use a shearing cut. I didn't specify the cut because you may use a carbide cutter that doesn't allow you a shearing cut. There a many good videos out there especially the one by Allan Batty: Allan Batty

Here's another one that I just searched for and does a good job (IMO) comparing carbide cutter and a skew: Carbide vs Skew

When knocking off corners it is harder to achieve, so (as most have said above): fast rpms, sharp tools, and light cuts until round.
 

LK&T

Member
Joined
Dec 1, 2020
Messages
139
Location
Sedro Woolley, WA
I only use a shearing cut. I didn't specify the cut because you may use a carbide cutter that doesn't allow you a shearing cut. There a many good videos out there especially the one by Allan Batty: Allan Batty

Here's another one that I just searched for and does a good job (IMO) comparing carbide cutter and a skew: Carbide vs Skew

When knocking off corners it is harder to achieve, so (as most have said above): fast rpms, sharp tools, and light cuts until round.
I'm also getting the idea that there's "woodturning sharp", and then there's "resinturning sharp".
 

leehljp

Member Liaison
Joined
Feb 6, 2005
Messages
9,326
Location
Tunica, Mississippi,
Tony: "I have to break him out of the habit of "stabbing" (presenting the cutting edge to the barrel perpendicularly and on the same plane) the barrel."

I am wondering . . . If the fact that a pen is small . . and that seems to say - it can be done in a few minutes or at least an hour - that pushes those new to turning to try and get a pen done before they fully (or even partially) understand the basics? Tony's post above made me think of that.

I am not a person that naturally "practices" things, but after about 3 or 4 pens, I knew I didn't know how to turn right, how to sand right, how to apply CA correctly, how to use the different tools correctly or just how sharp was needed. I cut a two foot long piece of pine 2X4 into pen sized blanks and practiced Drilling, putting tubes in, turning and getting the feel of the tool, and the feel of how it cut, practice sanding (which its different than on flat work that I knew well) and practice with CA application and sanding. I probably spent about 6 or 7 hours practicing the steps that one day.

I did not have a TonyL kind of person to help me, but I sure wish I had. I don't think there was a wood late within 50 miles of me when I started. But it was the practice, practice practice. A pen was not my goal; learning the steps and feel WAS. Even after I had a hundred or so wood blanks under my belt, I started turning a few acrylics. I destroyed a couple of inexpensive ones and then decided to learn to cast. With my cheap cast acrylic (don't remember which kind exactly as the kind was written in Japanese ) and I practiced on 3 or 4 of those to get the feel. That helped immensely.

My 9th grade Typing instructor in 1962 taught us: When you start something new that you don't know how to do, do a step at a time and repeat, repeat, repeat. Sure helped in learning how to turn pens. Kinda like the Karate Kid, Wax on, Wax off. It really helps when you don't have someone like Tony to help. Thanks Tony for what you do!
 

TonyL

Member
Joined
Mar 9, 2014
Messages
8,915
Location
Georgia
I'm also getting the idea that there's "woodturning sharp", and then there's "resinturning sharp".
I will sharpen my tools 3 to 6 + times per barrel when turning acrylic, and once, but no more than twice when turning most woods.
I may also use my carbide insert on handful of wooden barrels (before discarding) that I don't believe are sharp enough for acrylic, resin, etc.
The rule of thumb that I use is not apply any force/pressure beyond the weight of the chisel when turning.

As I state repeatedly, this is just what works for me.
 

LK&T

Member
Joined
Dec 1, 2020
Messages
139
Location
Sedro Woolley, WA
I will sharpen my tools 3 to 6 + times per barrel when turning acrylic, and once, but no more than twice when turning most woods.
I may also use my carbide insert on handful of wooden barrels (before discarding) that I don't believe are sharp enough for acrylic, resin, etc.
The rule of thumb that I use is not apply any force/pressure beyond the weight of the chisel when turning.

As I state repeatedly, this is just what works for me.
I did notice that the roughing gouge ( hereafter known as "The Destroyer Of Resin") needed to be sharpened more than turning wood. Cutting performance dropped off hard after a few minutes. Wood seems to be a more gradual decline. Anyway, I was sharpening as I went along and using my normal standard for a roughing gouge, which is 240 grit. I wonder if honing the RG to around 1000 would be beneficial. I'll give it a try. At least now I have some scrap to practice on......
 

LK&T

Member
Joined
Dec 1, 2020
Messages
139
Location
Sedro Woolley, WA
I am wondering . . . If the fact that a pen is small . . and that seems to say - it can be done in a few minutes or at least an hour - that pushes those new to turning to try and get a pen done before they fully (or even partially) understand the basics? Tony's post above made me think of that.

I am not a person that naturally "practices" things, but after about 3 or 4 pens, I knew I didn't know how to turn right, how to sand right, how to apply CA correctly, how to use the different tools correctly or just how sharp was needed. I cut a two foot long piece of pine 2X4 into pen sized blanks and practiced Drilling, putting tubes in, turning and getting the feel of the tool, and the feel of how it cut, practice sanding (which its different than on flat work that I knew well) and practice with CA application and sanding. I probably spent about 6 or 7 hours practicing the steps that one day.

I did not have a TonyL kind of person to help me, but I sure wish I had. I don't think there was a wood late within 50 miles of me when I started. But it was the practice, practice practice. A pen was not my goal; learning the steps and feel WAS. Even after I had a hundred or so wood blanks under my belt, I started turning a few acrylics. I destroyed a couple of inexpensive ones and then decided to learn to cast. With my cheap cast acrylic (don't remember which kind exactly as the kind was written in Japanese ) and I practiced on 3 or 4 of those to get the feel. That helped immensely.

My 9th grade Typing instructor in 1962 taught us: When you start something new that you don't know how to do, do a step at a time and repeat, repeat, repeat. Sure helped in learning how to turn pens. Kinda like the Karate Kid, Wax on, Wax off. It really helps when you don't have someone like Tony to help. Thanks Tony for what you do!
Mmmmmmm, interesting point. I think someone new to turning might be doing better than I am with resin because they'd be more cautious. I'm not new to turning, but the first to say I'm not exactly a seasoned turner either. In any case. I have made a whole bunch of stuff out of wood and with a couple of exciting exceptions have had good success. And I understand sharp, why it's important, how to get it and know when it's not there. All of that means I chucked up my first resin blanks with a healthy dose of cavalier attitude, and that was a mistake. I blew up my first resin blank, but then successfully turned a couple of really nice looking pens. That success was my next mistake- thinking the first blank was just a fluke. It's pretty clear now that I lack some basic knowledge when turning resins and have to climb that particular learning curve. It really is a different animal than wood.
 

qquake

Member
Joined
Feb 8, 2004
Messages
5,014
Location
Northern California
To get started with turning a square blank to round, it helps to partially round the square corners on a belt or disc sander.

This helps in the initial phase but may not be the cure-all for your problem. . Other pen turners will probably comment also.

You need to take very light cuts throughout the process of rounding and turning acrylic blanks.
I do this with my bandsaw.
 

Attachments

  • 033.jpg
    033.jpg
    651.6 KB · Views: 184

leehljp

Member Liaison
Joined
Feb 6, 2005
Messages
9,326
Location
Tunica, Mississippi,
I do similar to what Jim Lane does above, except I usually use my router table and a 1/4"or 3/8 inch rounder bit, depending on the size of the blank. Bandsaw or router bit in a table are very helpful.

Chad, I am not a professional in this by any means. I grew up on a farm and my dad put me to welding, repairing and overhauling pumps and engines by the time I was 10 or so. Dad couldn't afford new machinery and often bought something broken or worn out and fixed it. Then he says he found out that I could out weld him at 12 - 13 years old. Anyway, I learned to sharpen drill bits by hand, sharpened my fill of hoes and blades at an early age. But it wasn't until about 12 years ago that I learned what "sharp" really was. I thought a fine edge was what a good fine grinding wheel or 400 grit sanding belt could put on it.

I came upon a situation in segments in which the segment's dust would contaminate the adjacent segments, and no cleaning or wiping or eraser would clean it off good enough to suit me. I learned that a mirror edged blade would do it, no sandpaper needed. I spent about an hour sharpening and honing the edge, testing it on my arm to shave hair. It worked. I still run into folks who say it doesn't need to be that sharp, and for most people, maybe it doesn't. But for me, the dividends paid off and still pay off.

JohnT and I are both verbal about our tool of choice, but we both understand that the right sharpness reaps wonders. There are several here who, in many situations and blank types get a better finish (both wood and cast blanks) with a sharp blade than with 600/800 sandpaper.
 
Joined
Nov 28, 2020
Messages
45
Location
Knoxville, TN
Let's talk about this for a minute.

"Laid the chisel flat" - what do you mean? That the shaft of the tool and the handle are horizontal, rather than angled with respect to the ground?

Because if that's what you are doing, you are using the tool as a scraper, not as a cutter, and you are not using a cut that "rides the bevel".

Turning fundamentals with a gouge (such as a spindle roughing gouge or a bowl gouge): With the handle LOW and held against your side, rest the tool shaft on the tool rest. Slowly lift the end of the handle until the back of the tool starts to touch the spinning blank. Pull the tool backwards and lift the end of the handle slightly to engage the cutting edge, and stop. Slide your body to the left or the right, taking the tool with you, and you'll shave the edge of the workpiece.
Thanks for that. I was wondering what it meant but I think what you described helped a lot.

As for laying the chisel flat. I guess I dont know terminology that well either, ha. It's when I lay the chisel on the tool rest and only adjust the angle the handle up and down to get a "rooster tail" coming off the blank.

It seems like my main issue is the flat side of the blank becomes a problem. Since sometimes I don't drill exact center or my drill press is slightly angled I guess. This makes one side rounded but still have a flat area that catches on the chisel. I'm going to use all the advice from this thread such as: don't be as aggressive, pay attention to the angle of chisel, make sure lathe at a high speed, temperature of the blank (might be important), sharpen chisel throughout the project, and consider a negative cut carbide tool.

Thanks so much for everyone's advice and expierence working with these acrylester blanks. I'm new to them. I usually turn wood. So I gotta slow it down a bit!
 

LK&T

Member
Joined
Dec 1, 2020
Messages
139
Location
Sedro Woolley, WA
I do similar to what Jim Lane does above, except I usually use my router table and a 1/4"or 3/8 inch rounder bit, depending on the size of the blank. Bandsaw or router bit in a table are very helpful.

Chad, I am not a professional in this by any means. I grew up on a farm and my dad put me to welding, repairing and overhauling pumps and engines by the time I was 10 or so. Dad couldn't afford new machinery and often bought something broken or worn out and fixed it. Then he says he found out that I could out weld him at 12 - 13 years old. Anyway, I learned to sharpen drill bits by hand, sharpened my fill of hoes and blades at an early age. But it wasn't until about 12 years ago that I learned what "sharp" really was. I thought a fine edge was what a good fine grinding wheel or 400 grit sanding belt could put on it.

I came upon a situation in segments in which the segment's dust would contaminate the adjacent segments, and no cleaning or wiping or eraser would clean it off good enough to suit me. I learned that a mirror edged blade would do it, no sandpaper needed. I spent about an hour sharpening and honing the edge, testing it on my arm to shave hair. It worked. I still run into folks who say it doesn't need to be that sharp, and for most people, maybe it doesn't. But for me, the dividends paid off and still pay off.

JohnT and I are both verbal about our tool of choice, but we both understand that the right sharpness reaps wonders. There are several here who, in many situations and blank types get a better finish (both wood and cast blanks) with a sharp blade than with 600/800 sandpaper.
Almost all of my woodworking (not woodturning) is done with hand tools. You are completely right about sharpness and what it means to surface finish. A plane blade sharpened to 6000 grit and stropped on leather will leave a surface no halfway reasonable sandpaper regime will touch. Many woodworkers believe it beneficial to roughen a planed surface before applying a finish!

After my posts last night I sharpened my roughing gouge, skew and negative rake scraper to a 5 micron finish. Also cranked up the lathe speed another notch. Then I spent a good hour practicing with the remnants and cutoffs of the blanks I blew up. Time well spent, and thank you very much to you and JohnT for all the good advice.

Also, apologies are in order to Kyle for the complete hijack of your thread.
 

leehljp

Member Liaison
Joined
Feb 6, 2005
Messages
9,326
Location
Tunica, Mississippi,
Chad,
I got shown up big time when I lived in Japan (26 years). A Japanese man heard me using the router in my garage (with the door down) and knocked on it. He introduced himself and said he heard my router and knew what I was doing (routing). Although fluent in Japanese, occasionally I ran into a Japanese who was just difficult to understand even if I understood the words. He was on of those. We talked shop, but I didn't fully understand what he did; I showed him some of my tools and some of my work. I asked him what he did and he replied he made woodworking tools. (He was speaking of his hobby at the time, not about his work, but I didn't know that at that time.) He lived about 1/2 mile away and one day he invited me to his home. I went and was absolutely floored. Most beautiful and artistic woodworking inside that I had ever seen. I asked his wife what kind of work he did and she replied: He is an art professor at a University in Osaka.

He took me into his basement and I saw 2 meter long ribbons of wood he had hand planed. They were so thin that I could read a newspaper through it. I was floored and commented how great his skill was, and how sharp his tools were. He said: They aren't sharp enough. I will call you to come over after I have sharpened my hand planes and let you see what a "sharp" plane will do.

About two week later he invited me over. I went, and he began to explain: "You know that humidity changes causes dimensional changes in wood from day to day?" Me: "Yes, very familiar with that."
Him: Well two days ago I planed this board he pointed to - 2 x 8 some kind of fir, about 1 meter long. (then he went into details that were difficult to understand but he got his point across). - with humidity changes, the soft wood between the hard grains swell by a hundredth of a mm more than the hard wood. Do you understand that?"
Me, Yes.
Him, "well I can plane those raised sections off and it will look like strings, when my plane is sharp."

He DID. strings, not ribbons. And that was with Japanese planes that he set by tapping the front and sides with a small hammer to set.

(He became friends wth Sam Maloof in Sam's last few years. )

As to needing to rough wood for finish to stick to: I suppose there may be some paints that won't stick to some woods, but I have had difficulty in thinking along those lines. House paint will stick to a window pane for 40 years, through heat and freezing temps; CA will keep a rear view mirror attached to a windshield for 40 years. Oily wood, woods that expand and contract a lot will cause the paint to loose adhesion, but that is not because of the paint or smoothness, but more or less from the wood expanding and contracting.

I would love to see some of your work, when you have time to post some.
 
Joined
Oct 26, 2020
Messages
39
Location
Michigan
Hmmm. I had that problem at one point as well. Heat is a big factor. If the piece gets to hot it shatters. The Tube to glue bond could also be a factor. You asked about something that wasn't HSS. I turn almost all Acrylics and the most effective way for me has been The Easy Wood Tools Negative rake Carbide Finisher. I have had not a single issue with it so far and I have made like 30 pens with it. You don't have to sharpen it and its very easy to use. it is normal to get little chips while rounding the blank but once perfectly round you should get long strings of it. I would also advise to stay away from Polyresin. Personally I hate the stuff. Super brittle and impossible to turn and it smells awful. I hope this helped. Happy Holidays. Stay Safe everyone.
 
Joined
Nov 28, 2020
Messages
45
Location
Knoxville, TN
Hmmm. I had that problem at one point as well. Heat is a big factor. If the piece gets to hot it shatters. The Tube to glue bond could also be a factor. You asked about something that wasn't HSS. I turn almost all Acrylics and the most effective way for me has been The Easy Wood Tools Negative rake Carbide Finisher. I have had not a single issue with it so far and I have made like 30 pens with it. You don't have to sharpen it and its very easy to use. it is normal to get little chips while rounding the blank but once perfectly round you should get long strings of it. I would also advise to stay away from Polyresin. Personally I hate the stuff. Super brittle and impossible to turn and it smells awful. I hope this helped. Happy Holidays. Stay Safe everyone.
That does help a lot! Thank you! I'm thinking about getting the carbide tool. Where do you get blanks that are more stable? I seem to go on PSI and most blanks are acrylester.
 
Joined
Oct 26, 2020
Messages
39
Location
Michigan
That does help a lot! Thank you! I'm thinking about getting the carbide tool. Where do you get blanks that are more stable? I seem to go on PSI and most blanks are acrylester.
If you are US located i would say Woodcraft is better. They are more expensive but better to a degree. They still behave the same way but they are harder. They will chip if you push to hard on them.
 

qquake

Member
Joined
Feb 8, 2004
Messages
5,014
Location
Northern California
That does help a lot! Thank you! I'm thinking about getting the carbide tool. Where do you get blanks that are more stable? I seem to go on PSI and most blanks are acrylester.
Look for Aquabright, Kirinite, and Lava Bright, to name a few. Stay away from anything inlace and/or acrylester. Rhino aren't as bad as inlace acrylester, but more brittle than others. They're somewhere in the middle.
 

Pen Joe

Member
Joined
Jan 1, 2013
Messages
122
Location
La.
I just got two of the red/white stripes with the blue and white stars to make a few pens, the Red/White I got from Pen State blows up either drilling the hope to put the bushing for when I get them on the lathe, not just a chip I mean just blow up good thing I have the dust collector, newer had this happen on them before, could this be a batch that was overheard, cooled down to fast, that is disgusting, got one peace left and if this one does the same I am done with the stripes and maybe even pen state, I ever center each end to it does not do that, about 3/8" into drilling it breaks, then if you make it past that on the lathe no matter how gentile it blows just that color, the procedure of cutting is right results are wrong, is it the batch.
 

jttheclockman

Member
Joined
Feb 22, 2005
Messages
19,135
Location
NJ, USA.
I just got two of the red/white stripes with the blue and white stars to make a few pens, the Red/White I got from Pen State blows up either drilling the hope to put the bushing for when I get them on the lathe, not just a chip I mean just blow up good thing I have the dust collector, newer had this happen on them before, could this be a batch that was overheard, cooled down to fast, that is disgusting, got one peace left and if this one does the same I am done with the stripes and maybe even pen state, I ever center each end to it does not do that, about 3/8" into drilling it breaks, then if you make it past that on the lathe no matter how gentile it blows just that color, the procedure of cutting is right results are wrong, is it the batch.
There have been reports of those blanks being bad. I would contact vendor.
 
Top Bottom