
mmayo
Member
Other parts of this series: Part 1
Now that I drilled the acrylic blanks it is time to continue.
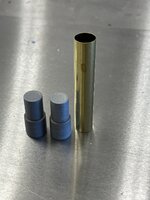
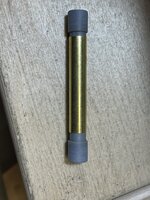
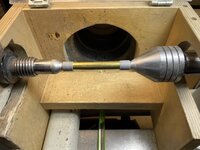
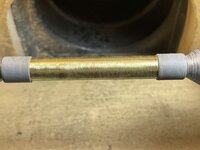
First step is roughing up the tubes. Intelligent people will tell you not to do this BUT I do every time with every pen. The first photo shows a brand new pen tube with two shop made 3D printed sanding bushings. I use these to avoid flaring the tube ends with a live center and dead center. They fit the inside perfectly. Put the bushing/tube/bushing sandwich on the lathe between live and dead centers. The last photo is the tube after 220 grit sanding at 800 rpm's for a few seconds. You can use 80-400, but I like 220 or more coarse.
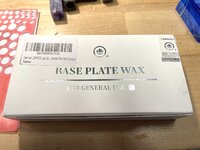
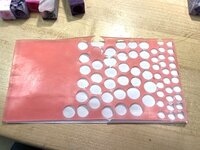
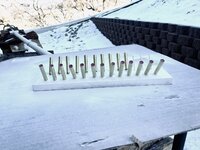
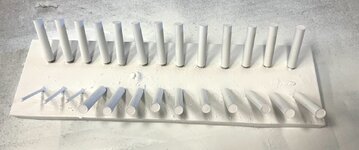
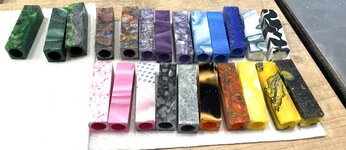
Second step is plugging one end of the tube. I use dental base wax available from EBay. Keep the white paper under the wax as you plug the ends. Last photo of this group shows all the tubes with the top end plugged ready for painting.
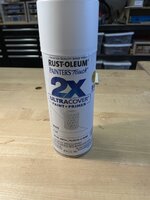
The third part of this phase is painting tube outside of the sanded tubes with spray paint. Visit Home Depot and buy some flat white spray. Shake plenty!!! It snowed here, but I painted outside the shop anyway. Make them fairly covered but don't get drips.
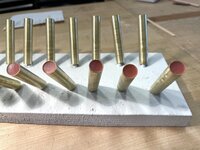
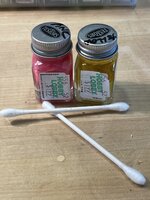
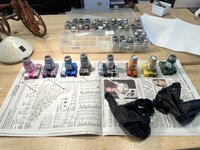
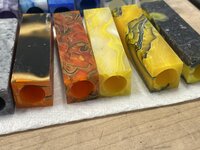
Dust off that Testor's model paint. Get a few q-tips, gloves and paper towels. I try to typically use lighter versions of the blank's color for painting inside the tube. White for everything has proven less successful for me. I select darker colors to darken the blank, even black. Be creative, but remember what worked. I group the blank colors together and start painting the groups using the q-tip. Smooth is best here. Last photo shows the painted blanks.
Now wait overnight. Don't rush the drying time.
Now that I drilled the acrylic blanks it is time to continue.
First step is roughing up the tubes. Intelligent people will tell you not to do this BUT I do every time with every pen. The first photo shows a brand new pen tube with two shop made 3D printed sanding bushings. I use these to avoid flaring the tube ends with a live center and dead center. They fit the inside perfectly. Put the bushing/tube/bushing sandwich on the lathe between live and dead centers. The last photo is the tube after 220 grit sanding at 800 rpm's for a few seconds. You can use 80-400, but I like 220 or more coarse.
Second step is plugging one end of the tube. I use dental base wax available from EBay. Keep the white paper under the wax as you plug the ends. Last photo of this group shows all the tubes with the top end plugged ready for painting.
The third part of this phase is painting tube outside of the sanded tubes with spray paint. Visit Home Depot and buy some flat white spray. Shake plenty!!! It snowed here, but I painted outside the shop anyway. Make them fairly covered but don't get drips.
Dust off that Testor's model paint. Get a few q-tips, gloves and paper towels. I try to typically use lighter versions of the blank's color for painting inside the tube. White for everything has proven less successful for me. I select darker colors to darken the blank, even black. Be creative, but remember what worked. I group the blank colors together and start painting the groups using the q-tip. Smooth is best here. Last photo shows the painted blanks.
Now wait overnight. Don't rush the drying time.
Attachments
-
 A6532F3D-1983-4486-BABC-11CFD28569B1.jpeg283 KB · Views: 386
 -
 8F86BC28-40CB-4D20-AD5B-42E52D0DE81E.jpeg419.6 KB · Views: 384
 -
 85A48E74-5C20-47FF-8191-850FD6D135B7.jpeg285.8 KB · Views: 351
 -
 BDFE176E-5987-4FFA-B49A-8A81DF977DFC.jpeg211 KB · Views: 347
 -
 D70B7DC4-C784-4645-927B-CDE7A2FDBCE4.jpeg236.5 KB · Views: 343
 -
 FB93F629-EF43-4D96-B29B-554019CB3187.jpeg338.2 KB · Views: 339
 -
 47DC8A84-1F37-46BD-AB82-FA5BA504FFFF.jpeg275.1 KB · Views: 360
 -
 C755D3A2-00AD-4DF1-B5F8-338FB39D42E5.jpeg234 KB · Views: 333
 -
 FF701B1B-C2D7-4039-92AC-B5E5B55415A0.jpeg277.9 KB · Views: 377
 -
 1B735E12-7E1F-4800-9054-5DE680B37586.jpeg169.2 KB · Views: 354
 -
 28710279-564F-45A9-A2B5-C0670428D7BF.jpeg316.1 KB · Views: 373
 -
 5073BFED-0BFD-4991-A44D-C90803BEA61A.jpeg451.2 KB · Views: 397
 -
 4207246E-9B7F-4C94-9792-F8E30704C90C.jpeg215.5 KB · Views: 397
 -
 6B5BC44E-D4BA-4CF9-AB9D-CD978F269683.jpeg306.8 KB · Views: 404
Last edited by a moderator: