Darrin,
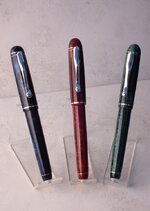
The pens look great! How did the show go?
Could you elaborate on "I created a sleeve for the cap and body then added finials."? I have been trying to figure out how you add the metal rings, I thought you would need a metal lathe but obviously it can be done without one.
The show was amazing. I barely got my table set up when they opened the doors. I constantly had between 1-6 people at my table all day. I was so busy, I didn't have time to eat or take a picture of my table. It was great. I haven't heard any statistics for the show attendance yet, but Phillip says that they raised enough for next years show. I know I will be there, but I think I will have to take someone with me.
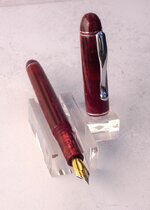
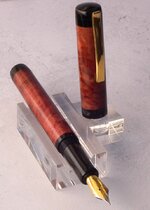
The Red Mallee was the only custom FP I sold. But I do have orders for two.
For the sleeve, i turned a piece of ebonite down to a uniform 16mm, to fit on my collet chuck. Then I turn a long tenon just larger than the threads I would be using. Example, the cap threads are 12x.75, so I turned a tenon13mm dia, and to a length long enough to go through the wood portion. I then parted it off leaving about 5mm of the 16mm dia. attached. This will form the cap ring and cover the end of the wood. Then I drill a 13mm hole through my wood blank and glue in the ebonite. I stated using the ruberized CA for this, it seems to work wonderfully. Once cured, I can drill and tap it as normal, and there will be a thin layer of ebonite inside the wood.
For the metal rings, you don't have to have a metal lathe, but it helps. My first rings were made from aluminum sheet using tin snips and a step drill. Since then, a friend of mine has made me a bunch on his metal lathe, using a generic sized holes.
Once you have the ring, it is pretty easy. Before I drill through the cap or body, I add the ring. To do this, you not only need your aluminum ring, but also a ring made out of your blank material such as the alumilite. My rings for the cap are 13mm ID and 16mm OD and are 1mm thick. The allumilite ring is the same, but about 3mm thick. I turn a tenon on the cap blank to snug fit both rings. I then apply the glue and hold it in place using my tail stock and a piece of delerin. Once its cures, I clean up the end and start the drilling and taping process.
I use the same process for the finials, except that the ID is 10mm. The problem I have run into, is that when I make the finial for the barrel using these aluminium rings, there is not much of the ring material left when I shape the end to make it postable. If my barrel is off center even slightly, I turn right through the alluminum dmkt

.
Part of the problem here, is that all of my mandrels are made using acrylic. There is just to much play in the soft material. As soon as I get my metal lathe, I will be making all brass mandrels. Also, once I start making my own rings, I will be able to adjust the size as needed.
I think the most time consuming thing doing these is turning the tenons. Doing them by hand on the wood lathe, I have to stop and measure 6-8 times to get the diameter consistant and accurate to within +-.05mm. With the metal lathe, you cut it down, measure, then accurately remove the required amount using the dial gauges.
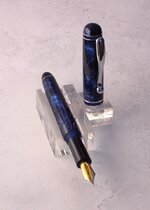
Well its time to hit the shop and start working on those custom orders. There are being done with my allumilite/BLMB blanks. The pearl blue I made was very popular at the show.
Thanks again to everyone here for their support. Before the show I was having doubts about continuing this on a professional level, but now I have a new found confidence.