A few 8-loop Celtic Knots

Signed-In Members Don't See This Ad
See more from Brian G

Brian G

Member
Joined
Jul 2, 2013
Messages
1,567
Location
Bloomington, MN
I've had these done for a while, but I had not taken the time to take photographs. Short summary is that I mill stock to an octagon, cut the kerfs with a 1/16" kerf circular saw blade in a table saw, and fill the kerfs with the "rope" material.

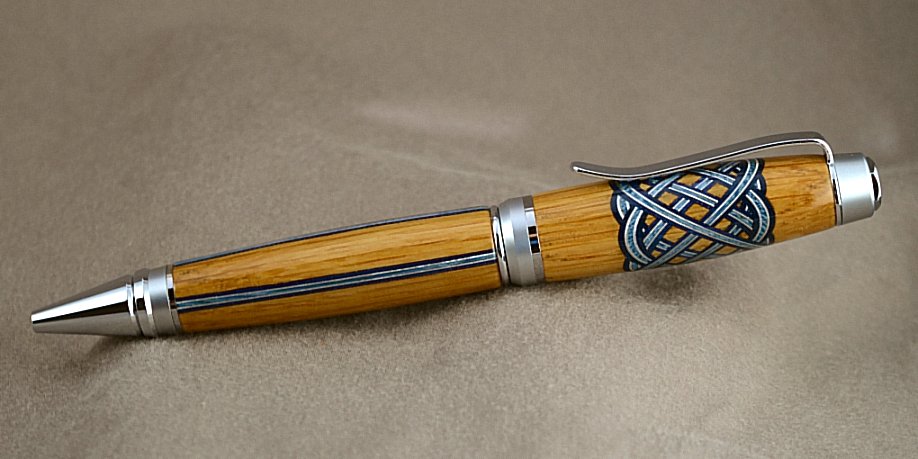
First up is stock white oak. The knot material is aluminum flashing and two shades of blue dyed veneer. The knot angle is approximately 52°. Finish is CA.

attachment.php


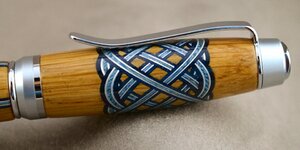
A closer look at the knot. What looks like ghosting near the finial is some kind of shadow or reflection.

attachment.php


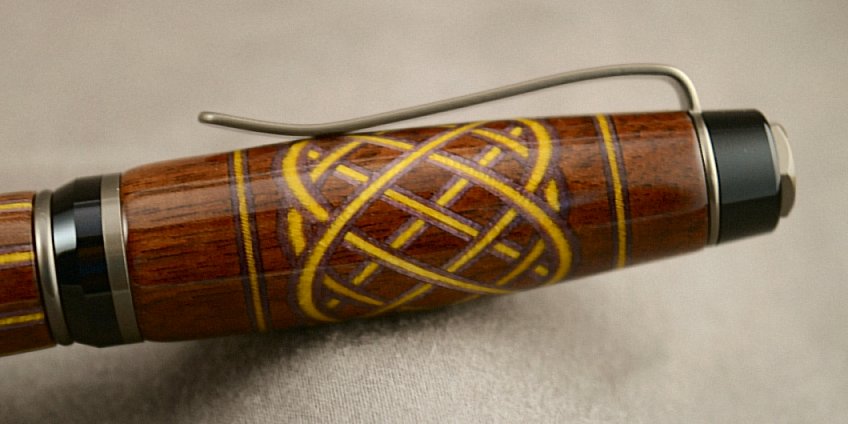
Next is stock black walnut. The knot material is purple and yellow dyed veneer. Knot angle is about 52°. The color contrast isn't as striking as I was hoping to see, but it's probably the most technically "perfect" knot I've made. CA finish.

attachment.php


A closer look at the knot, showing that darn ghosting shadow or reflection.

attachment.php


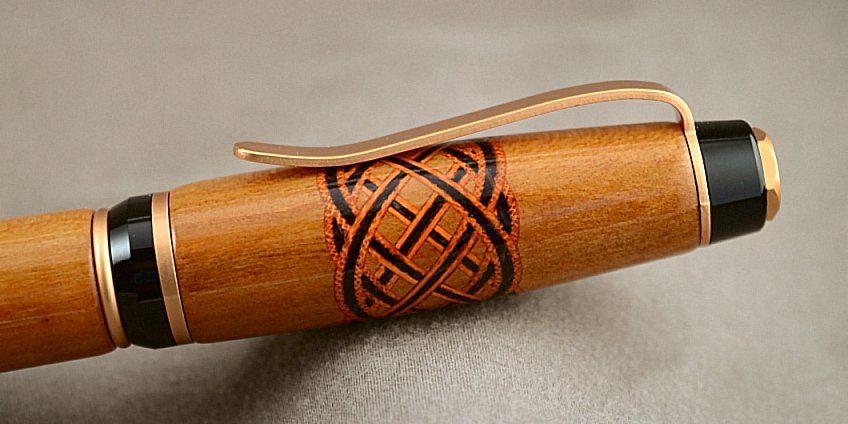
Last is stock cherry. The knot material is black and orange dyed veneer. Knot angle is 45°, which I think is a little too compact.

attachment.php


I like how the orange veneer end grain gives the appearance of a rope.

attachment.php


Feedback welcomed, critiques accepted, and thank you for looking.
 

Attachments

  • 8LCKALOak.jpg
    8LCKALOak.jpg
    71.5 KB · Views: 1,299
  • 8LCKALOakUpper.jpg
    8LCKALOakUpper.jpg
    136.6 KB · Views: 1,214
  • 8LCKVeneerWalnut.jpg
    8LCKVeneerWalnut.jpg
    52.9 KB · Views: 1,220
  • 8LCKVeneerWalUpper.jpg
    8LCKVeneerWalUpper.jpg
    55.2 KB · Views: 1,214
  • 8LCKVeneerCherry.jpg
    8LCKVeneerCherry.jpg
    56.7 KB · Views: 1,199
  • 8LCKVeneerCherryUpper.jpg
    8LCKVeneerCherryUpper.jpg
    63.1 KB · Views: 1,182
Signed-In Members Don't See This Ad

mark james

IAP Collection, Curator
Joined
Sep 6, 2012
Messages
12,720
Location
Medina, Ohio
Your precision is incredible Brian. Each is superb artistry.

I agree that the 52 is possible more visually appealing, but the 45 is still way cool.

There are multiple opportunities for alignment errors with knots this complex, but you have them mastered quite well.

Excellent.
 

jttheclockman

Member
Joined
Feb 22, 2005
Messages
19,082
Location
NJ, USA.
Job well done. I like making the Celtic knot and may have to give these a try. Yours are an inspiration. Thanks for showing.

Is there a sequence that needs to be followed or can you just go in order??
 
Last edited:

magpens

Member
Joined
Feb 2, 2011
Messages
15,913
Location
Canada
Very beautiful work !!! . Seems to me that you scored in a fairly recent BASH contest !!

A question ... same as John just ahead of me ... would you specify the sequence (rotationally) in which you construct your 8-knot Celtics ? . I realize that it may be difficult to verbalize the answer, especially in text. . But if we think of the "top" peak of each one, and if we think of the octagonal "base" construct, then we can identify an angle at which the peaks occur ... 0, 45, 90, 135, 180, 225, 270, 315 degrees ... and then it might be easier to specify the order in which you cut them. . Thanks.
 

Dehn0045

Member
Joined
Mar 19, 2017
Messages
1,533
Location
US
Very nice! The first one is my favorite, the colors pop nice. The others are great too. I would like to see one like this on a capped rollerball or a single barrel. Personally I'm not a huge cigar fan. Regardless, I think you were spot on with your choice of plating.
 

greenacres2

Member
Joined
May 2, 2017
Messages
1,686
Location
Northwest IN
Great pens!! I hope that among your "thoughtful answers" you may take a minute to talk about how you got the octagon shape to start with (no small feat), and also the adhesive used (i'm guessing epoxy??)
Thanks,
earl
 

Brian G

Member
Joined
Jul 2, 2013
Messages
1,567
Location
Bloomington, MN
Hello All,

Thank you again for the feedback and compliments. They do mean a lot!

Here's a helpful website that I stumbled on when I was figuring out the calculations for the dimensions of the octagon: How to calculate the measurements of any geometric shape you can think of, and some you didn't even know existed.

That helped me dial in the length of the sides of the octagon for an approximately 1" square blank about 12" long. I say approximately, because measuring the length of the sides comes down to the ability to consistently use a caliper to just catch the edge. For these pens, the blank measured 0.995" square.

I used a 45° chamfer bit in a router table to mill the octagon from the square blank. It's no different than cutting the corners off of a blank prior to turning, except it's a little more exacting.

It's really a matter of trial and error, minor adjustments to bit height and depth of cut, and being consistent with feed pressure. The goal is to end up with a symmetrical stick that looks like an octagon. Important tip: use some otherwise boring scrap wood to dial in the dimensions of your stock and to get the router bit setting just right.

If you're going to go to the trouble of making octagon sticks, make a whole bunch of different varieties of stock. I've run out, so I have to go through the tedious process of the set up.

As for the order of cuts, I lack the spatial thought capability to visualize how different cutting orders might affect the appearance of the knot. I think the order would make the knot look different, but I don't know how different.

Draw an octagon (I can't draw shapes; many years ago my organic chemistry professor remarked that I was the only student who excelled in making benzene rings look like inebriated amoebas) and label the sides 1 to 8 (clockwise or counterclockwise, doesn't matter). I followed the pattern of cutting on opposite sides. That meant 1 & 5, then 3 & 7, then 2 & 6, and finally 4 & 8.

I also cut the kerf to fit the knot material, rather than trying to match the thickness of the kerf by fussing with the various thicknesses of the layers of knot. It's easier to add a piece of tape or two to the stop block when I cut the kerf. I shoot for a slip dry fit, where I can easily put the knot material in the kerf with no force, and it stays in when I give it a firm shake.

I use thick CA for gluing. I also clamp across the diagonal just to feel a little better until the CA cures. Epoxy takes too long for making the knots, and I don't trust the 5 minute kind for the knot. Definitely use epoxy for gluing the tubes, though.

If you're going to try making one or two. . . mill enough stock to make a few dozen. You will not regret having the extra stock. You might also consider making a handful in a production run. 8 loops is a bit tedious.

Off and on I've contemplated making a few videos of the process. That's still under consideration.

I don't know whether that helps explain, but I'd be happy to elaborate.
 

jttheclockman

Member
Joined
Feb 22, 2005
Messages
19,082
Location
NJ, USA.
Thank you Brian for taking the time to explain the process you followed. It is quite clear. Again the outcome of the ones you shown is well worth the effort and something to be proud of. Thanks again. So I added another winter project. :biggrin::biggrin:
 

ramaroodle

Member
Joined
Feb 15, 2018
Messages
686
Location
Seattle
I am going to try and make my first knot and was checking out various youtube vids for the process and jigs. Then I saw this and had a mini stroke!! Very nice work. Gotta try it. Thanks for the detailed explanation and link.
 
Last edited:
Signed-In Members Don't See This Ad
Top Bottom