
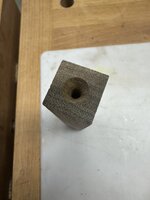
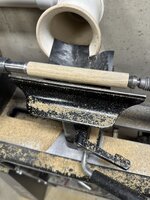
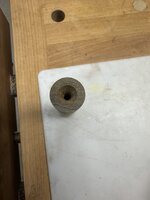
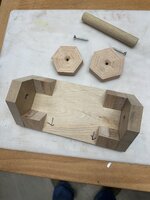
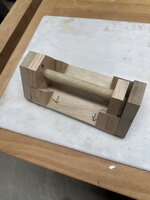
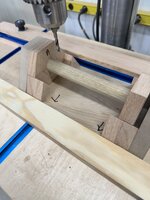
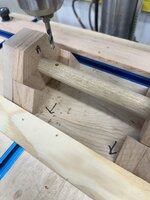
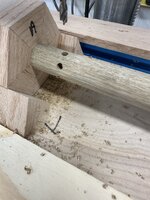
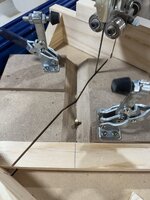
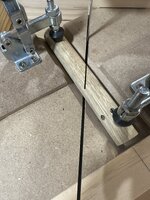
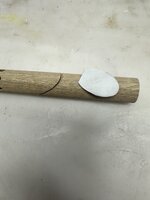
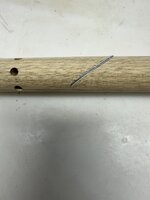
I was asked on Facebook to share my method so I thought I'd share it here too, with better pictures. Ok here's my technique. I start with a square blank. Drill each end to accept a 60° live and dead center. I also drill a .180 hole in each for the size screw I'm using. Next step is to just turn the blank round. From there I screw a hexagon on each end that will drop down into the drill press jig. The hexagon in the end closest to the drilling is tight, the tail end I just snug it, not super tight. Put the drilling jig on the drill press, making sure the drill will hit tight at top dead center. I have best luck drilling each hole half way through instead of three holes all the way through. It's important to use a stubby brad point to drill. From there it drops into the sawing jig where there is a brass pin that the hole fits on. Clamp it down and saw most of the way through. Glue in your infill. When it's set mount back on lathe between centers and just cut down the infill, try not to remove any wood. Do that for all 6 holes. Knot is now complete and you can finish the blank as you wish. I like seperators, same as the infill and end caps. I'm attaching pictures, not sure if they'll be in the correct order. Hope all this helps. I should warn you, the most critical part is the hole in the center of the hexagons, needs to be exactly in the center. If that's not the case you will not have perfect results. Pictures to follow. This method would work for any number of infill but would require a specific drilling jig for each number. I also think those parts could be made by 3-D printing them.
Attachments
-
 IMG_5077.jpeg164.3 KB · Views: 307
 -
 IMG_5078.jpeg392.4 KB · Views: 283
 -
 IMG_5079.jpeg170.2 KB · Views: 273
 -
 IMG_5080.jpeg301.3 KB · Views: 271
 -
 IMG_5081.jpeg272.3 KB · Views: 266
 -
 IMG_5082.jpeg288.9 KB · Views: 266
 -
 IMG_5083.jpeg269.1 KB · Views: 266
 -
 IMG_5084.jpeg429.3 KB · Views: 291
 -
 IMG_5085.jpeg329.4 KB · Views: 294
 -
 IMG_5086.jpeg515.8 KB · Views: 280
 -
 IMG_5087.jpeg213.2 KB · Views: 270
 -
 IMG_5088.jpeg216.6 KB · Views: 281