Adapting the Hinze Tennon Cutter for ballpoint and rollerball pens

Signed-In Members Don't See This Ad

NGLJ

Member
Joined
Sep 15, 2021
Messages
468
Location
Surrey BC, Canada
The Hinze tenon cutter is clearly aimed at making fountain pens, which is fine. However, if you want to make ballpoint (Cross and Parker) and rollerball (Schmidt) you also have to make tenons to be threaded. Like many of us, I grew tired of cut a little, measure, and so on, and when cutting say a 7 mm tenon it doesn't take much to go a little too far! So, I got to thinking about how I could adapt the Hinze tenon cutter to cut 7 mm, 8 mm, 9 mm and 3/8" tenons without drilling a 6 mm hole for the shaft. First of all the kit doesn't come with 7 mm, 8 mm and 3/8" bushings. A quick message to Rick Herrell and that took care of that.

At first I thought in terms of replacing the 6 mm shaft with shafts with 6 mm on one end, enough to fit snugly in the head of the cutter, and 2 or 2.5 mm the rest of the way. Even assuming that this could be done, it is debatable how much extra stability it might bring because of the flexibility of the shaft. Since there is no shaft to help guide the cutter, instead of the using a Jacobs chuck to hold the cutter and advance it using the tailstock handle, I opted for using a tailstock ER32 Tap and Die holder (again from Rick). By locking down the tailstock and quill it minimizes any movement. You are now free to advance the cutter slowly along the shaft of the tap and die holder, at the same time holding on tight to minimize any vibration. This was done at about 800 RPM. I chose this speed because it was the minimum of the top range on my lathe. I didn't try lower speeds, which might help to reduce vibration, and give a cleaner cut.

As always, setup is still important. This was done by drilling a small 6 mm hole in the end of the workpiece, enough to securely locate the 6 mm shaft. This is removed before threading. After that the process is as normal to set the distance to the cutter. I discovered that with the cutter as far in as possible that cutting a 7 mm tenon isn't going to work. It will be oversized. So, I replaced the cutter with a slightly larger cutter. If 7 mm is of no interest, then that isn't necessary. I then discovered that it cut too much undersized, no doubt due to vibration and holding by hand. I compensated by working out how much the cutter needed to be moved, and set it using the bushing and a feeler gauge (7 thou).

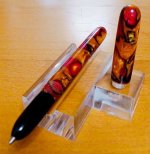
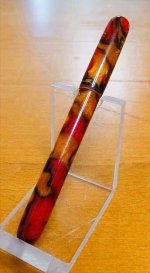
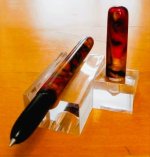
As I went up in sizes the cuts were much closer (no doubt lower percentage error). If the cut was a little oversized I went back over it by angling the cutter in very slightly. There is very little slop in the tap and die holder, but enough to take a small amount off, and clean up up the cut at the same time. In all cases I threaded the tenon to validate that the tenon is usable. I haven't tried this with all typical materials, eg. acrylic, Alumilite, ebonite, Delrin, etc.. I did use Delrin and ebonite, and made usable threaded tenons. Next I will make a pen using this approach to see if there are unforeseen gotchas!
 
Signed-In Members Don't See This Ad
"Next I will make a pen using this approach to see if there are unforeseen gotchas!"

I Look forward to this. Thanks for the write-up.
 
Not sure which Hinze Tenon Cutter you have, as there are two different variations as I understand one made by Jim and one made for him by another machinist at Turners Warehouse. I have the newer version which came with 2 pins and the pins are removable from the cutter body. As I understand it, the older version did not allow the pin to be removed.

I use an ER32 collet in the tailstock to hold the tenon cutter. I have used it on occasion without the guide pin and it worked but I had to drastically reduce the feed speed and give a good taper to the starting edge of the tenon to allow the cutter to center on the raw tenon. Since Rick was able to make you the registration guides, I like your idea of having a 6mm stepped down to a smaller diameter - if you keep your feed speed down and have sharp cutters, I don't think the guide pin would be under much stress and should hold up. Maybe start with the cutter set to 10, then do multiple passes reducing the cuts with your guides until you hit it. Less cutting would mean less stress and the existing tenon may provide enough support to keep it on track - just keep tapering the end.

Fingers crossed!

Kevin
 
I got my version from Turners Warehouse, and it came with one removable pin. Indeed you have to go slowly but being able to cut clean accurate tenons this way is a big improvement over manually and is still much quicker. I also found it helped to cut a little, back out the cutter, cut some more, and so on, which is easy to do with the tap and die holder. Thinking about it now, starting larger and slowly reducing the cutter size might be a good strategy. If you try with the reduced pin size, please let us know how you make out. If it works it would be a definite advantage.
 
I have now made a pen, and although I always enjoy my pen turning it is so much easier, quicker and more pleasurable using the Hinze Tenon Cutter. The materials are black ebonite and Pearlux Alumilite from William Wood-Write. This particular Pearlux is one of my favorites, and is popular with my customers. I really like black ebonite as a contrast section color. The sizes are M11 x 1 and M8 x 0.75.

I get a few requests for "smaller" custom pens, mostly from ladies, and this is my attempt to meet that demand. I am calling it "The Handbag Pen". It has a 12.1 mm diameter cap, an 11.4 mm diameter barrel, and overall length of 4.5". By making a 25 mm section, and using ebonite, I was able to make the complete pen from one 5.25" blank.

To cut the tenon on the section I used the approach mentioned above. Ebonite cuts quite nicely, and I got a good 8 mm tenon right away. For the cap thread on the barrel I could use the 6 mm rod supplied with the kit, and it is clear that doing this is superior. Makes me think about reduced rods......hmmmm.
 

Attachments

  • small.jpg
    small.jpg
    36.5 KB · Views: 40
  • small2.jpg
    small2.jpg
    33.3 KB · Views: 36
Got to thinking and made a guide rod for ballpoint and rollerball by cutting the end off a 6 MM drill bit (10 MM length), drilling a 2 MM hole (5 MM deep), and gluing in a 2 MM drill bit (same bit). I used thick CA and it seems to have worked OK so far. I added extra CA around where the bit enters the hole for strength.

2 MM works for a Cross style refill. For Parker and Schmidt it needs to be 2.5 MM, but you can use the 2 MM and counterbore with 2.5 MM later. So, only one is needed. I tried it out cutting an 8 MM tenon on Ebonite, and threading it with M8 x 0.75. It worked out well. Only time will tell as to how well it holds up.
May have wanted to use a 2 part epoxy… the CA will probably fail at the most inconvenient time. Specifically metal to metal.
 
So far so good but I agree. I was looking for a quick fix to try it out. I suspect that I will be getting out the epoxy as some point!
 
Got to thinking and made a guide rod for ballpoint and rollerball by cutting the end off a 6 MM drill bit (10 MM length), drilling a 2 MM hole (5 MM deep), and gluing in a 2 MM drill bit (same bit). I used thick CA and it seems to have worked OK so far. I added extra CA around where the bit enters the hole for strength.

2 MM works for a Cross style refill. For Parker and Schmidt it needs to be 2.5 MM, but you can use the 2 MM and counterbore with 2.5 MM later. So, only one is needed. I tried it out cutting an 8 MM tenon on Ebonite, and threading it with M8 x 0.75. It worked out well. Only time will tell as to how well it holds up.
Drilling a 2 MM hole to accommodate the 2 MM pin leaves things just a little too tight, and causes the pin to spin. Also, if you back out to clear away shavings, it gets stuck in the hole. You don't want it too slack or it won't work well as a guide pin. I experimented, and found that a number 44 drill bit, prevents it from getting caught without much slop in the hole.
 
I have now made a pen, and although I always enjoy my pen turning it is so much easier, quicker and more pleasurable using the Hinze Tenon Cutter. The materials are black ebonite and Pearlux Alumilite from William Wood-Write. This particular Pearlux is one of my favorites, and is popular with my customers. I really like black ebonite as a contrast section color. The sizes are M11 x 1 and M8 x 0.75.

I get a few requests for "smaller" custom pens, mostly from ladies, and this is my attempt to meet that demand. I am calling it "The Handbag Pen". It has a 12.1 mm diameter cap, an 11.4 mm diameter barrel, and overall length of 4.5". By making a 25 mm section, and using ebonite, I was able to make the complete pen from one 5.25" blank.

To cut the tenon on the section I used the approach mentioned above. Ebonite cuts quite nicely, and I got a good 8 mm tenon right away. For the cap thread on the barrel I could use the 6 mm rod supplied with the kit, and it is clear that doing this is superior. Makes me think about reduced rods......hmmmm.
Having made a pen for a Parker refill, I challenged myself to make one for a Schmidt rollerball refill using only one 5.25" blank. The Schmidt is longer and about 0.5 MM thicker. The extra length can be accommodated but the extra thickness with an M8 x 0.75 thread makes accurate drilling essential. Even then you will have very thin walls, making it rather fragile. Having got through a "few" Ebonite sections, I finally managed it. The cap is 12 MM in diameter and the barrel 10.5 MM in diameter. I didn't set out to go thinner than the Parker version, but clearly it can be done. In order to accommodate the extra length the section needs to be a little longer, thus reducing the length of the barrel. In the Parker case you have a little leeway in the total length of cap plus barrel, but none with the Schmidt. Using an M8 x 0.5 MM tap and die, might make things a little easier. However, I don't plan to purchase plus appropriate mandrels. Moving up to M9 x 0.75 MM or 3/8"-32 is the answer.
 

Attachments

  • 2025-10-02_13-01-22.jpg
    2025-10-02_13-01-22.jpg
    24.5 KB · Views: 14
  • 2025-10-02_13-02-19.jpg
    2025-10-02_13-02-19.jpg
    21.3 KB · Views: 13
Got to thinking and made a guide rod for ballpoint and rollerball by cutting the end off a 6 MM drill bit (10 MM length), drilling a 2 MM hole (5 MM deep), and gluing in a 2 MM drill bit (same bit). I used thick CA and it seems to have worked OK so far. I added extra CA around where the bit enters the hole for strength.

2 MM works for a Cross style refill. For Parker and Schmidt it needs to be 2.5 MM, but you can use the 2 MM and counterbore with 2.5 MM later. So, only one is needed. I tried it out cutting an 8 MM tenon on Ebonite, and threading it with M8 x 0.75. It worked out well. Only time will tell as to how well it holds up.

Rherrell makes stepped bits which this might be a variant to relieve the gluing process
 
Back
Top Bottom