Bottle Stopper - with big gap!

Signed-In Members Don't See This Ad
See more from TattooedTurner

Joined
Aug 13, 2016
Messages
1,460
Location
Surprise, Arizona

View in Gallery


View in Gallery


View in Gallery


View in Gallery


View in Gallery

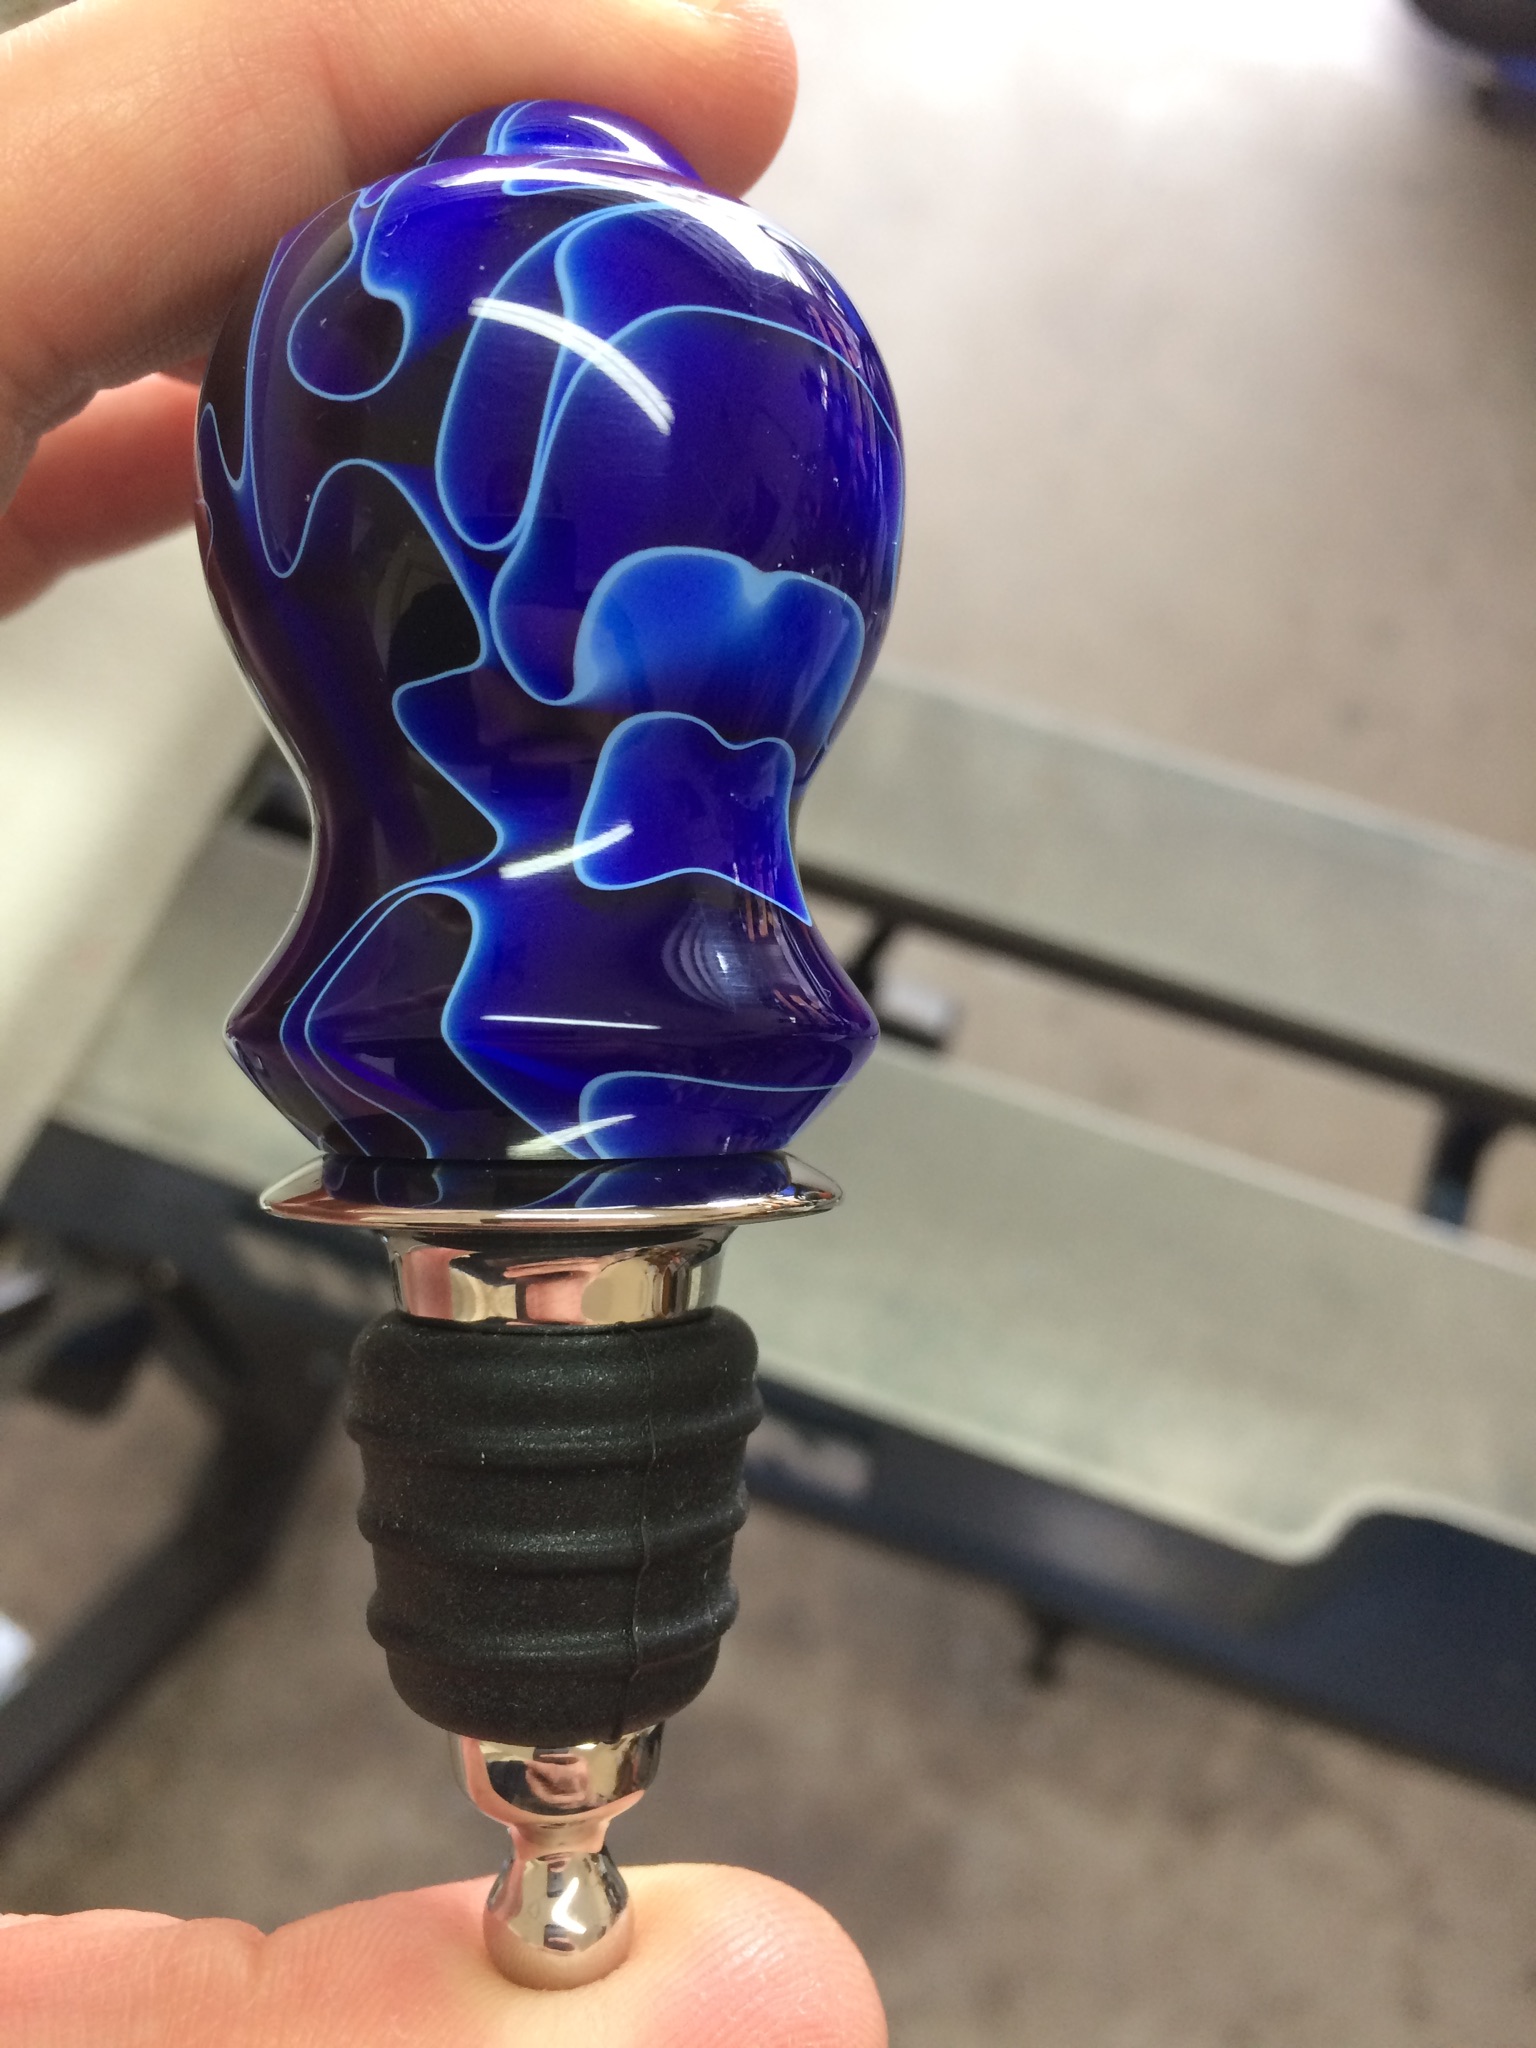
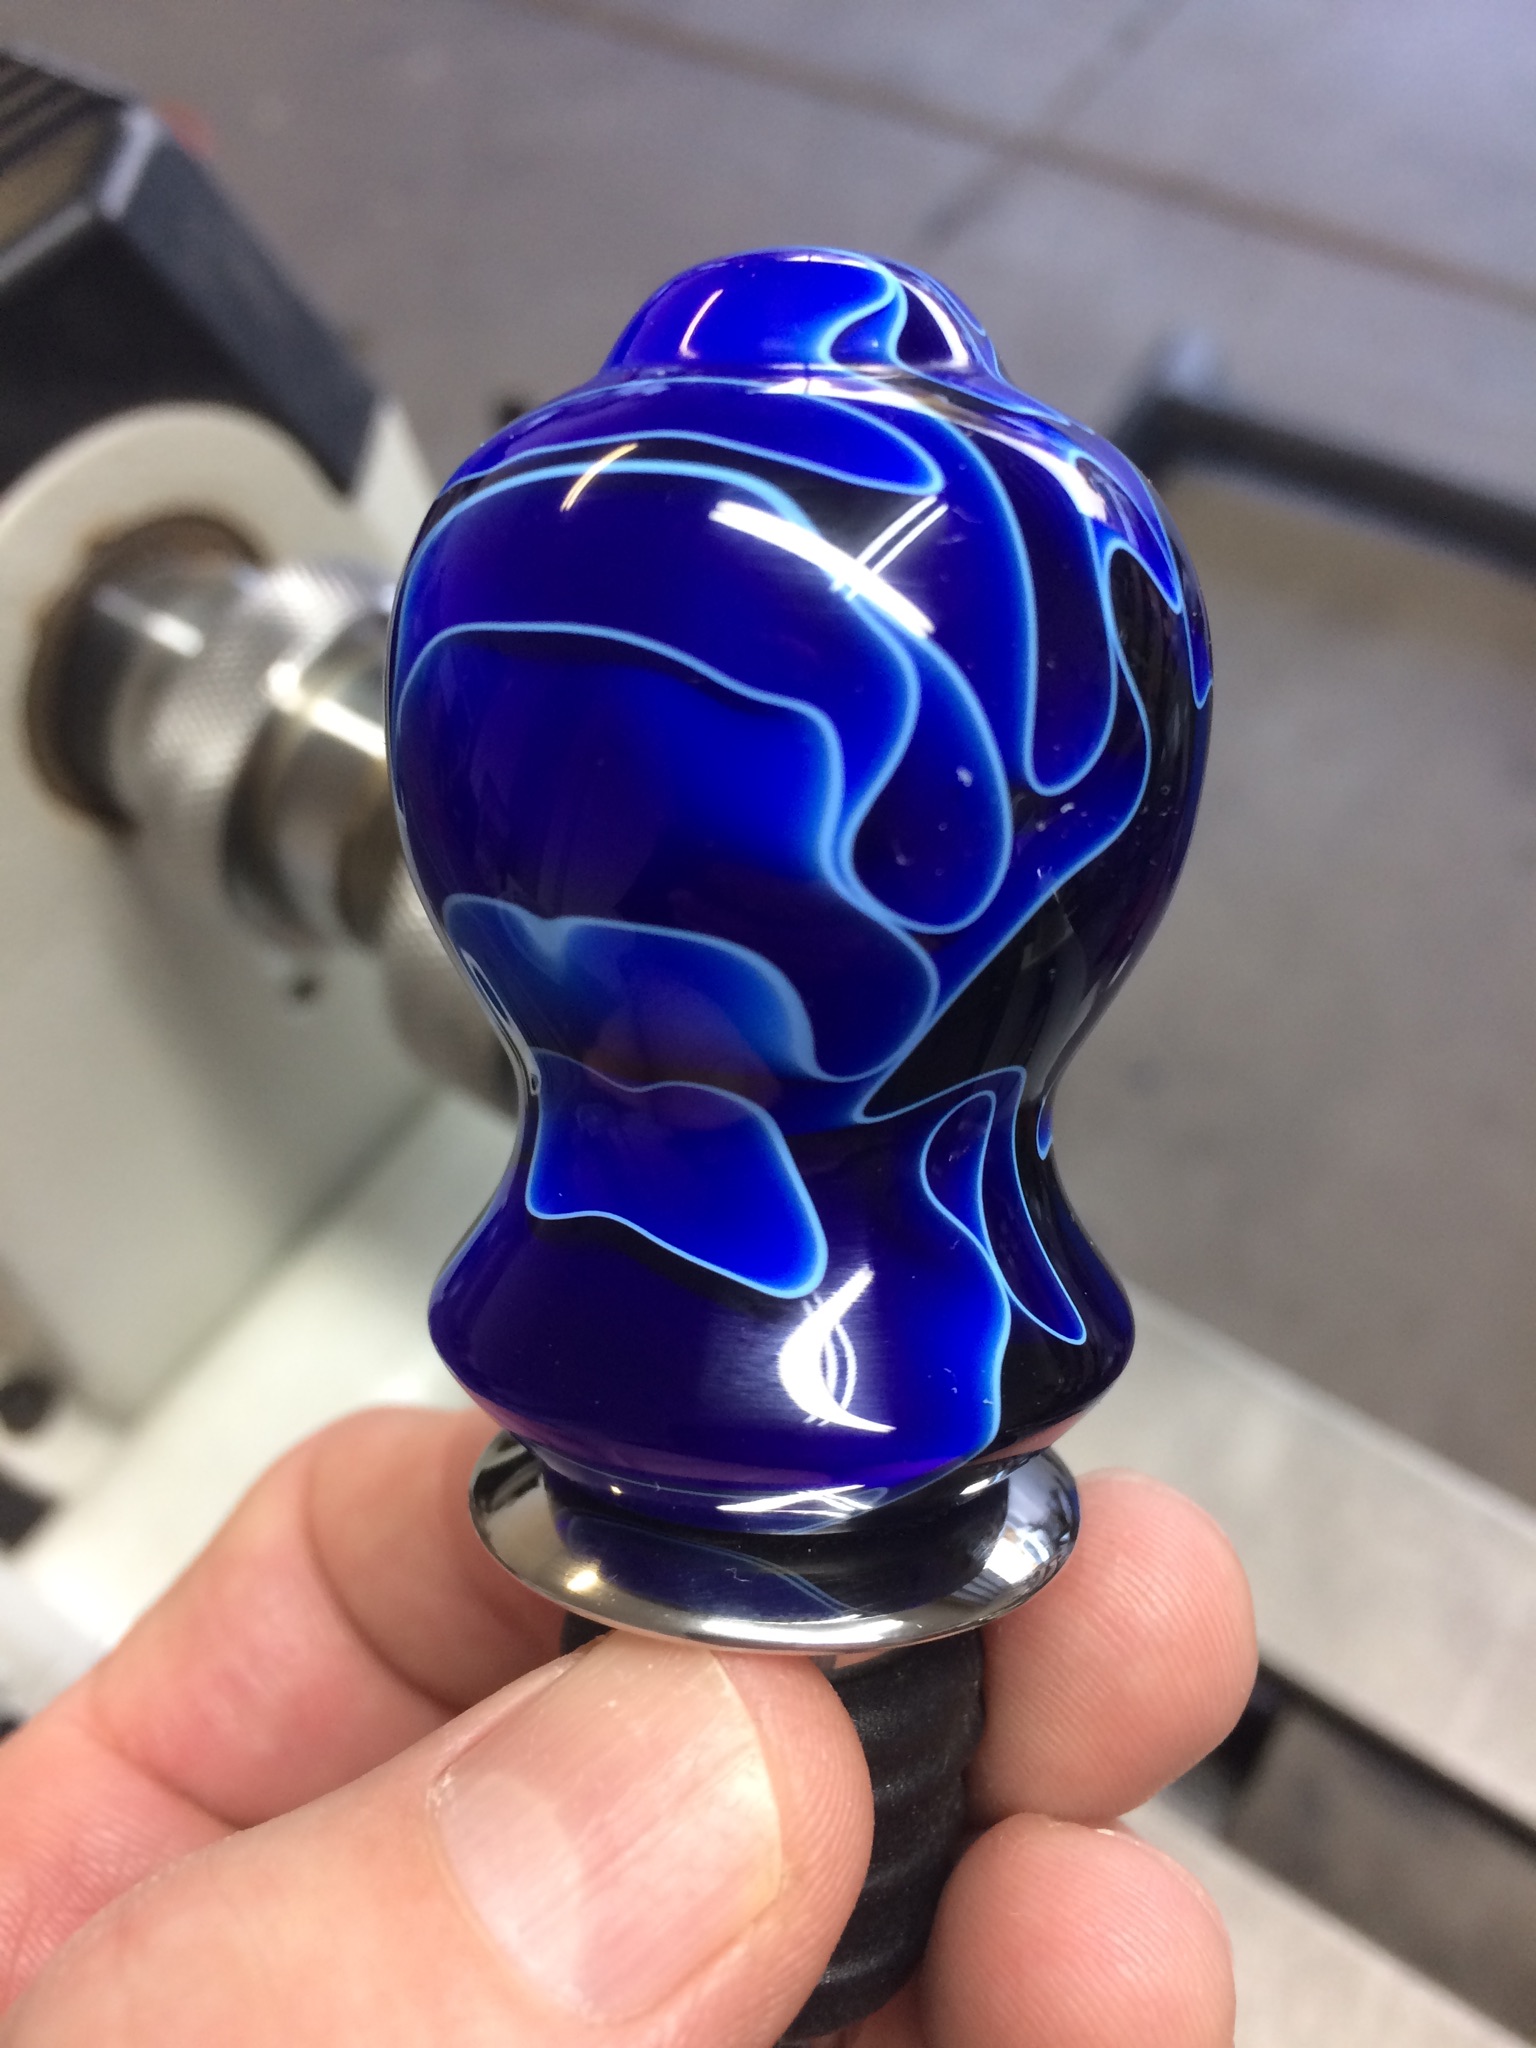
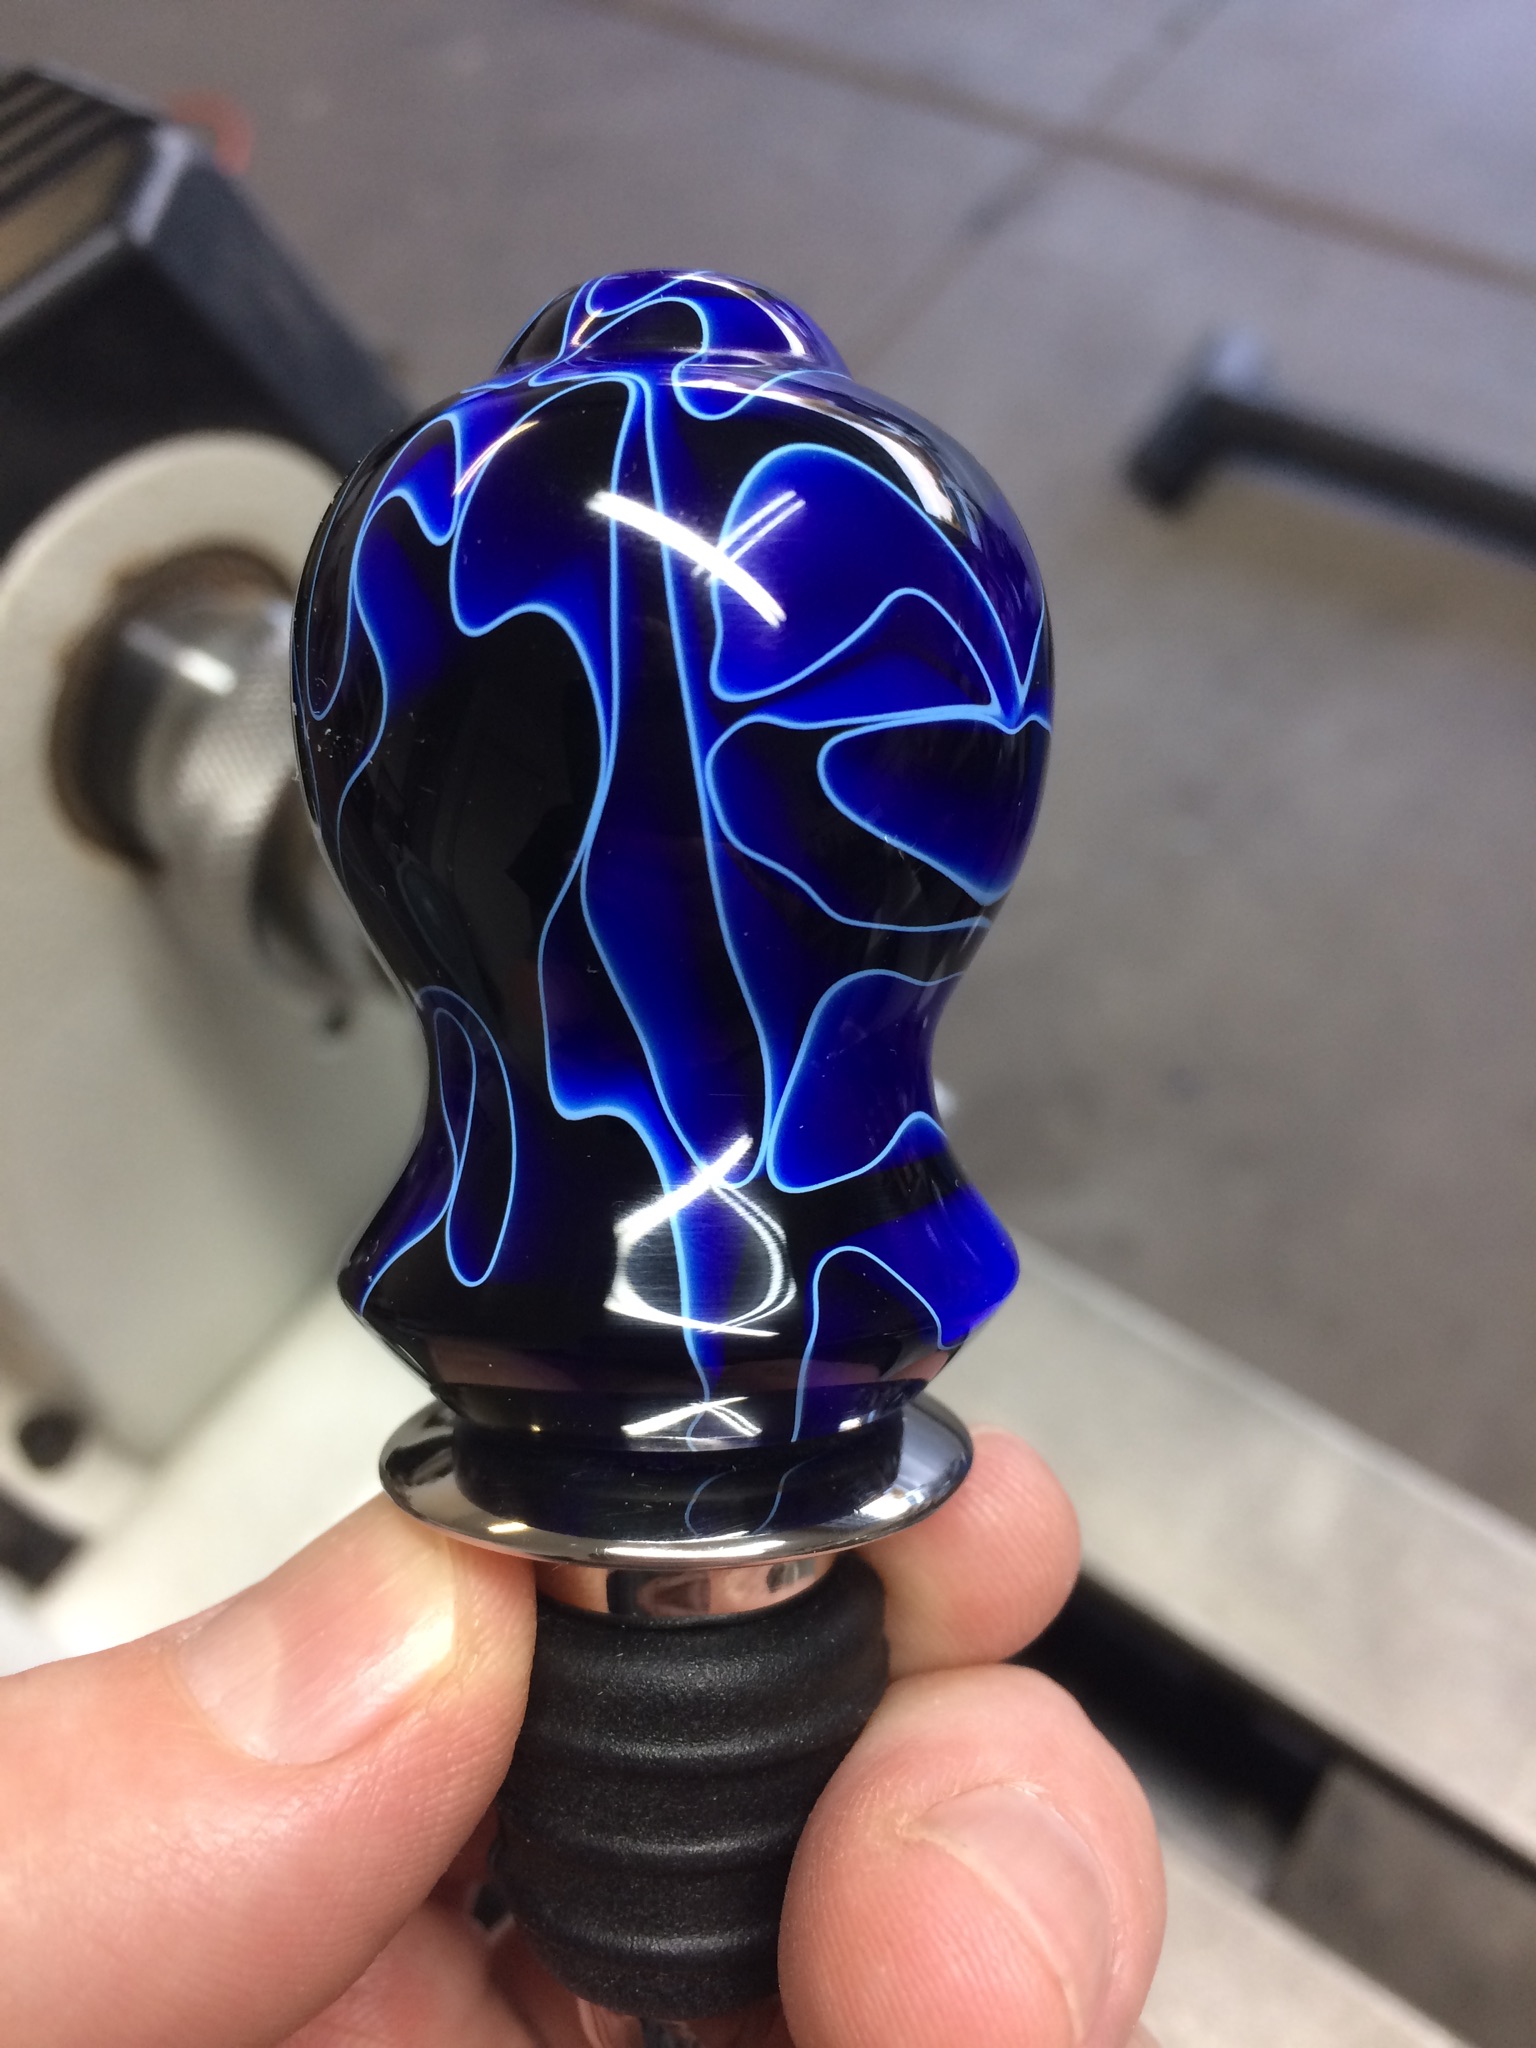
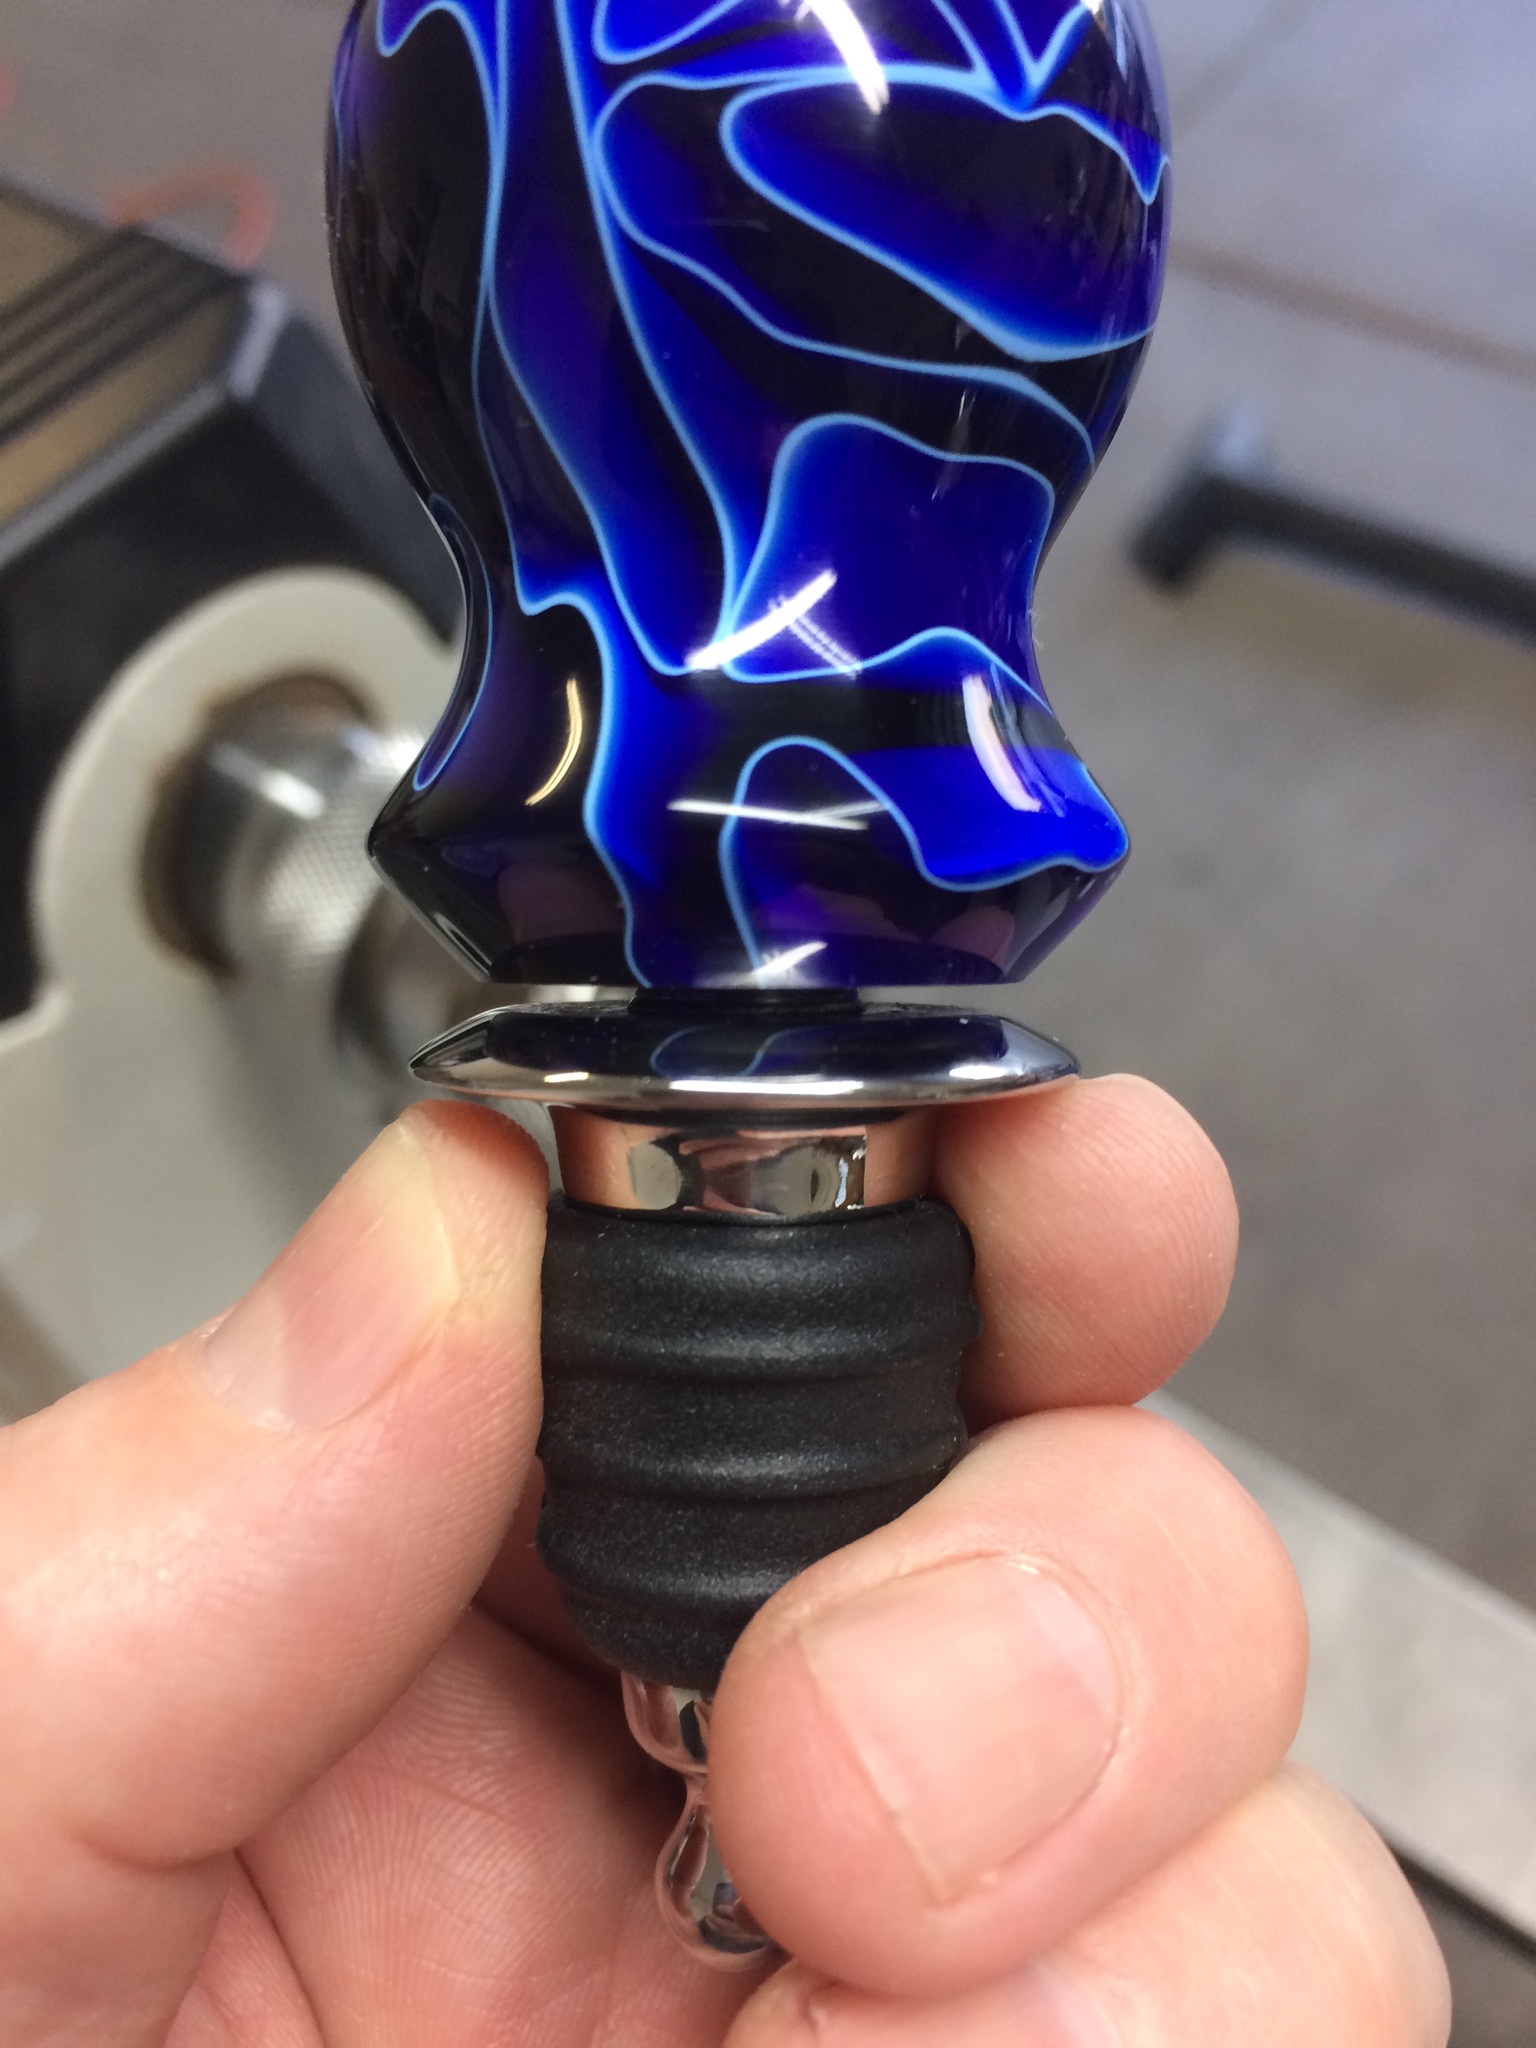
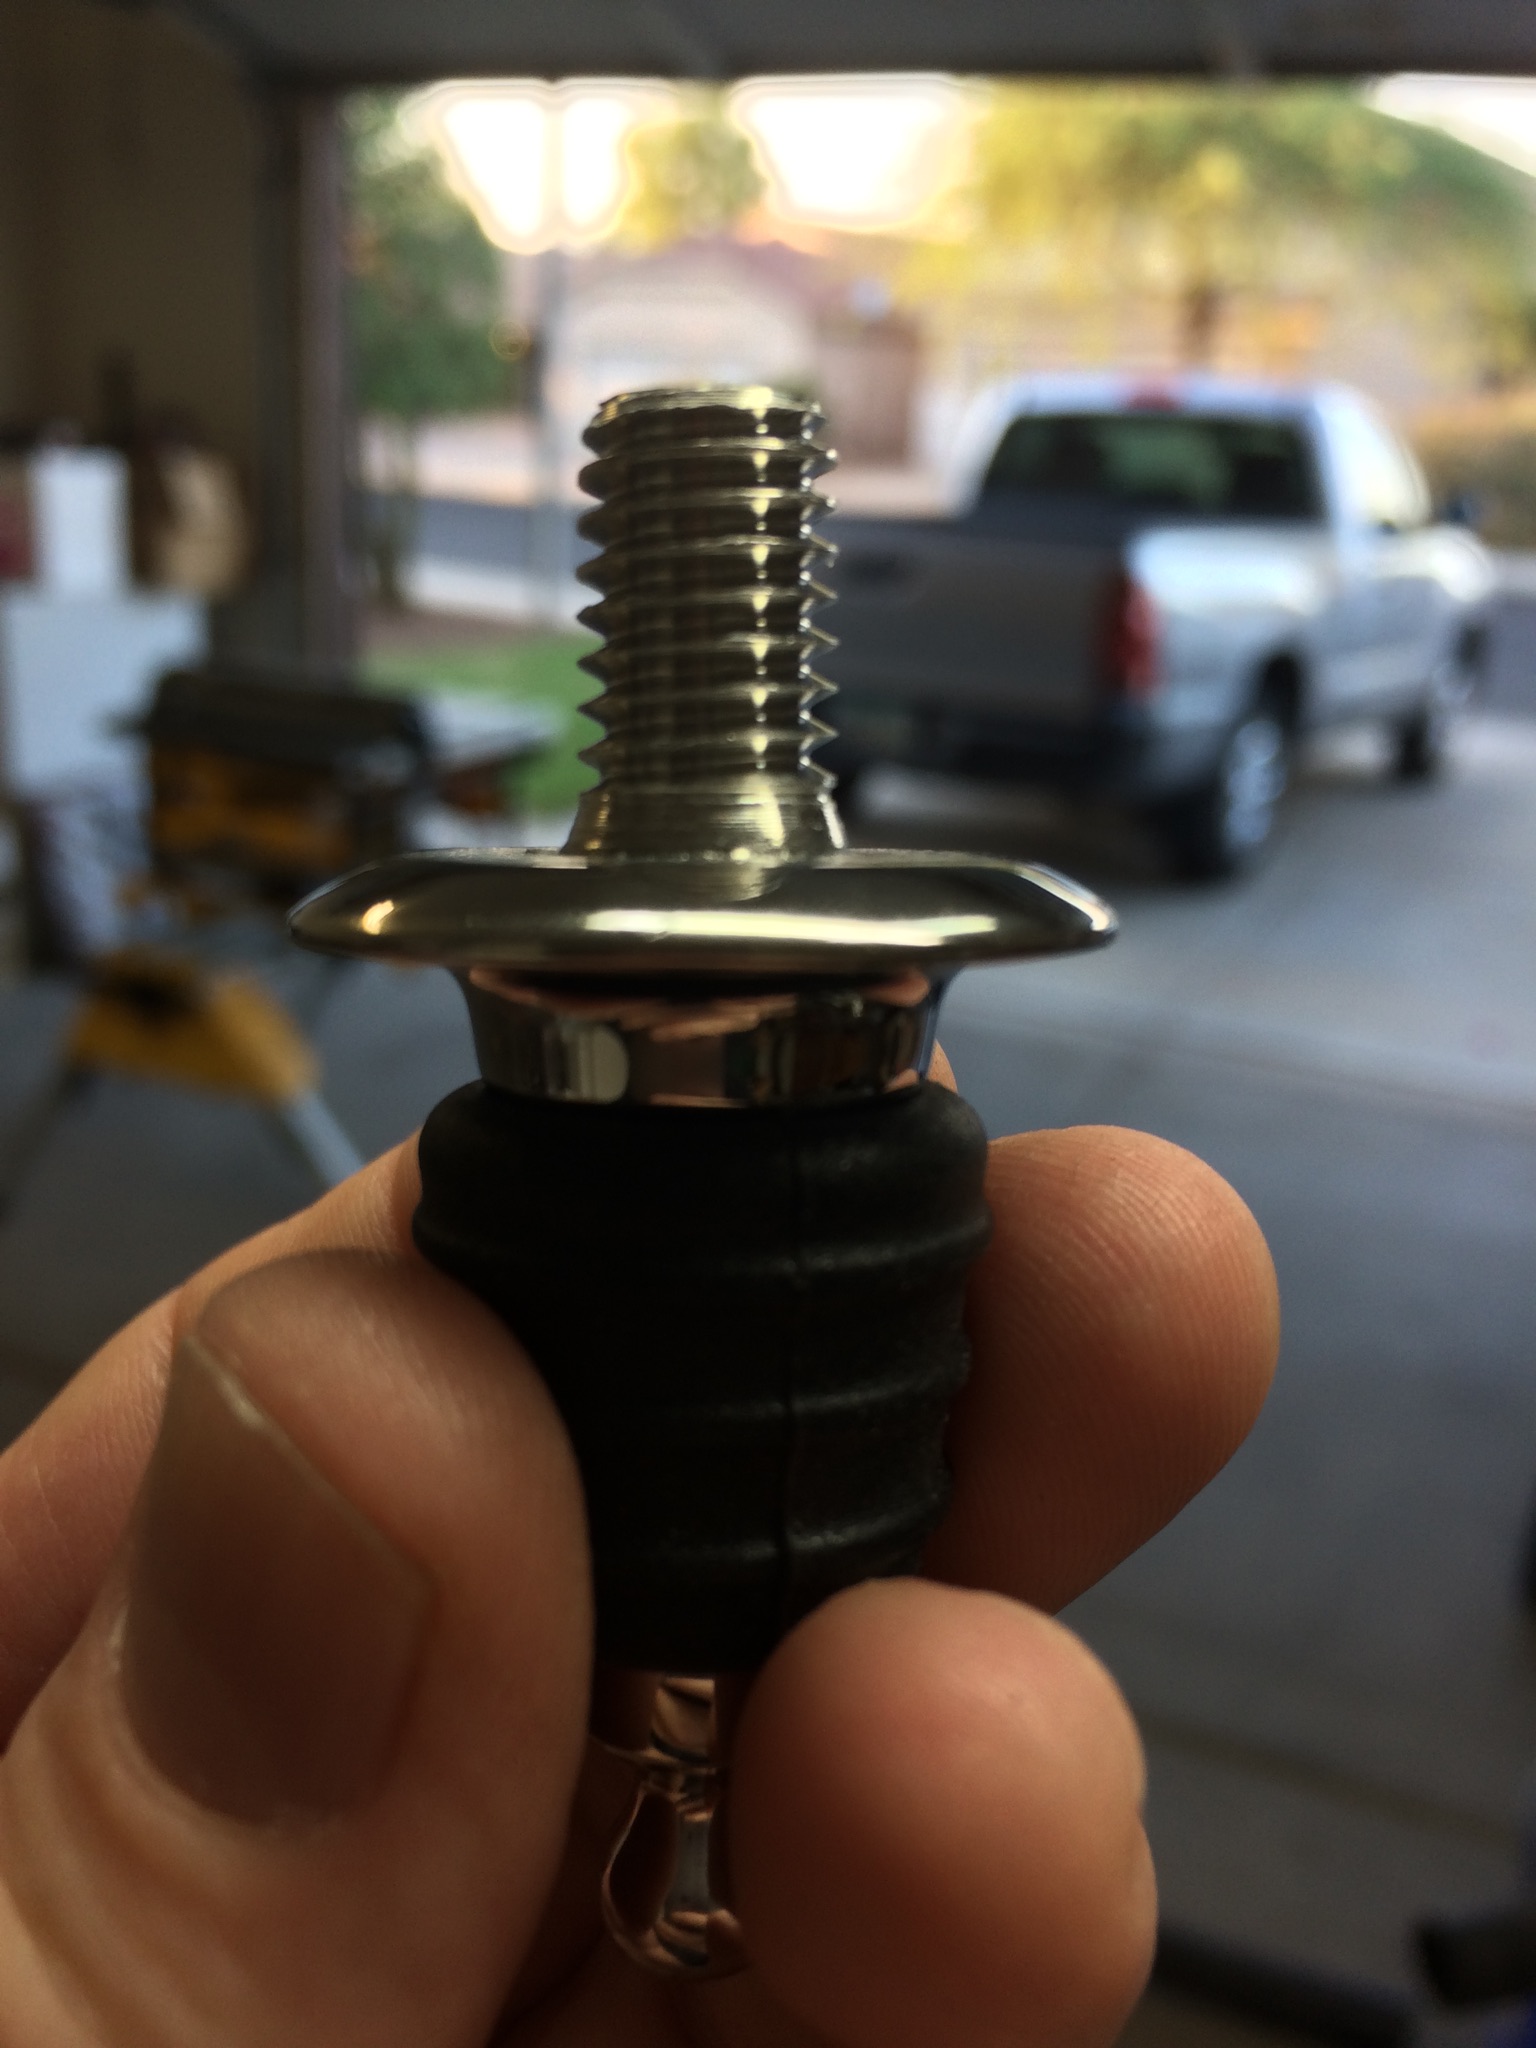
I went to Woodcraft in Chandler, AZ today to pick up some pen and bottle stopper kits to make for my daughters. This is the first bottle stopper I've made and I'm not very happy with it. The hole is drilled & tapped deep enough but there is a big gap between the finished blank & plug. The culprit is the bottom of the threads on the plug don't go all the way down and end with a taper going from the 11/32" out to 13/32"! No mention of this and had I known I would've drilled a 13/32" hole about 1/8" deep to allow for it. I even got the more expensive stainless steel stoppers so I'm kind of ticked. I wanted the cone style which their website said were in stock at my store but all they had were these in stainless steel so I picked them up anyway. I don't think I can fix this one but at least I know for the next one. After looking at the pix I see the acrylic needs more sanding but overall I'm happy with how that part turned out. I didn't cast this one, it's their Sapphire Water blank. This is for the younger of my two daughters and she likes black and sapphire blues so this one is perfect.

There are some flakes on the acrylic but that's only because I didn't wipe it off good enough before the pics.
 
Last edited:
Signed-In Members Don't See This Ad

Charlie_W

Member
Joined
Nov 16, 2011
Messages
5,918
Location
Sterling, VA USA
Super job on turning the stopper!

As for tapering the opening in the stopper, first, you can use a countersink in your cordlesss drill and simple shave out enough for a flush fit.
Alternatively, you can use a Dremel with a bit or small sanding drum.

I just flare the hole out with a lathe chisel after drilling and tapping the hole. I also make the bottom of the stopper slightly concave so the edges are nice and snug when screwed on. Epoxy locks it in olace permanently.
 

campzeke

Member
Joined
Jun 28, 2015
Messages
577
Location
Tampa, FL
Easy fix ... Thread a nut over the stopper thread and cut about 1/4" off the end. Dress the cut end with a file and remove the nut cleaning the threads in the process. Put a few drops of epoxy or whatever type of glue you prefer in the threaded hole and thread your turning onto the stopper. Once the glue dries, present that beautiful stopper to your daughter as planned.
 

JimB

Member
Joined
Mar 18, 2008
Messages
4,683
Location
West Henrietta, NY, USA.
Charlie mentioned the fix but I'll also tell you that Woodcraft is very expensive for SS stoppers. You can get them many other places for half their price.
 
Joined
Aug 13, 2016
Messages
1,460
Location
Surprise, Arizona
Super job on turning the stopper!

As for tapering the opening in the stopper, first, you can use a countersink in your cordlesss drill and simple shave out enough for a flush fit.
Alternatively, you can use a Dremel with a bit or small sanding drum.

I just flare the hole out with a lathe chisel after drilling and tapping the hole. I also make the bottom of the stopper slightly concave so the edges are nice and snug when screwed on. Epoxy locks it in olace permanently.

Thank you sir! I will try with the dremel first. This stuff is brittle and I don't want to chance chipping with a countersink. Tomorrow's stopper will get the flare out treatment.

Thanks for the compliments. For a first stopper I'm quite pleased.
 

Charlie_W

Member
Joined
Nov 16, 2011
Messages
5,918
Location
Sterling, VA USA
Charlie mentioned the fix but I'll also tell you that Woodcraft is very expensive for SS stoppers. You can get them many other places for half their price.

Yup, I prefer Ruth Niles for SS. She has the stand up stopper as well as a number of options. Prices are very reasonable too.
 

Skie_M

Member
Joined
Aug 7, 2015
Messages
2,737
Location
Lawton, Ok
Looks lovely .... if you have the long rubber covered pins available for a plate face on your lathe, you could just take this finished stopper body and chuck it up (use tailstock with a live center to line it up) and then use sandpaper on a sanding block or stick to ream out and finish up the stopper bottom to give you clearance for that hole.

If not, then perhaps wrapping your stopper in a layer of leather to protect it and holding it in your 4-jaw chuck would work too ... or turn a wooden faceplate with a custom hole and line that with rubber or leather for a good protective grip?

You don't need it to turn perfectly true just to sand out a quarter of an inch of that hole for clearance, but any chip-out underneath would be hidden by the stopper end anyways and you'll glue it securely, right? You could just grab an appropriately sized twist drill bit and go slowly if you can get it to spin true enough ... just need 1/4 inch for clearance ... test fit the stopper end occasionally to see how close you are getting!
 

mecompco

Member
Joined
Apr 24, 2015
Messages
1,607
Location
Fairfield, Maine
Can you not just drill the hole deeper? I did that with one I did that came up a little short. I spread some thick CA around the newly enlarged hole, let it dry, and ran the tap down to re-cut the threads.

Regards,
Michael
 

Skie_M

Member
Joined
Aug 7, 2015
Messages
2,737
Location
Lawton, Ok
Well, the hole's already deep enough ... it's just that the stopper end's threads don't run all the way up to the base. They stop short and the hole in the stopper body doesn't accommodate the unthreaded part of the shaft so it jambs up right there. All he needs to do is make the hole in the stopper body wider for the first 1/4 inch to account for that and no other changes.


See, if the threaded screw was too long, he'ld drill the hole deeper and re-tap it ... the problem is that it's already deep enough for the whole screw, and he's putting it on as tight as it'll go ... but there's a gap because it can't screw on to that unthreaded part at the base of the stopper part.
 
Joined
Aug 13, 2016
Messages
1,460
Location
Surprise, Arizona
Did you cast this blank? The stopper will be perfect once you fix the fit

No, it's the sapphire water blank from Woodcraft.

Well, the hole's already deep enough ... it's just that the stopper end's threads don't run all the way up to the base. They stop short and the hole in the stopper body doesn't accommodate the unthreaded part of the shaft so it jambs up right there. All he needs to do is make the hole in the stopper body wider for the first 1/4 inch to account for that and no other changes.


See, if the threaded screw was too long, he'ld drill the hole deeper and re-tap it ... the problem is that it's already deep enough for the whole screw, and he's putting it on as tight as it'll go ... but there's a gap because it can't screw on to that unthreaded part at the base of the stopper part.

Thank you for explaining that so I didn't have to type it out!
 

LancsLad

Member
Joined
Dec 14, 2015
Messages
17
Location
Nanaimo, Vancouver Island, BC, Canada
Great colour and well turned.

I had a similar situation, what I did was to turn a wooden washer to fit (used other stopper to size). Then I split the washer to glue in place and painted it black to look like a rim.

I did countersink the next blanks to fit.

Hope this helps.

Roy
 

mmayo

Member
Joined
Jan 12, 2013
Messages
2,958
Location
Tehachapi, CA
It seems CSUSA shave brushes also require a countersink to all you to seat them. I too thought the hole was not deep enough, so I made the hole extra deep. It did not help. The countersink did the trick, make it deep too.
 

Sataro

Member
Joined
Mar 15, 2009
Messages
3,096
Location
Mexia, TX
May sound stupid but how about a washer to fill the gap? What I mean by a washer is to turn a washer out of acrylic in a contrasting color to fill the gap. Solid black, blue or even deep red. So you have a two piece stopper.
 
Top Bottom