yorkie
Member
About to do a couple of shows and have 75 already made. Thought I would make another 46 pens
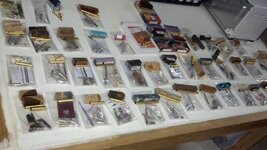
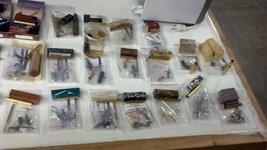
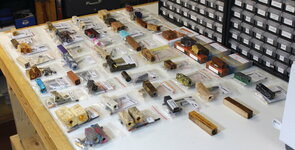
Some of the materials in this series of pens are going to be: HMS Victory Oak, Lava, alligator jaw bone, buffalo horn, snakewood, P47 thunderbolt shell, tiger myrtle, Masur birch, ironwood Burl, beeswing narra, pomelle bubinga, Amboyna, Thailand Rosewood burl and Dalmatian Ebony.
Should be fun!
Some of the materials in this series of pens are going to be: HMS Victory Oak, Lava, alligator jaw bone, buffalo horn, snakewood, P47 thunderbolt shell, tiger myrtle, Masur birch, ironwood Burl, beeswing narra, pomelle bubinga, Amboyna, Thailand Rosewood burl and Dalmatian Ebony.
Should be fun!