Triple Crown
Member
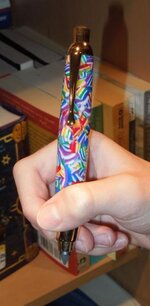
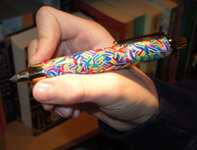
My son and I finished the Artist's Pencil. Had some problems that we worked through for a nice result. Always learning!
February 12, 2012
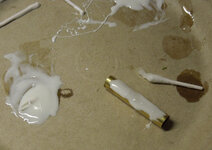
Well, over the next couple of days, we added some more paint on the tube and in the blank to make sure it wouldn't show any brass. I also read on here about coloring the glue and wanted to try this since I've seen glue before through some acrylic blanks (although I had not learned of reverse painting the blanks then). Since we didn't' know what to use to color it or if adding paint to glue might compromise the strength of the glue, we experimented before gluing the tube in the blank. We added two drops of white acrylic paint to 5 minute epoxy and spread it over an extra brass tube to see how it would look and feel. Here's a picture. Being satisfied, with the strength and opaqueness, we made some more epoxy-paint-mix and glued up the tube. My son wanted to do all of the steps so he worked at squaring the blank for a bit with the pen mill, but I ended up finalizing the job (pretty tough step for smaller hands) and it made me tense anyway.
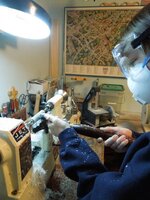
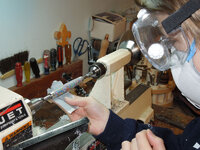
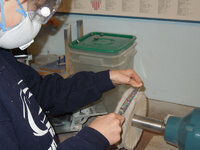
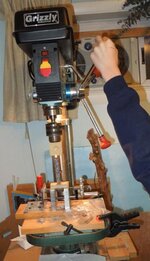
Got it on the lathe yesterday evening and he turned it down to shape. He gets nervous around the ends of the blank because he's afraid he'll blow it up. (It's happened before.) I ended up turning it down to the bushings and then he finalized the shape, sanded it, and micromeshed it. He also buffed it. We had to drill a hole in a piece of wood for the push button pencil lead extender to go in while he pressed the other half of the pencil together.
Anyway, got it all put together and he is very proud of it. He brought it to school today and showed his friends. This was our first Artist's Pencil and we had a great time making it together! As usual, learned new things along the way. Thanks for reading!


February 12, 2012
Was hoping to do a new project with my younger son – he's been wanting to do the Artist's Pencil. Haven't done this one before. (Actually, all we've done so far are a lot of ball point pens – mostly cigars.) We got started though and persevered through a tough obstacle. The blank he chose way back specifically for his fat pencil is an acrylic called Confetti that we got at Woodcraft. The tube is 15/32" and quite a bit longer than the cigars. Even though we backed the bit out very often to clear the shavings, right after it pushed through, it got too hot and the shavings melted and bonded to the bit half way out! We worked slow and steady pulling it off. He held onto the chuck on the drill press so it wouldn't rotate and I pulled with a lot of might while wiggling the blank back and forth. He did not want to give up and cut it off or break it and start with another one. It took maybe close to an hour. I thought it would crack toward the end, but it held up. I told him that we might not get to do anything more tonight except paint the inside of the hole so the brass tube doesn't show. He didn't think that would be necessary so I cut a sliver of the remaining portion of the blank about the thickness that the plastic will be and showed it to him under light. Sure enough, it shines pretty bright through it. (Thanks all! Learned about reverse painting here.) Since I didn't have any Testors type of white paint, we sprayed the inside of the blank and also the brass tube with some white Krylon primer I had. Brrrrr it was cold out there. That's where we are up to on this new project. I'll post a picture of it when we finish it.
Well, over the next couple of days, we added some more paint on the tube and in the blank to make sure it wouldn't show any brass. I also read on here about coloring the glue and wanted to try this since I've seen glue before through some acrylic blanks (although I had not learned of reverse painting the blanks then). Since we didn't' know what to use to color it or if adding paint to glue might compromise the strength of the glue, we experimented before gluing the tube in the blank. We added two drops of white acrylic paint to 5 minute epoxy and spread it over an extra brass tube to see how it would look and feel. Here's a picture. Being satisfied, with the strength and opaqueness, we made some more epoxy-paint-mix and glued up the tube. My son wanted to do all of the steps so he worked at squaring the blank for a bit with the pen mill, but I ended up finalizing the job (pretty tough step for smaller hands) and it made me tense anyway.

Got it on the lathe yesterday evening and he turned it down to shape. He gets nervous around the ends of the blank because he's afraid he'll blow it up. (It's happened before.) I ended up turning it down to the bushings and then he finalized the shape, sanded it, and micromeshed it. He also buffed it. We had to drill a hole in a piece of wood for the push button pencil lead extender to go in while he pressed the other half of the pencil together.


Anyway, got it all put together and he is very proud of it. He brought it to school today and showed his friends. This was our first Artist's Pencil and we had a great time making it together! As usual, learned new things along the way. Thanks for reading!
