Today's lessons!!

Signed-In Members Don't See This Ad

RAdams

Banned
Joined
Apr 5, 2009
Messages
2,983
So i didn't know that your not supposed to use acetone to clean your nib feed and holder. I tried and was freaking out because the thing seemed to stay wet with black ink. It wasn't black ink.. It was plastic. The holder melted off in layers and now it no longer fits the snazzy nib section i made tonight!

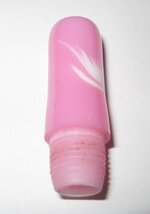
I know it isn't a whole pen but it is an incredible start for me!! I am so happy i can hardly stand it. Of course i destroye teh cool red and blue blank that was going to be the body and lid.. This piece is good to go and ready for a pen! I just gotta get the pen body figured out the rest of the way...

My first kitless is one step closer!!
 

Attachments

  • front section.JPG
    front section.JPG
    11.3 KB · Views: 214
Signed-In Members Don't See This Ad

skiprat

Passed Away Mar 22, 2022
In Memoriam
Joined
Oct 19, 2006
Messages
7,812
Location
In a Skip in Wales
Cool !!! One step at a time is a good way to do it, but starting with a fountain pen is brave. Looking forward to the complete success.
Well done so far!!:wink:
 

RAdams

Banned
Joined
Apr 5, 2009
Messages
2,983
A fountain pen is brave? To me it seemed the easiest way to go. I started to try to make a ballpoint but couldnt figure out how to get either type refill to work without doing some kind of step drill situation in the nib. I made one the other night from the contest Butch did. The whole transmission, tubes, and refill thing... I finished a pen, but it was SOOOOOOO UGLY. It looked almost obsene (SP). I really want to finish this pen for my wife, who is my biggest cheerleader. Her birthday was a month ago and i promised her something special. I thought i could just bang out a kitless and hit a homerun. So far i am a donkey for not completing it yet. I think today might just be the day!!
 

RAdams

Banned
Joined
Apr 5, 2009
Messages
2,983
I forgot to add some lessons earlier. I guess i was in a hurry to get the pic posted.


But before i get to the lessons, Where would a person buy quantities of nib feeds and feed holders? Heritage maybe??? I am headed there now!


Making a kitless pen (for me) has been a challenge in engineering unlike anything i ever expected. It is alot of time making jigs, tools, attachments, and other misc. pieces that will not even be part of the finished product. I have ruined several PR blanks, and several Alumilite blanks all in the "learning" process. It teaches a person to look at penmaking from a totally different perspective. You cannot just mount the tubes and turn to the bushings. You have to reverse engineer the entire project, keeping in mind ink pen function, refilling, durability, fit, and of course style. It is something that is very easy to lose yourself in. I have made the biggest mess in my shop since starting my kitless voyage than the entire 4 years i have been turning. It is such an involved project, I end up with my drill bits, punch set, tap and die set, calipers, bushings box, dremel attachment box, and several different blanks and partial blanks and lots of other stuff all out on the bench at once.

Sound like a bad thing? It is. It's messy, and dirty, and difficult, and there is a high rate of failure for a noob such as myself. It's also challenging, and frustrating, and It is the most fun i have ever had in my shop. Just making a successful (SP) nib section was one of the most rewarding feelings in the world. I can only imagine how proud of the actual pen i will be!


So if you are reading this, and you are frustrated in your own kitless failures, KEEP UP THE FIGHT! If you get stuck, ASK QUESTIONS! SHARE!!!!!!

Even your failures can be someone elses success! I fixed my threading problems by looking at someone elses failure! Learn from your mistakes, and keep trying!
 

penmaker56

Member
Joined
Feb 28, 2008
Messages
449
Location
Potomac, MD, USA.
Welcome to the kitless world, fountain pens and roller balls are easier than ball points, and push button (clicker) are much harder than twists. I started a pictorial on my facebook page about the evolution of a kitless pen, but stopped due to lack of interest. If you need kitless parts and supplies, please check out my website, which I tried to gear toward the kitless pen maker.
 

RAdams

Banned
Joined
Apr 5, 2009
Messages
2,983
Next lesson.... er lessons.


You cannot tap the lid by hand and expect it to line up straight with the body.

closed is closed. If you try to go too far, the thread section breaks off inside the lid. I think i need to switch to a smaller nib section thread size to leave more meat between the internal and external threads. I am down to two or three more whole alumilite blanks out of a box full. Painful to keep breaking blanks one after the next. I am close though, and it will all finally be worth it!
 

1dweeb

Member
Joined
Feb 9, 2010
Messages
639
Location
Saginaw, Texas
For the beginning pens, nibs with feeders may be purchased through BEREA Hardwoods in their fountain pen parts section. Once you start turning out nicer pens you might want to use the Heritage nibs. That's the direction I have gone.

Wayne
 

1dweeb

Member
Joined
Feb 9, 2010
Messages
639
Location
Saginaw, Texas
I used a drill chuck mounted in my tail stock to hold my drill bit, tap and die so that all of my threads would be in line. I used 12 X 1 set for the cap and 10 X 1 for the nib.
 

LEAP

Member
Joined
Dec 22, 2006
Messages
1,938
Location
Old Orchard Beach, Maine
That looks like you are off to a great start, There is nothing like the feeling when you can say I figured it out and made it all from scratch. Keep up the great work!
 

ldb2000

Member
Joined
Sep 11, 2007
Messages
5,381
Location
Laurence Harbor, NJ, USA.
Keep at it Ron , you WILL get it eventually . I've been at it three years now and I still have more failures then successes but you learn something with each failure .
I really prefer to make the kitless ballpoints because of the complexity of them . It's the design challenges that I love .
 
Top Bottom