September PITH Pictures!

Signed-In Members Don't See This Ad

plantman

Member
Joined
Jan 2, 2012
Messages
3,437
Location
Green Bay, Wi
WOW !!!!!!!!!!!!!!!!!!!!!!!!!!!!!!!!!!!!!!!!!! I might be able to part with this one in exchange for that one when you are finished. You are so far out of the box that you would need the rocket just to return to the level of us mear mortal pen makers. Beauiful concept and design. Hope to see it in a photo soon. Jim S
 
Signed-In Members Don't See This Ad

healeydays

Member
Joined
Nov 30, 2012
Messages
1,057
Location
Bedford NH
Now that's steampunk/scifi if I ever saw it. If you put a laser pointer out of the top, it would be interesting for presentations...
 

BSea

Member
Joined
Dec 28, 2009
Messages
4,628
Location
Little Rock, Arkansas
I received my pen yesterday from Eric (Buzzzz4). It's a Beautiful Mickey Mouse watch parts pen. The kit is a Jr. Retro (one of my favorite kits). I don't know if Eric knew that, or just a lucky coincidence. The The pictures may bot show it well enough, but the tubes were wrapped with carbon fiber then the watch parts attached. What a great addition to my PITH collection. In addition, I received some very nice blanks including 2 of Eric's famous mini pinecone blanks.

Thanks Eric!


glenspens

Member
Joined
Mar 26, 2013
Messages
849
Location
Jonesborough,Tn. USA 37659
Oblique pen Art

Look at what I got from Ben(crimsonkeel) what can I say but way cool:biggrin:
The pen is Lignum Vitae w/his 3 color blank, a hand cast & turned ink well ,Antique Esterbrook nibs, black ink and 3 of his blanks . my pic do not do the pen justice :redface: ....Thanks Ben ...now I just need to learn how to use the pen.......
 

Attachments

  • 009.JPG
    009.JPG
    208.6 KB · Views: 167
  • 002.JPG
    002.JPG
    208.4 KB · Views: 170
  • 014.JPG
    014.JPG
    208 KB · Views: 165

Kendallqn

Member
Joined
May 9, 2013
Messages
114
Location
Phoenix, Az 85044
My Pith Pen

I finally got to come home after being out of town for almost a month. My pen was waiting for me when I arrived. My 19 year old daughter appropriated it of course. Thanks again to mlconnelly great job.
 

Attachments

  • IMG_0154-web.jpg
    IMG_0154-web.jpg
    136.2 KB · Views: 176
  • IMG_0156-web.jpg
    IMG_0156-web.jpg
    533.9 KB · Views: 171

mlconnelly

Member
Joined
Sep 16, 2013
Messages
223
Location
Spartanburg, SC
Welcome Back Ken

I'm glad you liked the pen. Sorry that it was appropriated by your daughter. I guess I am out of touch to think a teenager would go for it. Here is a little more explanation. I am fortunate that my fathers hobby is clock repair so there is certainly no shortage of spare parts to play with. I wanted to carry the brass / copper theme throughout the pen. The lower barrel is a 30 caliber casing fitted with the proper slimline stuff. The upper barrel is a piece of brass bushing stock that I drilled out to fit the transmission of the pen. On either side I soldered a piece of smaller bushing stock. Starting at the top is a winding nut from an old alarm clock. Immediately below that is a lantern pinion gear. On a clock this drives the escape wheel which rocks the spring on which the pendulum hangs. On either side of the pinion are two time regulating gears. The copper wire was out of scrap when I re-wired my shop last year. These wires feed through a plate that holds the verge on the back of a set of clock works. The verge provides the rocking motion from the escape wheel to the pendulum spring. The clip is from the closing door catch on an old kitchen clock. And finally both wires terminate in the outside of a cam gear that initiates chiming on Westminister chime. My original design was for a single barrel pen and to have the winding pinion power the two outside gears and extend the tip of the pen. I had to abandon that when I found my available bushing stock would be too thin to turn down.

I had a blast making the pen. Sorry about the poor soldering work. It was my first time doing that. I can't wait to try another one.
 

Attachments

  • P9280646 (Copy).JPG
    P9280646 (Copy).JPG
    49.6 KB · Views: 148
Last edited:

CrimsonKeel

Member
Joined
Mar 1, 2013
Messages
495
Location
Royal oak, MI
Look at what I got from Ben(crimsonkeel) what can I say but way cool:biggrin:
The pen is Lignum Vitae w/his 3 color blank, a hand cast & turned ink well ,Antique Esterbrook nibs, black ink and 3 of his blanks . my pic do not do the pen justice :redface: ....Thanks Ben ...now I just need to learn how to use the pen.......

I'm glad you liked it. was a little worried about if it would be received well being a dip pen but I figured for this one time it would be fine. Here are some more pictures I took of it before I sent it out. Take a picture of some of your test writing when you try it out.
W8Ss9a4.jpg

xuZLdSp.jpg

wfB2tjp.jpg

eHP98Us.jpg

E6oeL7k.jpg

0b7T3HQ.jpg

CfgOgi5.jpg
 

CrimsonKeel

Member
Joined
Mar 1, 2013
Messages
495
Location
Royal oak, MI

toddlajoie

Member
Joined
Feb 6, 2010
Messages
1,728
Location
Feeding Hills MA
I thought it seemed "backwards" for a Leftie Pen.. (i.e if you held it in your left hand the nib would be upside down...)

So it is basically the same idea tho, to prevent the writing hand from smudging, in this case from big flashy swirlies, correct?
 

ChrisN

Member
Joined
Mar 23, 2013
Messages
730
Location
Denver, PA
So it is basically the same idea tho, to prevent the writing hand from smudging, in this case from big flashy swirlies, correct?

No, it's designed to make drawing those big flashy swirlies easier. The nib is offset so it is aligned with the lines you draw, and makes nice lines with clean edges.
 

Lathemaster

Member
Joined
Dec 27, 2006
Messages
476
Location
Land O Lakes, Florida, USA.
Finally found time to setup for photos.

This is the awesome pen I received from Darin (a.k.a. Fordwakeman).

Description:

Top is a brass era car (late teens early 20's - 1900's) Schrader valve (tire stem valve). He cut it down and soldered 2 nuts in place, between the nuts he glued gears and parts from an antique wind up wrist watch and then cast it in resin.

Bottom is a Kynoch 500 express nitro shell casing. Sometime in its life it was necked down to .458 caliber. This is a British safari load used to hunt Cape buffalo.

The nib is a .458 500 gr. Barnes triple shock copper hollow point.

The pen is setup to retract a mini Cross style refill by twisting the bullet.

Cheers
Mike
 

Attachments

  • Steampunk-full.jpg
    Steampunk-full.jpg
    119.2 KB · Views: 125
  • Steampunk-Closeup.jpg
    Steampunk-Closeup.jpg
    134.2 KB · Views: 142

Sprung

Member
Joined
Jul 1, 2014
Messages
773
Location
NE WI
Yesterday I received the pen that Harry (plan0_harry) made for me. WOW is about all I can say. This is a work of art! It's a Victorian kit from PSI that he did some serious modifications to. I keep taking this pen and just looking at it and all the little details and my pics definitely don't do Harry's work justice.

Thank you again, Harry!

Also, I hope John (juteck) posts a pic or two of the pen I sent him - I had such a busy and crazy week when I sent his pen out that I forgot to get pics before sending it to him! :eek:
 

Attachments

  • e.jpg
    e.jpg
    89.8 KB · Views: 111
  • d.jpg
    d.jpg
    89.7 KB · Views: 106
  • c.jpg
    c.jpg
    90.8 KB · Views: 126
  • b.jpg
    b.jpg
    92.2 KB · Views: 123
  • a.jpg
    a.jpg
    135.7 KB · Views: 147

plano_harry

Member
Joined
Jan 12, 2012
Messages
1,959
Location
Plano, TX 75093
Glad you liked it Matt! It was a lot of fun to create.

Here are some more pictures.

Yesterday I received the pen that Harry (plan0_harry) made for me. WOW is about all I can say. This is a work of art! It's a Victorian kit from PSI that he did some serious modifications to. I keep taking this pen and just looking at it and all the little details and my pics definitely don't do Harry's work justice.

Thank you again, Harry!

Also, I hope John (juteck) posts a pic or two of the pen I sent him - I had such a busy and crazy week when I sent his pen out that I forgot to get pics before sending it to him! :eek:
 

Attachments

  • Victorian Steam4 m.jpg
    Victorian Steam4 m.jpg
    242.7 KB · Views: 108
  • Victorian Steam m.jpg
    Victorian Steam m.jpg
    148.9 KB · Views: 111
  • Victorian Steam1 m.jpg
    Victorian Steam1 m.jpg
    233.3 KB · Views: 129
  • Victorian Steam2 m.jpg
    Victorian Steam2 m.jpg
    211.3 KB · Views: 103
  • Victorian Steam3 m.jpg
    Victorian Steam3 m.jpg
    182.1 KB · Views: 108

Sprung

Member
Joined
Jul 1, 2014
Messages
773
Location
NE WI
Yup, those pics are better than mine! :biggrin:

Thanks again, Harry! I really like all the details you put into this pen and how they all add up to make one awesome pen.
 

toddlajoie

Member
Joined
Feb 6, 2010
Messages
1,728
Location
Feeding Hills MA
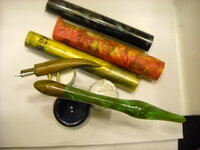
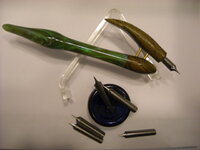
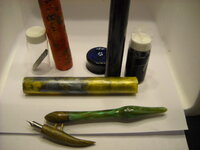
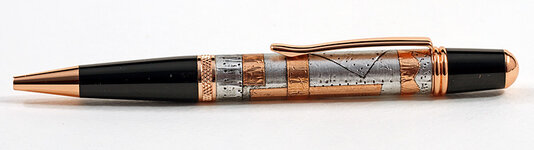
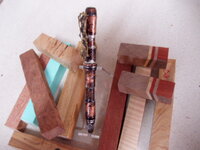
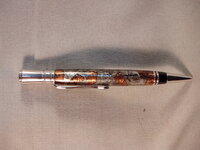
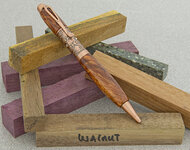
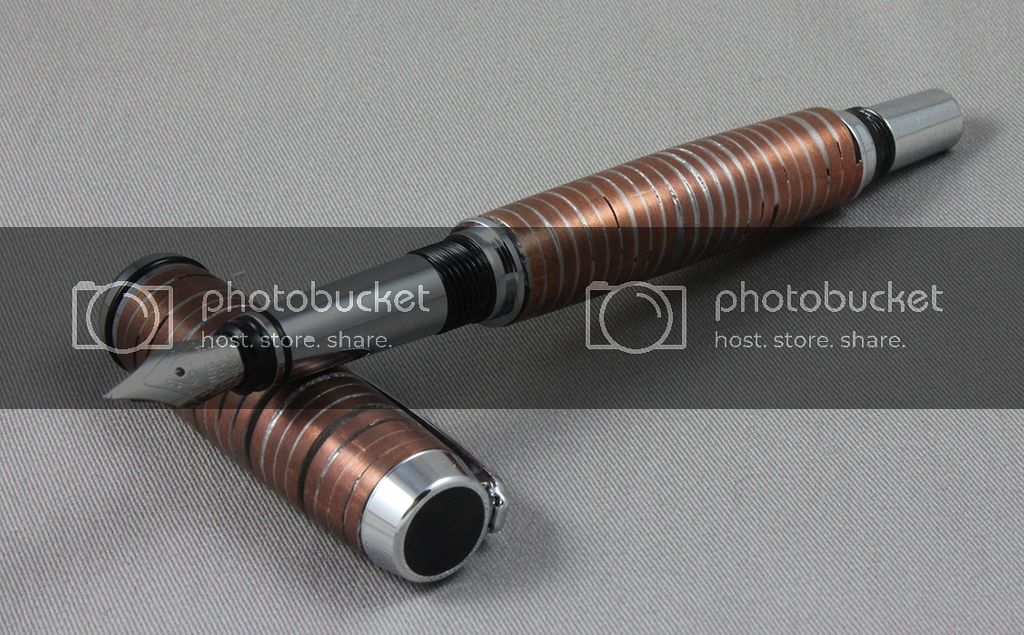
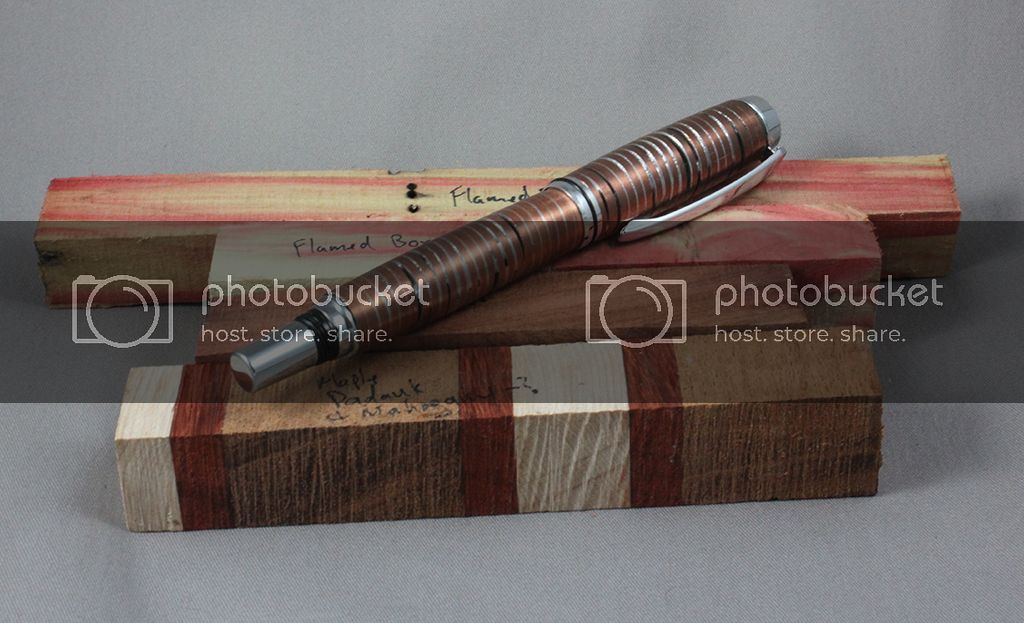
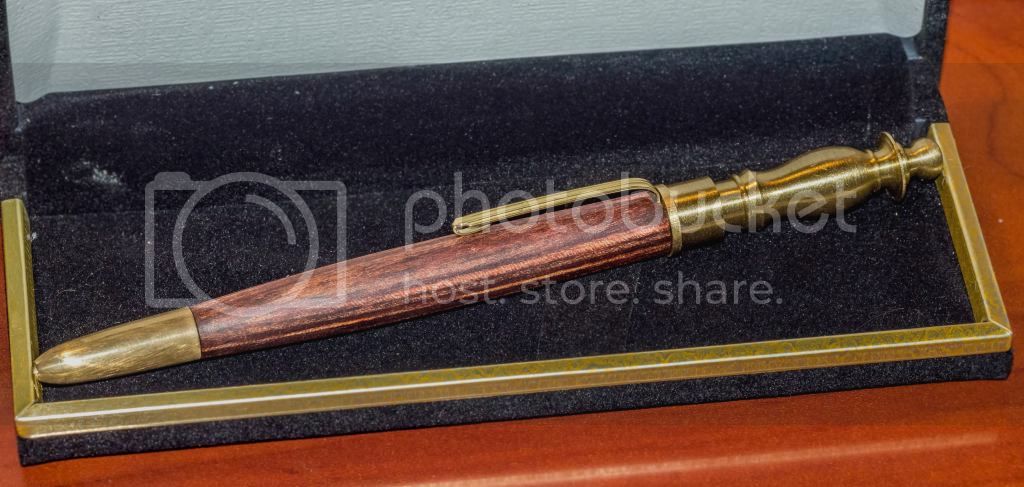
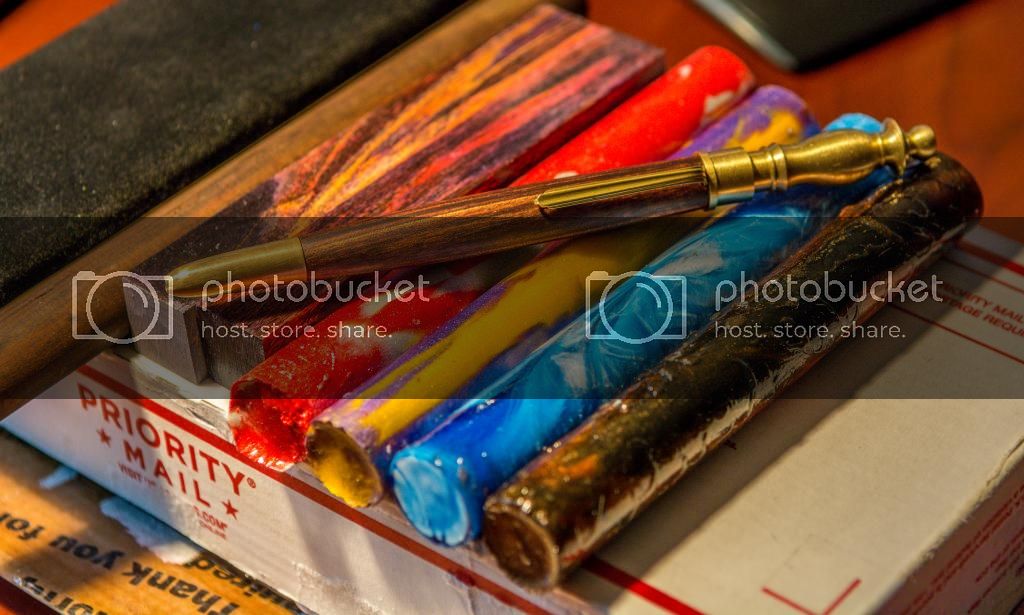
Jim, thanks for posting!! Glad you like the pen, here are a few photos I took before I sent it off.

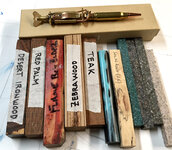
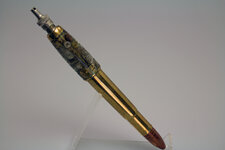
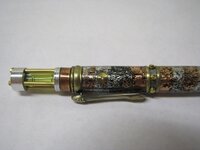
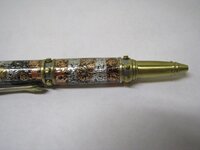
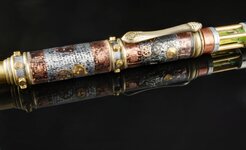
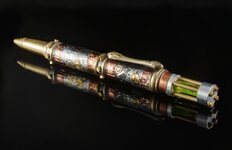
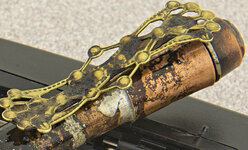
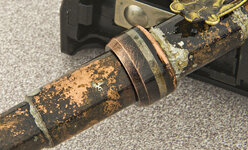
The pen is exactly what it looks like, REALLY bad homeowner plumbing, no paint. The copper is tubing and connectors bought at Home Depot, the silver is solder, and the black is burnt flux.

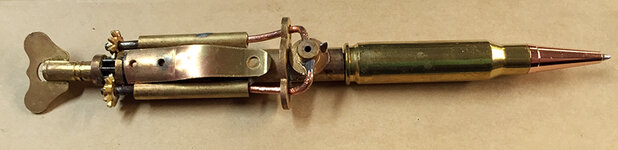
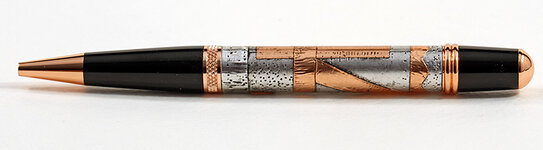
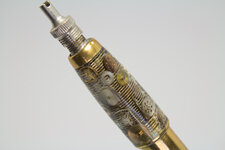
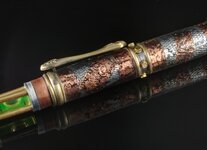
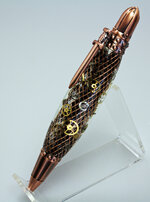
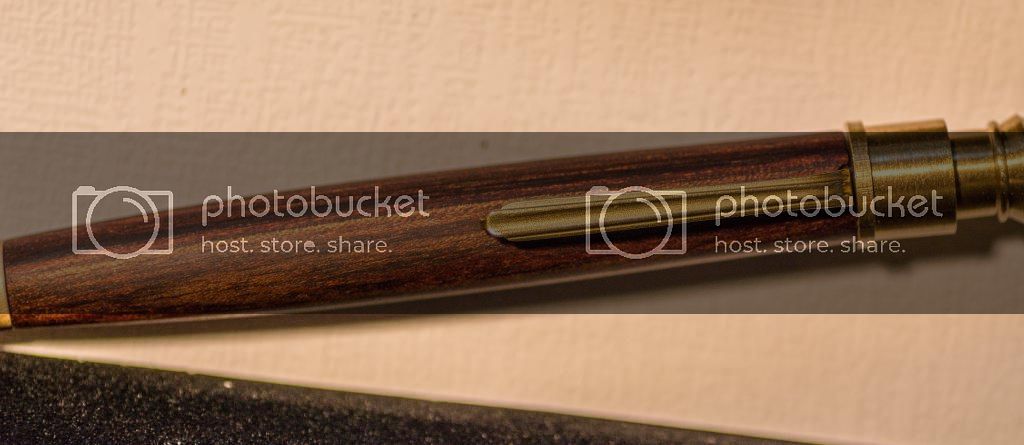
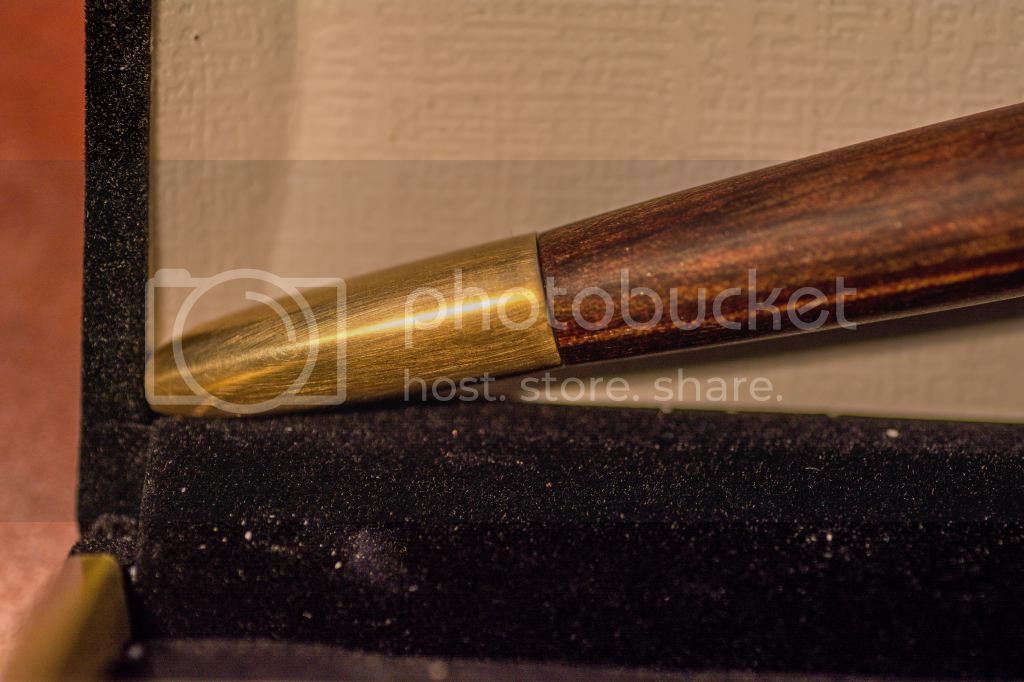
I took a 4 - 3/8" copper connectors and a few sections of 1/4" copper tube (which surprisingly fit together, as one is ID measured and the other is OD measured...) I put one of the connectors in the lathe and flaired one end of it out a bit so it came close to the size of the cigar Nib piece, Then soldered it, along with another connector, to a piece of the 1/4" tube so they were the right length for the lower barrel. Then I set myself to abuse the heck out of them. I WAY overheated them, rubbed extra flux around on it with a q-tip, touched it with solder in a few places, ran it under water to cool it down, and repeated the steps (several times). The burnt Flux is what makes the black... Did similar for the clip end, but rather than flair the crap out of one end to reach the centerband, I soldered a circle of scrap electrical ground wire which came surprisingly close to the centerband diameter.

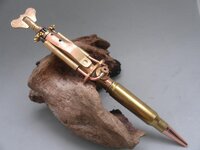
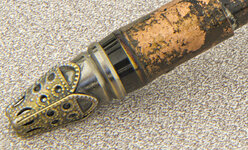
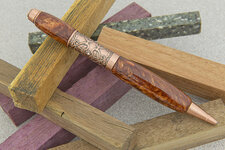
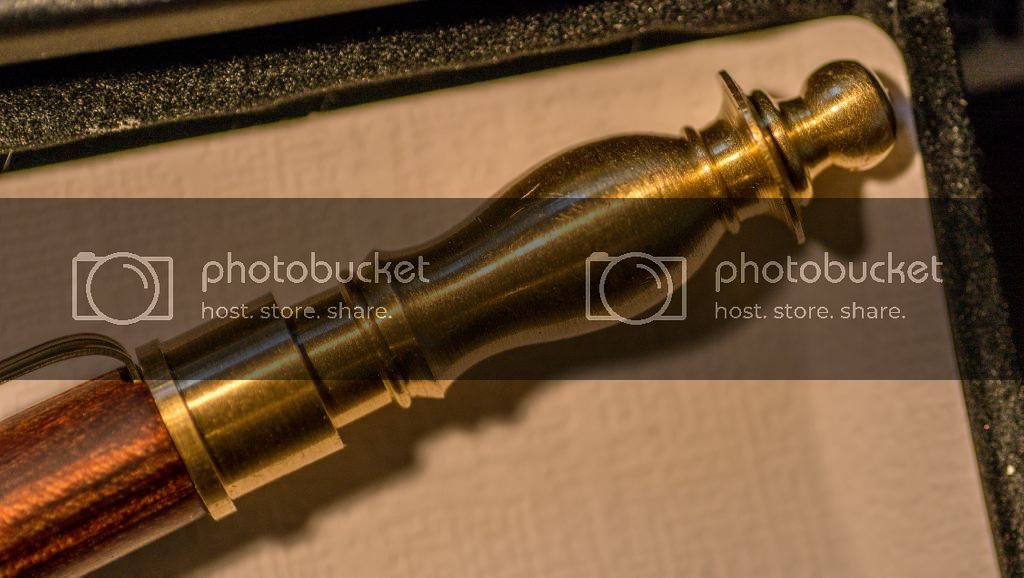
For the hardware, I found these little metal baskets in Michael's that looked like they would fit the nib pretty well, and they did, so I epoxied one on there. I also found an victorian style bracelet, so I disassembled it and bent one of the pieces to fit the clip curve, and epoxied that onto it. I put the lower centerband piece (the one the transmission screws on to ) on the lathe, and turned the outside down so it fit into the end of the 3/8" connector, and all of the hardware is epoxied into the copper (the brass tubes didn't quite fit in, so they were not used...) Then I took the hardware (a combination of Black Ti, Gunmetal, and standard gold kits ('cause I wrecked a few parts in the "trial-and-mostly-error" phase and did not have a complete kit of one plating left...) and ran them under the wire brush wheel, 'cause the shiny plating just did not work...

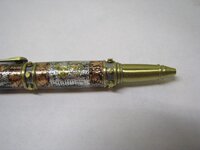
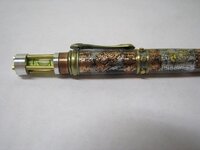
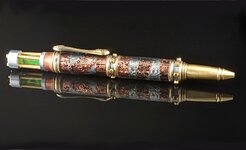
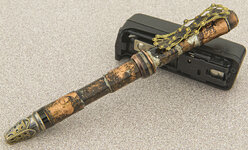
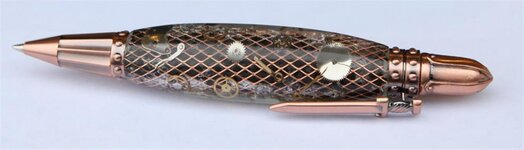
When it was all done, I absolutely LOVED how it came out, but it had one problem, it felt and looked great to me, but because it was bad copper plumbing, my hand turned black using it, and I figured it wouldn't take long to rub the coolness off, so despite the fact that I thought it felt fantastic, I had to give it a few coats of spray sealant to keep the black on the pen and off your hands. It changed the feel of the pen a bit, and gave it a bit of a shine (which hopefully will dull with some wear), which I wasn't thrilled with, but in the end, I think that's better than black fingers..

I had a blast making this, and I'm planning on making one for myself soon too, as I REALLY like how it came out.

attachment.php


attachment.php


attachment.php


attachment.php


I got my pen from Penmaker1967 the other day also, but haven't had a chance to take photos yet, so I will hopefully get to that on Monday and post it, I won't spill anything on it yet, but it is a very cool pen!!!
 

Attachments

  • Bad Plumbing Pen (Web) Top-Clip.jpg
    Bad Plumbing Pen (Web) Top-Clip.jpg
    156.4 KB · Views: 231
  • Bad Plumbing Pen (Web) Centerband.jpg
    Bad Plumbing Pen (Web) Centerband.jpg
    163.4 KB · Views: 249
  • Bad Plumbing Pen (Web) Nib.jpg
    Bad Plumbing Pen (Web) Nib.jpg
    216.2 KB · Views: 234
  • Bad Plumbing Pen (Web).jpg
    Bad Plumbing Pen (Web).jpg
    190.2 KB · Views: 237

toddlajoie

Member
Joined
Feb 6, 2010
Messages
1,728
Location
Feeding Hills MA
Here's the Pen I got from Todd Webb (aka penmaker1967), Its a fantastic acrylic blank that when I first saw it when I got home late at night, REALLY looked like some wood burls I've seen with some of the swirls, eyes, and sweeping grain.

It's been paired with a very cool hardware set that I was not familiar with called the Filibella. The Copper hardware compliments the blank incredibly well, and the filigree pattern adds to make it a very dynamic looking pen. It is very comfortable to hold, with the large metal section giving it a good weight in your hand, but still feeling very balanced.

He also managed to include some samples of some of my favorite woods, from Purpleheart to Walnut to Mesquite (a very cool, two tone blank at that!!), and a nice piece of what I think is Corian (which I have yet to try on a pen...)

When this pen is not in my pocket on my travels, it pen will sit on my desk and keep the other of my PITH trades company waiting for it's turn to come back around!!

Thanks for the excellent pen Todd!!!

attachment.php


attachment.php
 

Attachments

  • Pens 6417 (Web).jpg
    Pens 6417 (Web).jpg
    555.2 KB · Views: 337
  • Pens 6418 (Web).jpg
    Pens 6418 (Web).jpg
    139 KB · Views: 321

Lathemaster

Member
Joined
Dec 27, 2006
Messages
476
Location
Land O Lakes, Florida, USA.
So Darin's pen arrived at his home but he is on travel until Thursday. I did communicate with him and he asked that I post a picture until he can get back and do one as well.

THe pen I made for him is called "off the grid". It is made from a copper Knights Armor kit. The tube is covered with a black carbon fiber sleeve, then a fine wire mesh. Parts from several dismembered watches are attached to the mesh and the entire barrel is cast in clear resin. Turned and polished on the lathe (naturally).

Hope Darin enjoys it as much as I did making it. Was my first Steampunk effort and he was very understanding of the extra time I required to finish.

Cheers
Mike
 

Attachments

  • KnightsArmorOffTheGrid.jpg
    KnightsArmorOffTheGrid.jpg
    274 KB · Views: 146

Fordwakeman

Member
Joined
Mar 21, 2013
Messages
224
Location
Washington
So I'm the Lucky recipient of this awesome pen named "Off the Grid". Lathe Master did a great job and I Love it. The pen came in this neat leather pouch, and I also got some goodies (pen blanks). There was another blank but it's already made it to the saw, I'll have to show you as a finished pen.

Thanks again for this pen, Mike.
 

Attachments

  • offthegrid1 (Medium).jpg
    offthegrid1 (Medium).jpg
    72.8 KB · Views: 96
  • offthegrid2 (Medium).jpg
    offthegrid2 (Medium).jpg
    66.8 KB · Views: 71
  • offthegrid3.jpg
    offthegrid3.jpg
    185.6 KB · Views: 78

juteck

Member
Joined
Dec 10, 2008
Messages
861
Location
Charlotte, NC
PITH from Sprung (Matt Sprunger)

I'm quite late in posting this picture, since Matt got his pen to me a month ago. It is solid copper wire wound around the tubes then soldered, and turned using carbide tools. no finish on the copper will allow to patina to develop over time, and the gaps between the wire and solder give this pen a great steampunk look and feel. It is a heavy pen, and I'm just about to ink it up and take it for a test drive! Thanks Matt!

PITH2014fromMatthewSprungera_zps7cd50520.jpg


and thanks for the extra goodies too! I loved the camphor smell when I opened the box up!

PITH2014fromMatthewSprunger_zpsfe274046.jpg
 

mark james

IAP Collection, Curator
Joined
Sep 6, 2012
Messages
12,770
Location
Medina, Ohio
THIS IS COOL! Well Done!


I'm quite late in posting this picture, since Matt got his pen to me a month ago. It is solid copper wire wound around the tubes then soldered, and turned using carbide tools. no finish on the copper will allow to patina to develop over time, and the gaps between the wire and solder give this pen a great steampunk look and feel. It is a heavy pen, and I'm just about to ink it up and take it for a test drive! Thanks Matt!

PITH2014fromMatthewSprungera_zps7cd50520.jpg


and thanks for the extra goodies too! I loved the camphor smell when I opened the box up!

PITH2014fromMatthewSprunger_zpsfe274046.jpg
 

Sprung

Member
Joined
Jul 1, 2014
Messages
773
Location
NE WI
John, thanks for posting pictures - especially since I forgot to take some before sending it to you! Real glad you like the pen! Had a lot of fun making it for you - and overcoming the challenges I faced during the making of it.
 

pesto126

Member
Joined
Sep 29, 2013
Messages
91
Received my pen from Jonathon (Brooks803) and what a wonderful work of art! I'll let Jonathon explain how he made it as I am very curious - the way the clip installs into the wood is most intriguing and the coves and beads on the pen top is very detailed! The pen is weighted perfectly as well - heavy from the brass but not too heavy where your hand gets tired from usage. Very nicely done...

Jonathon also included some wonderful blanks that I'm sure I am going to have a great time turning - my daughter has already claimed the orange/brown swirl!

Here are my photos taken quickly this morning.. thanks again Jonathon!!

NIKOND7100_7260.jpg


NIKOND7100_7253.jpg


NIKOND7100_7255.jpg


NIKOND7100_7254.jpg


NIKOND7100_7263.jpg
 
Last edited:

Brooks803

Member
Joined
Sep 13, 2009
Messages
5,632
Location
Aiken, South Carolina
I'm happy you like it Andy! I wanted to go a bit outside of the normal steampunk look. My original plan was to use copper, but since I was already so far behind I opted for brass.

Now about that brass finial....sadly....I did not make that :rolleyes:. When I was reading up on some articles by well known steampunk artists I saw that they find a lot of their material from hole in the wall hardware stores. They take apart thermostats and other things and repurpose them. So off to the downtown hardware store I went. I didn't find much that was usable for pens except that finial. It's actually a lamp pull handle. It was a real PITA to mount on the lathe to drill out for the twist mechanism! Since it wasn't super polished I matched it with the brass nosecone that I did turn. I did make and send along a second finial made of ebonite just in case you wanted to carry the pen around. It's much lighter that way and will fit in a shirt pocket.

The clip recess was also a pain. It's held in place by the twist mechanism, but I had to turn away a part of that to get the clip to seat properly. Plus to get the refill to stick out enough. The clip itself came from an old vintage pen I bought years ago.

The material...it looks like a rosewood huh? It's not real wood though :cool:. It's some sort of composite that might have some wood in it, but it felt more like a graphite composite more than anything else. I got it from a friend that stopped by the shop one day. I sent a little rod of it along with the blanks for you to try out. It takes threads very well. You have to be really patient in drilling it though. It gets hot FAST! So take your time. Also enjoy the other blanks!

Here are a few pics I took before shipping it out:


Signed-In Members Don't See This Ad

MIKL

Member
Joined
Jul 5, 2009
Messages
439
Location
Sale, Victoria, Australia
Heres the pen/s i got received from Jim Burr

Jim had a problem with the first attempt being the Panache, i really like what he was trying to achieve... keep trying mate i reckon it would look good

so he went to Plan B (its amazing how many times i fall back on Plan B as well:)), a Cigar dressed in foil.... well done mate... works well and my favorite style of pen for work as well :)

also he threw in some blanks... did i mention favorites... BUCKEYE BURL!!!! along with some other great bits of timber

thanks very much Jim

MIK
 

Attachments

  • DSCN5329edt.JPG
    DSCN5329edt.JPG
    158.3 KB · Views: 118
Top Bottom