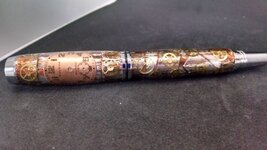
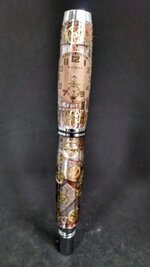
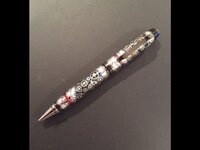
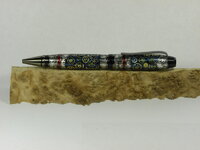
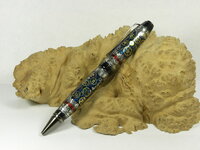
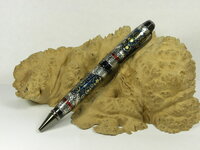
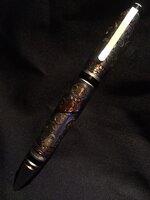
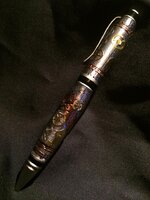
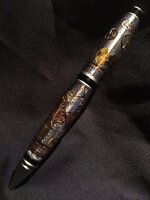
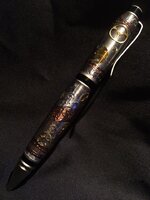
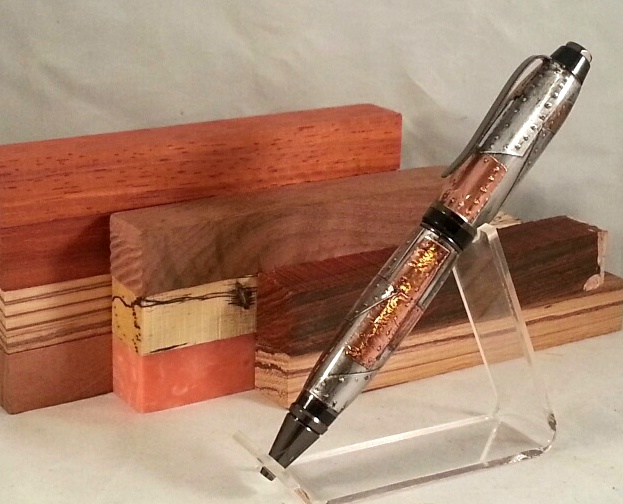
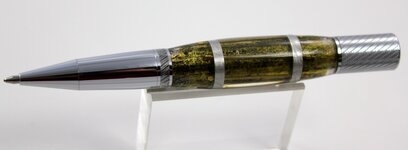
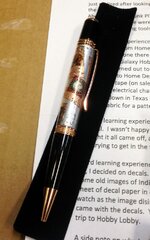
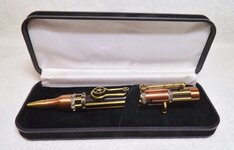
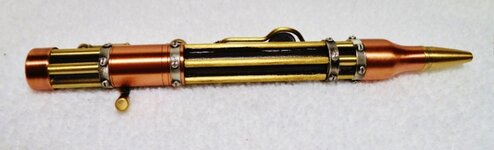
They say good things are worth waiting for, and this was no exception !!!! JasonC sent me this fantastic pen from Hawaii that he had modified with his own designs and ideas. It starts with a PSI Steampunk kit in antique copper and brass and spirals upward from there. Tubes have been painted black with brass ribs added. Several gears and tubes were also added on raised valves. Sitting in the black velvet case, realy makes this pen stand out !!! He said plan A didn't work out, and this was plan B. He is defnitely working with a different set of letters than I do !!!! The blanks he sent are an assortment of Hawaiian woods including several types of Koa, Kiaat, and Mallee. Thank you Jason for the outstanding pen and blanks. Jim S
Jim,
I couldn't type much earlier - was in town with the family and checked the phone while waiting for the girls to try on clothes.

Now that I can type somewhat efficiently...
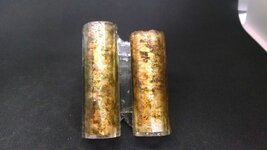
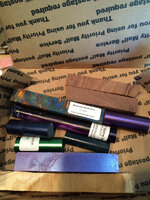
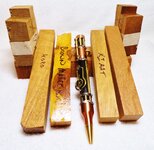
The Koa is obviously from here in Hawaii. Actually from a neighbor - his wife's family has a ranch on the Big Island. The pre-cut, bundled blanks are some he cut and gave me. I've got quite a bit (a lot, actually) so I decided to pass some along.
The Brown Mallee is Australian.
The wood I wrote Koko on is also known as Lebbeck -
also from Australia.
The Kiaat is from
South/Central Africa.
I can't remember if I put any other species in there.
I hoped you'd like the pen. I felt like crap having to make that one because the original I idea I had became insanely more complicated than I had time for. The best laid plans are nothing without time to execute them.
Reality is there never was a Plan B but I was forced to come up with one.
But since you mentioned Plan A...
My original idea wasn't a steampunk pen, but instead a steampunk pen holder. The pen was to be a Princeton kit made from Eucalyptus burl. That pen would sit inside a rocket - also made from Eucalyptus burl. The pen, when inserted in the rocket body, would form the tip of the rocket. In addition, the weight of the pen would close a microswitch that would turn on LEDs inside the rocket and illuminate various parts of the pen holder.
The reasoning was that I didn't want to cast blanks because I felt a lot of people would do that. I also didn't want to steal Simon's style (even though it's, in my opinion, THE way to go). I wanted to do something different. I also didn't want to make a wild pen that wouldn't be comfortable/enjoyable to use. I figured I could make a nice pen (the Princeton) and instead of focusing my effort on the pen, put the effort into the pen holder. I thought if I made a cool pen holder the pen would be more apt to actually be used/displayed instead of being stored away in a case.
While the plan worked in my head (and I know it eventually will when I find time to fully execute it) I just didn't have time to complete it. Main issue is packaging. There's a lot going on in very little space.
This was the 1:1 drawing I did to plan everything out. You can see the Princeton on the right. 1:1 drawings are awesome because you can scan it into the computer to save and print copies for making templates.
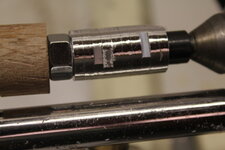
Spent 5.56 cartridges for booster rockets with red LEDs. Brass tubes would hide the LED wiring and attach the boosters to the main body. Never got farther than this first test piece with one hole drilled.
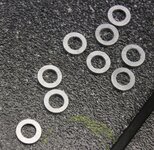
I made eight brass fins on the router using the template made from a copy of the drawing, some ply, spray adhesive, and scroll saw.
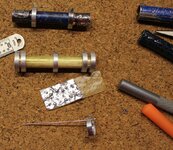
Scuffed some Lexan and edge lit the lexan with blue LEDs. Bench test.
Made this guy. A porthole.
I then test fit a green LED inside the rocket body.
...and that's as far as I got. :frown:
The unit would've had an internal 12V battery, the weight-actuated micro-switch, another on/off switch, 12 blue LEDs, four red LEDs, one green LED, and a bit of wiring. Then all the aging/assembly/finishing.