Learning to cast, take 2

Signed-In Members Don't See This Ad

Russknan

Member
Joined
Mar 13, 2012
Messages
537
Location
Nanuet, NY
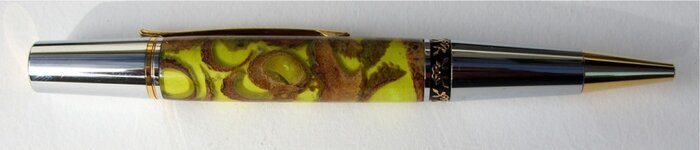
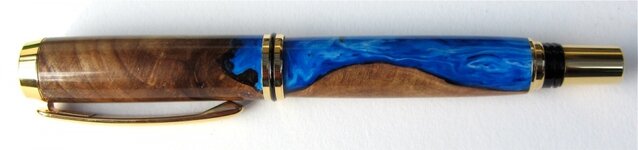
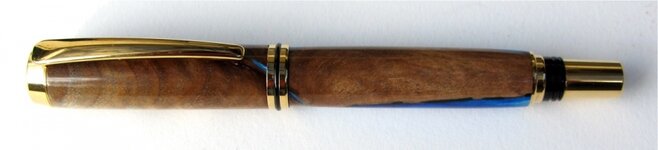
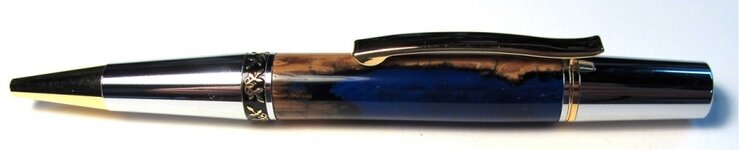
This is the second of what will be 3 quick threads. I didn't want to post them all together. Here are some subsequent pours which have turned out to be more successful than the "inclusion" ones in the previous post. One Aero pen is made of beech and Alumalite, The other Aero is an acorn cap inclusion - with an insufficient number of caps, in my opinion. And the Jr. Gent 2 is a walnut hybrid. One thing I have found with the hybrids is that painting the blank before tube insertion with spray (white paint in this case) can cause the paint to work its way into tiny holes in the wood and leave unsightly white dots showing when the blank is turned down to size. In those cases, I have used a dental pick to dig out the spots, and then sanded using BLO to make a slurry, trying to jam some of the slurry into the holes. I got it to work that way, but if there is a better method, please let me know. I'm thinking that I may need to paint the tubes with a Q-Tip, but wonder whether I might still have the problem. Any suggestions, comments, etc. would be welcomed. Russ
 

Attachments

  • IMG_2739.jpg
    IMG_2739.jpg
    56.5 KB · Views: 239
  • IMG_2734.jpg
    IMG_2734.jpg
    61.2 KB · Views: 241
  • IMG_2733.jpg
    IMG_2733.jpg
    54.4 KB · Views: 180
  • IMG_2697.jpg
    IMG_2697.jpg
    43.2 KB · Views: 206
  • IMG_2690.jpg
    IMG_2690.jpg
    45.3 KB · Views: 174
Signed-In Members Don't See This Ad

Justturnin

Member
Joined
Aug 19, 2011
Messages
2,235
Location
Houston, Tx
For the caps, don't be scared to slowly stir the caps to flip them around and let the resin in and the trapped air out. Also, pour slowly, if you flood the mold you trap air in a cast like this.
 

Charlie_W

Member
Joined
Nov 16, 2011
Messages
5,918
Location
Sterling, VA USA
Those look great! Pic #2 looks like the resin would be moving and churning around in person! #4 & 5 have a beautiful rich blue.

After you drill the blank, how about dribbling some thin CA in the tube, let dry and redrill before painting? Worth a try. That may fill the interior pores before painting.
 

crokett

Member
Joined
Dec 4, 2012
Messages
610
Location
Mebane, North Carolina
I'm confused why you paint the blanks of a wood pen. The only blanks I paint are the acrylics. The only issue I have had with seeing brass on a wood pen is when the blank blows up (like with black palm). Sometimes with wood at the ends of the tube if the hole that is drilled isn't crisp you can see epoxy after the blank is turned down. My solution to that is cut the blank a little long, then when I put the tube in leave at least 1/16" of wood at each end of the tube.
 

healeydays

Member
Joined
Nov 30, 2012
Messages
1,057
Location
Bedford NH
I'm confused why you paint the blanks of a wood pen. The only blanks I paint are the acrylics. The only issue I have had with seeing brass on a wood pen is when the blank blows up (like with black palm). Sometimes with wood at the ends of the tube if the hole that is drilled isn't crisp you can see epoxy after the blank is turned down. My solution to that is cut the blank a little long, then when I put the tube in leave at least 1/16" of wood at each end of the tube.

These pens aren't wood pens.

From what I see the pen being discussed is a mutt so you have a mix of wood and resin so painting is prudent...
 

Russknan

Member
Joined
Mar 13, 2012
Messages
537
Location
Nanuet, NY
Thanks, all, for the kind comments and suggestions. I will try stirring the caps. And I do like the look of the resin. I'll certainly do more. Yup, the painting is for the resin parts. CA in the hole before painting sounds like a great idea! Russ
 
Top Bottom