KMCloonan
Member
I'm not sure where I got this idea, but I have searched and not found anything like it.
I have been making my own hybrid blanks for a couple of years now, with decent results. I sometimes struggle to find reasonably priced live edge burls. I started out simply cutting a block of Cherry burl using my bandsaw into two "S" shaped pieces that I was going to cast into some sort of hybrid.
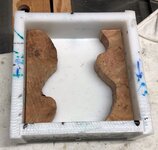
Then I got the idea to use my bandsaw to make the curves more jagged, simulating more of a live edge. This turned out pretty cool, but it made the two blocks of cherry quite a bit thinner, leaving a large open space in the mold to fill with resin. I don't think hybrid blanks with small pieces of burl at each end looks very good, so I decided to move the two chunks of burl closer together to reduce the resin field. I used a couple strips of oak as backer boards to hold the cherry in place (along with some hot glue.
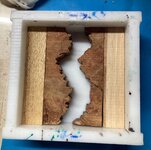
This looked sort of cool - like a river runs through it.... Then I started thinking about making shorter hybrid blanks....
So I poured my resin and put it in the pressure pot
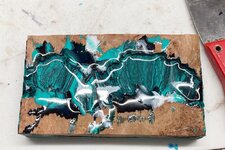
Once I cut away the oak backer boards, the remaining hybrid block was 3" tall x 5.25" wide.
I took the block to my bandsaw and cut normal width (but much shorter) hybrid blanks
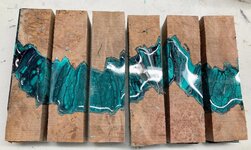
They looked pretty cool
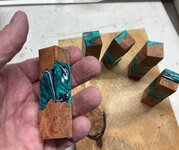
I threw one on my lathe and turned the blank down and threw it into a LeRoi kit.

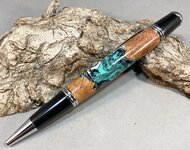
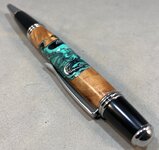
I have not seen a lot of single barrel pens with a "Wood-Resin-Wood" blank. For most single barrel pens, you cut a hybrid blank in half, so you have a "Wood-Resin" blank (or a "resin-wood")
I like the look of this pen with the mini-hybrid blank. The upside is you use less material. The downside is that it takes the same amount of work to prep and pour the hybrid blank. I am going to try this again in a larger mold, and make more in one pour.
Also, I am really happy with the "Fake" live-edge I made by cutting the edge of the burl board into jagged sections.
Thanks for reading this long post. Comments and critiques welcome.
I have been making my own hybrid blanks for a couple of years now, with decent results. I sometimes struggle to find reasonably priced live edge burls. I started out simply cutting a block of Cherry burl using my bandsaw into two "S" shaped pieces that I was going to cast into some sort of hybrid.

Then I got the idea to use my bandsaw to make the curves more jagged, simulating more of a live edge. This turned out pretty cool, but it made the two blocks of cherry quite a bit thinner, leaving a large open space in the mold to fill with resin. I don't think hybrid blanks with small pieces of burl at each end looks very good, so I decided to move the two chunks of burl closer together to reduce the resin field. I used a couple strips of oak as backer boards to hold the cherry in place (along with some hot glue.

This looked sort of cool - like a river runs through it.... Then I started thinking about making shorter hybrid blanks....
So I poured my resin and put it in the pressure pot

Once I cut away the oak backer boards, the remaining hybrid block was 3" tall x 5.25" wide.
I took the block to my bandsaw and cut normal width (but much shorter) hybrid blanks

They looked pretty cool

I threw one on my lathe and turned the blank down and threw it into a LeRoi kit.


I have not seen a lot of single barrel pens with a "Wood-Resin-Wood" blank. For most single barrel pens, you cut a hybrid blank in half, so you have a "Wood-Resin" blank (or a "resin-wood")
I like the look of this pen with the mini-hybrid blank. The upside is you use less material. The downside is that it takes the same amount of work to prep and pour the hybrid blank. I am going to try this again in a larger mold, and make more in one pour.
Also, I am really happy with the "Fake" live-edge I made by cutting the edge of the burl board into jagged sections.
Thanks for reading this long post. Comments and critiques welcome.
