Hello Anne and Greetings from Nebraska.
Drilling:
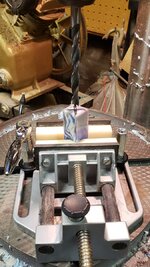
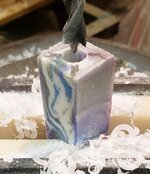
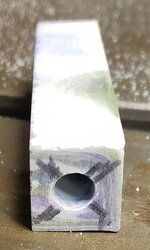
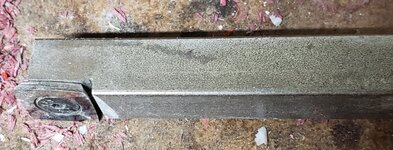
I use standard drill bits or special bits designed for drilling acrylic materials. For two barrel pens I typically cut the blank in half, leaving plenty of extra length. Then, I drill the blank deep enough to accept the tube but not all the way through. Drill bit catches on the exit hole are one of the main causes for cracking the blank. After drilling, I saw off the extra length as scrap. When drilling it is imperative that you clear the flutes on the drill often, like after each quarter of an inch. It is also helpful to pause when about half way through to let the drill bit and inside of the blank cool down. Heat buildup is a big culprit in having blanks crack and blow out when they are being drilled.
Gluing:
Make sure to scuff the tubes before gluing. I also clean mine with denatured alcohol after scuffing to make sure there is no oil or residue on the tube that could hamper adhesion. I use epoxy to glue the tubes into all of my plastic blanks. Before inserting the tube I make sure that all of the surfaces of the tube are covered will with glue. This is especially critical if the wall of the blank is going to be thin after it is turned. (Oh, yes, I almost forgot - paint the tube and the inside of the blank if there is any chance that the material is semi-transparent so that the tube doesn't show through after it is glued in).
Turning:
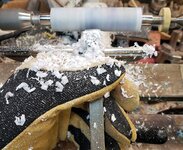
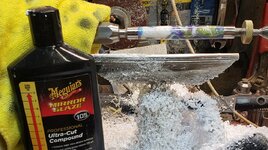
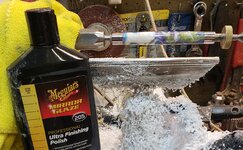
Inlace is very brittle so don't be to aggressive with cutting. I have been successful with carbide tools, but I have been using negative rake carbide cutters because they make less aggressive cuts. It is easy to know if you are being too aggressive because the blank will chatter and chip out. I also turn my lathe down to about 2000 RPM when I work with Inlace. I stop well proud of the bushings and get to the final shape by dry sanding with a relatively coarse 150 grit. After I reach 800 grit I turn to wet sanding using micromesh for finishing.
Inlace and other brittle plastics require a lot of patience compared with wood - especially in drilling and turning/sanding.
I have a lot of Inlace blanks in my cache because of the huge variety and what beautiful pens it can produce, however, I also have a lot of Inlace blanks in my cache because it is not my preferred material for plastic blanks. My preferred blank material is RhinoPlastic as it is less brittle and easier to turn. Alumilite blanks, typically custom made, are some of the easiest turning material for plastics that I have ever used. If you want to try Alumilite I highly recommend DiamondCast brand Alumilite blanks produced by McKenzie Penworks.
Having cracks and blowouts can be very frustrating, but with patience and practice I'm sure you will develop a regimen that works for you.
Regards,
Dave
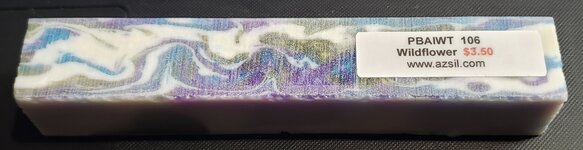
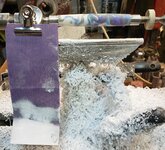
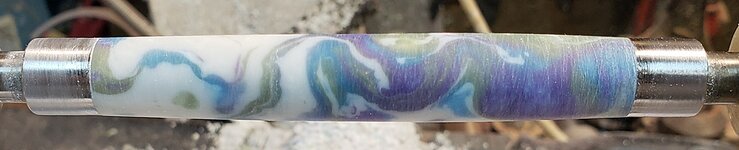
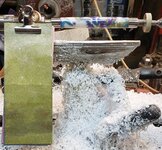
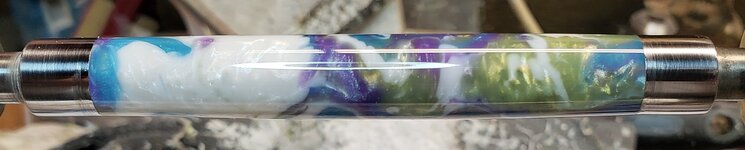
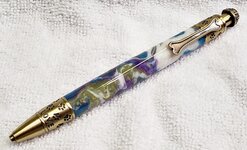
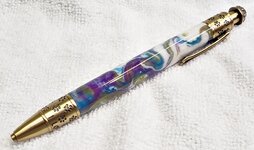
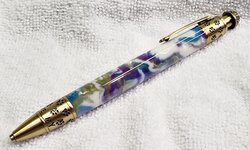
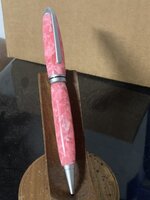
PS Here is a picture of the last Inlace pen I made. The blank was called Peacock. The back side (bottom photo) had much more purple in it than the front (clip) side.
One Pen - Three different views as rotated:
View attachment 244059View attachment 244060View attachment 244061