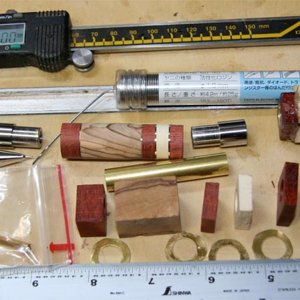
Segmenting: Glue first then drill, or drill first then glue?

Signed-In Members Don't See This Ad

jrista

Member
Joined
Aug 12, 2021
Messages
2,241
Location
Colorado
Question is in the title. So far, I've mostly glued my blanks together, then drilled them out. However, with metal layers, that always seems to be hard. Recently, someone shared a video on how to drill basically perfect holes in metals by using some folded over pieces of fabric, which seems to provide the necessary pressure, and prevents the metal from being yanked up the flutes. That got me thinking, have I been doing this all wrong? Should I be drilling first, then gluing? I've actually tried that a few times, using the tube as a guide when gluing, but that also seems to greatly complicate getting the tube glued in properly.

Or is it more of a matter of, sometimes you glue then drill, and other times drill then glue, according to the kind of blank?

I'm about to try my hand at some more interesting segmenting mostly with resins and metal layers. A lot of the segments will be angled. The thought about drilling first then gluing because of that video on how to drill perfect holes in metals got me thinking about that, however I have no clue if there is any way to do that with angled segments. Unless I waste a lot more material, that is...
 
Signed-In Members Don't See This Ad

Drewby108

Member
Joined
Apr 30, 2022
Messages
360
Location
Spokane, WA
If your pieces are square to the drilled hole, then I'd drill first and build directly onto the tube. If they're angled, I think that becomes case by case based on if you can make/have a drill guide jig.
 

KenB259

Member
Joined
Dec 24, 2017
Messages
3,582
Location
Michigan
I've done it both ways, both work, but I generally build the blank and drill last. Some would be impossible to drill first, such as herringbones, scallops, come go mind. I think it probably just comes down to personal preference.
 

Alan Morrison

Member
Joined
Jan 15, 2019
Messages
3,094
Location
N Ireland
I've done it both ways as well and it generally depends on the design. Veneers are not too easy to drill first and if assembling angled pieces I would think that you would have to drill first anyway and then cut the angle.
 

leehljp

Member Liaison
Joined
Feb 6, 2005
Messages
9,331
Location
Tunica, Mississippi,
Both work, but the outcome requires careful planning, plenty of patience and good preparation.

For Gluing first: In some instances it requires the knowledge that it IS going to come apart when drilling! So the question then becomes - "How do I keep it from coming apart?" The first person I remember that put this thought into a post was a fellow that passed away long ago, (Eagle) and he mentioned that one complicated segment that he expected to come apart before turning from end to end - he wrapped it heavily with thread/string and CA'ed it from end to end. Then, he started turned an end section; added string to the just turned section and CA'd that. Then turned another part.

Later, some geniuses here suggested using gauze to wrap with several layers and CA that. And that is where we are today! This strengthens the blank considerably and allows drilling while holding it together. Basically a hard cocoon! Eagle did this to prevent his segments from coming apart during turning.

But, This gauze works also for making and gluing segments together and then drilling. But precision marking on the ends for drilling is a necessity. However, this should keep a segmented blank from exploding or coming apart. IN taking care like this - it does not give one the freedom to just drill away. As much care must be taken in the drilling as in the prevention stage with gauze and CA. This will at least increase the odds of finishing the drilling without the segments coming apart.

My Segments glued first and then drilled:

For Drilling First - must do dry runs in some case to make sure all the segments do not come up short on the tube, or stick over the ends of the tube, which will make the end segments out of proportion. Once drilled, careful measurements of each piece, then with 20 - 30 minute epoxy (for me) allow me to glue and put the segments together, and clamp end to end. See below.

My Drill first and then glue:
Segment parts and steps

Completed:

Overall, it depends upon the individual situation, and the way we have witnessed the creativity over the years, each new segment development will probably require a new twist to be considered to accomplish the desired end results.

I can see your mind churning with ideas! Can't wait to see them.
 
Last edited:

jttheclockman

Member
Joined
Feb 22, 2005
Messages
19,158
Location
NJ, USA.
Another segmenter here. Hank summed it up very well. As the others I too have done it both ways and no right or wrong way but there are advantages doing it a certain way depending on the pattern of the segmentation. When it is a basic design as just rings on top of one another I always drill first and stack them. I use long open epoxy to glue segments so plenty of time but I always dry fit before hand. If there is a specific pattern to the blank you need to center the tube within the pattern so you cut your pieces as close as possible but still leave abit for squaring when dried. As other mentioned if doing celtic knots and scallops and gisi designs then drilling is secondary. Now a pen like Hank shows with the stripes I have done both ways also because I make my stripes a couple different ways. Mainly using a router on a round blank which is easily drilled using a collet chuck to hold it true.

Have to say i have been here for quite some time and every time I see the gauze thing show up I would love to see it in action because I still do not know how this is done. The reason I say this is because when you wrap string or gauze around a blank to be drilled, how are you holding it to be drilled. If you drill on a lathe what chuck do you use? If you drill on a drill press what holds the blank dead center when drilling? Usually it is a very intricate design that needs extra support to drill but if you wrap it then how do you hold it and still drill dead center of that pattern.? I would be interested to hear from someone that actually does this and if you have photos would even be better.
 

KenB259

Member
Joined
Dec 24, 2017
Messages
3,582
Location
Michigan
Have to say i have been here for quite some time and every time I see the gauze thing show up I would love to see it in action because I still do not know how this is done. The reason I say this is because when you wrap string or gauze around a blank to be drilled, how are you holding it to be drilled. If you drill on a lathe what chuck do you use? If you drill on a drill press what holds the blank dead center when drilling? Usually it is a very intricate design that needs extra support to drill but if you wrap it then how do you hold it and still drill dead center of that pattern.? I would be interested to hear from someone that actually does this and if you have photos would even be better.
I would like to see this technique in action too. I have kind of used this technique, but without the gauze. I always make my blanks square to within just a few thousands. Before drilling, on a few, I have glued thin strips of wood on all 4 sides, all the same thickness so the blank is still square for drilling and always on the lathe. I gave up drill press drilling blanks years ago. I too can't get my head around on how you could drill a straight hole through a blank wrapped in gauze.
 

egnald

Member
Joined
Jun 9, 2017
Messages
3,148
Location
Columbus, Nebraska, USA
From my somewhat limited experience with segmenting, the drill bit can also have a lot to do with success or failure when it comes to drilling segmented blanks, especially those with mixed materials.

I have never been successful using a brad point drill in a segmented blank. The outside spurs always seem to catch at material transitions and tear things apart. I have had the best luck with good, sharp, standard twist drills.

The rule of thumb is that the larger the point angle on the drill bit, the more "grabby" it is as it is shearing away material. So, if I have one I will use a 60-degree bit (typically made for drilling brittle materials like plastics). The next best would be a 90-degree, followed by 118-degrees, and lastly 135-degrees.

Dave

PS If I think a blank needs to have some kind of reinforcement for drilling, I cut a couple of lengths of outside corner moulding and epoxy them onto the blank. That keeps the whole thing relatively square for clamping while still acting as a splint to keep the individual pieces held together better.
 
Last edited:

jttheclockman

Member
Joined
Feb 22, 2005
Messages
19,158
Location
NJ, USA.
I would like to see this technique in action too. I have kind of used this technique, but without the gauze. I always make my blanks square to within just a few thousands. Before drilling, on a few, I have glued thin strips of wood on all 4 sides, all the same thickness so the blank is still square for drilling and always on the lathe. I gave up drill press drilling blanks years ago. I too can't get my head around on how you could drill a straight hole through a blank wrapped in gauze.
I too have given up drill press drilling. probably drilled a few when I first started because I bought that clamp thingy because that was what I read about here. But now always drill all blanks on lathe now. I have not run into a blank yet that I need to reinforce except I have one sitting on my bench that needs alot of help if I am going to drill that one. What I am planning on is if I ever get to it, I want to encase it in resin. I made up a tube that has centers on it and I drilled center holes in the blank to match. Insert dowels to hold center. In theory it should work but who knows. I thought about the popsicle stick to the outside method and may still go that route. Not sure. I put that and a couple other blanks on the side and they have been collecting dust. Too chicken to drill and turn them I guess. :)

Brad point bits just are not good for segmenting work especially if using different materials. Sharp bits are a must as well as good clearing and keeping bits cool.
 

jrista

Member
Joined
Aug 12, 2021
Messages
2,241
Location
Colorado
Have to say i have been here for quite some time and every time I see the gauze thing show up I would love to see it in action because I still do not know how this is done. The reason I say this is because when you wrap string or gauze around a blank to be drilled, how are you holding it to be drilled. If you drill on a lathe what chuck do you use? If you drill on a drill press what holds the blank dead center when drilling? Usually it is a very intricate design that needs extra support to drill but if you wrap it then how do you hold it and still drill dead center of that pattern.? I would be interested to hear from someone that actually does this and if you have photos would even be better.
This is exactly the question I have. I usually have to trim my segmented blanks to square, so I can hold them properly in my pen chuck, which is the only way I know of to get a perfectly dead-centered hole. With gauze...or string, I imagine getting good centering would become a lot harder.
 

KenB259

Member
Joined
Dec 24, 2017
Messages
3,582
Location
Michigan
That'sThis is exactly the question I have. I usually have to trim my segmented blanks to square, so I can hold them properly in my pen chuck, which is the only way I know of to get a perfectly dead-centered hole. With gauze...or string, I imagine getting good centering would become a lot harder.


That's why I always build them square from the get go. The lathe finds the center for me :D
 

jttheclockman

Member
Joined
Feb 22, 2005
Messages
19,158
Location
NJ, USA.
I do the same as Ken. Most my segmented blanks are built off square blanks. But it is not the only way. I also build blanks from the round when I am using my router. As Ken said the lathe will find center But to make sure on a square blank do the cross corner X and never go wrong. When I make blanks from the round I turn an exact round rod to the size I want which is always oversized. We all should know how to turn a perfect round rod:) Here are some examples of starting with a round rod. I made the blank, drilled the holes and then cut the pieces to length in that order. Then stack glued to tube using T88 epoxy.

IMGP0846.JPG
Copy of IMGP0881.JPG
 

NGLJ

Member
Joined
Sep 15, 2021
Messages
301
Location
Surrey BC, Canada
The only time that I have done drilling on the drill press is to drill at an angle. For center line drilling I always drill on the lathe. I always drill from both ends to avoid any drill exit issues. I start with a drill size smaller than the final size, and gradually increase drill sizes. I use parabolic drill bits, which I find clear the swarf efficiently. So far I have not aspired to create anything as impressive as the pen from John Terefenko. Perhaps one day :).
 

egnald

Member
Joined
Jun 9, 2017
Messages
3,148
Location
Columbus, Nebraska, USA
Just to reiterate what John (jttheclockman) stated about brad point drill bits not being good for segmenting...

Unfortunately there is often a general statement made about the use of Brad Point drill bits, also referred to as Spur Point or Doweling Bits. That being that they are the best drill for drilling wood. The statement is essentially correct, Brad Points drill bits do have some advantages for drilling wood - drilling wood across the grain that is. Brad Point Bits simply do not work well when drilling into the end grain which is most typical for drilling pen blanks.

For cross grain drilling, the small center point of a Brad Point Bit helps keep the bit from wandering as it initially enters the wood and the spurs on the outside create a clean sided hole including the entry hole. However, when drilling into end grain the spurs drag in the end grain which can cause the bit to deflect. The tiny point of the bit can also drift by following the wood's end grain. In either case, the drifting or wandering of the bit can be problematic for drilling deep holes through an end grain, which is also typical for drilling pen blanks. On segmented blanks, the spurs frequently catch on materials whenever there is a material transition. The resulting shear forces can be problematic and frequently tear the segments apart.

Standard twist drills are much less prone to causing problems when drilling deep holes into the end grain of wood.

Dave
 

jrista

Member
Joined
Aug 12, 2021
Messages
2,241
Location
Colorado
Both work, but the outcome requires careful planning, plenty of patience and good preparation.

For Gluing first: In some instances it requires the knowledge that it IS going to come apart when drilling! So the question then becomes - "How do I keep it from coming apart?" The first person I remember that put this thought into a post was a fellow that passed away long ago, (Eagle) and he mentioned that one complicated segment that he expected to come apart before turning from end to end - he wrapped it heavily with thread/string and CA'ed it from end to end. Then, he started turned an end section; added string to the just turned section and CA'd that. Then turned another part.

Later, some geniuses here suggested using gauze to wrap with several layers and CA that. And that is where we are today! This strengthens the blank considerably and allows drilling while holding it together. Basically a hard cocoon! Eagle did this to prevent his segments from coming apart during turning.

But, This gauze works also for making and gluing segments together and then drilling. But precision marking on the ends for drilling is a necessity. However, this should keep a segmented blank from exploding or coming apart. IN taking care like this - it does not give one the freedom to just drill away. As much care must be taken in the drilling as in the prevention stage with gauze and CA. This will at least increase the odds of finishing the drilling without the segments coming apart.

Hank, thanks for the detailed reply.

I've heard of this wrapping approach. I've actually used the fat popsicle sticks in the past (actually forgot about it...had a slow year+ of turning, and it was more like January 2022 that I last did much with segmenting). I am curious, you mention the importance of marking where you are going to drill...

Could you explain more about your approach to drilling? I use my drill press at times, but I ended up adjusting the table tilt for some other things, and even after getting the pin back in after leveling, its not quite as perfectly aligned as I had it before. So I am no longer getting well centered holes. I've switched pretty much to just drilling on the lathe, with my pen chuck jaws, which generally gets me dead-centered holes every time. Occasionally I'll have a less than optimal blank, and clamping such a thing g ets challenging. If that's the case, I'll usually try to flatten any problem areas first on the belt sander to eliminate such problems. I sometimes level things out with segmented blanks on the belt sander as well, but, that too is risky (to both the blank, and my poor fingers! Scraped one of them once...wow....what a fraction of a second of a belt sander will do!)
 

leehljp

Member Liaison
Joined
Feb 6, 2005
Messages
9,331
Location
Tunica, Mississippi,
When wrapping with gauze or with string as Eagle did, and I did on the pin stripe pen above, I wrapped the 2 blanks to the ends. Since I had not yet drilled, I put the blank between a small spur drive on the head stock end and a small diameter spur cup live center, (I think that is what I have). I turned this for the 1/4" section until it was round - with the intention of using a small diameter chuck, but I remember distinctly that it worked so well that I turned about 1 1/2 inch. Then I wrapped and CA'ed the turned part except for 1/2 inch on the end. Next I put the turned but unwrapped 1/2" end into a chuck in the head stock end.

Me - I learned long ago to be skittish of blowouts and will intentionally overbuild to prevent blowouts. (I overbuilt my 9 x 12 work shed in Toyota-City and one month later a typhoon parked over Toyota/Nagoya for about 4 hours; lost 2 shingles, house was damaged worse. I over build and over plan for mistakes in general.)

Drilling straight through the center has not been a major problem for me, although I do mess up on occasion.

I don't really see what is complicated about this. I have done it several times, although it has been 5 or 6 years since I last did it. I will admit I have problems clearly articulating what my mind sees and what I often do. In the last few years, I just make simple segments for friends and family.
 
Last edited:

leehljp

Member Liaison
Joined
Feb 6, 2005
Messages
9,331
Location
Tunica, Mississippi,
Hank, thanks for the detailed reply.
Could you explain more about your approach to drilling? I use my drill press at times, but I ended up adjusting the table tilt for some other things, and even after getting the pin back in after leveling, its not quite as perfectly aligned as I had it before. So I am no longer getting well centered holes. I've switched pretty much to just drilling on the lathe, with my pen chuck jaws, which generally gets me dead-centered holes every time. Occasionally I'll have a less than optimal blank, and clamping such a thing g ets challenging. If that's the case, I'll usually try to flatten any problem areas first on the belt sander to eliminate such problems. I sometimes level things out with segmented blanks on the belt sander as well, but, that too is risky (to both the blank, and my poor fingers! Scraped one of them once...wow....what a fraction of a second of a belt sander will do!)

The short of it is - that I just do it and it comes out perfect. I don't know how I drill any differently than anyone else. But my drilling just comes out right when I drill on the lathe. But I am extra cautious on segments with wood that has erratic grain direction, or with metal at an angle in the blank. Extra cautious! And I watch each mm of movement. If I" feel" something isn't going right, I stop and think about it and view my options. I spend time contemplating the situation. Like a good golfer on a long putt on an unlevel green, I contemplate long and hard and and plan in my mind, then progress forward. Usually it works. But special drilling techniques - I don't really have any.

Now a somewhat longer explanation:
First, I am not comparing myself to Sam Maloof at all. I could never do what he did. There is one paragraph in his book in which the Apprentice asks Sam as he gets set to drill a hole by hand at a specific compound angle to the chair seat. The Apprentice asks: "Aren't you going to measure your angle?" Sam replied that he didn't need to do that as he could see what angle to drill. After Sam drilled, the apprentice measured the angle and it was dead on. Then the apprentice asked Sam: "Do you have crosshairs in your eyeballs?" 😁 I laughed when I saw that.

I don't have his wood building abilities at all, but I have had an ability that flabergasts people (mainly my wife) and that is measurements and small distances, both inch, feet and metric. I discovered in my late teens that I could estimate the size of a room within 2 inches in any directing just by looking at it. That is 40-ish feet in size and less. Just a natural ability. I discovered in ROTC class back in the '60s that I had an unusual depth perception ability. I guess this may play into my drilling.

Even though I have an ability with tools and eye visualization, I do not have good eye hand coordination for carving, painting or drawing. I cannot freehand draw any better than a 1st grader, but give me a rule or compass (or computer graphics) I can layout with the best of them. Give me a good tool rest to guide the chisel on the lathe, and I can do that. But I can't do skews.

One other thing, I never learned to play chess, but in a sense like a chess player, I tend to visualize well in advance of where I am at any given minute in drilling or building.
 
Last edited:

Sylvanite

Member
Joined
Jul 18, 2006
Messages
3,113
Location
Hillsborough, North Carolina, USA.
I still do not know how this is done. The reason I say this is because when you wrap string or gauze around a blank to be drilled, how are you holding it to be drilled. If you drill on a lathe what chuck do you use?
I once made a segmented blank that I wrapped with CA-saturated string before drilling. I turned the segmentation round between centers first, then wrapped it with string and soaked it in thin CA clue. After the glue had cured, I turned it round between centers again - but not through the string. Then I mounted the blank in a collet chuck to drill it. After drilling, I flooded the inside of the blank with more thin CA glue, chased the hole, and glued in the tube. Then I mounted it on bushings on a mandrel and turned the blank to final dimensions - removing the remaining string in the process.

I hope that description helps explain the process,
Eric
 

leehljp

Member Liaison
Joined
Feb 6, 2005
Messages
9,331
Location
Tunica, Mississippi,
I once made a segmented blank that I wrapped with CA-saturated string before drilling. I turned the segmentation round between centers first, then wrapped it with string and soaked it in thin CA clue. After the glue had cured, I turned it round between centers again - but not through the string. Then I mounted the blank in a collet chuck to drill it. After drilling, I flooded the inside of the blank with more thin CA glue, chased the hole, and glued in the tube. Then I mounted it on bushings on a mandrel and turned the blank to final dimensions - removing the remaining string in the process.

I hope that description helps explain the process,
Eric
Thanks Eric! MUCH shorter than mine, and dead on! Thanks!
 

jttheclockman

Member
Joined
Feb 22, 2005
Messages
19,158
Location
NJ, USA.
I once made a segmented blank that I wrapped with CA-saturated string before drilling. I turned the segmentation round between centers first, then wrapped it with string and soaked it in thin CA clue. After the glue had cured, I turned it round between centers again - but not through the string. Then I mounted the blank in a collet chuck to drill it. After drilling, I flooded the inside of the blank with more thin CA glue, chased the hole, and glued in the tube. Then I mounted it on bushings on a mandrel and turned the blank to final dimensions - removing the remaining string in the process.

I hope that description helps explain the process,
Eric
Thanks Eric. The thing there is to be able to keep centers at all times especially in a detailed segmented pattern. Keeping some of the thread or gauze on after you turned down enough to fit a collet chuck then I can see this. No one ever explained this. Surely Eagle never did. He would want you to figure out on your own. The same principle can be done if left square and used a pen jaws chuck and you have equal thickness wood supports on the side. Again the crucial point is to keep dead center at all times of the operation. Thanks for explanation. Not sure I will be trying this but you never know. I have bookmarked this thread. Another tool on the tool belt.
 

Sylvanite

Member
Joined
Jul 18, 2006
Messages
3,113
Location
Hillsborough, North Carolina, USA.
I see two reasons to add sacrificial support to a segmented pen blank:
  1. Because one is afraid of blowout when drilling, or
  2. Because one is afraid of blowout when turning a square blank round.
My description above was for the first case. In the second, I can easily see gluing more wood (or gauze or string) to the sides to protect against a catch on the edges. One would simply turn the added material off as part of the rounding process. Either way, it's important to keep the segmented pattern centered. That's why I would turn between centers rather than using a chuck.

I hope that helps,
Eric
 

jttheclockman

Member
Joined
Feb 22, 2005
Messages
19,158
Location
NJ, USA.
I see two reasons to add sacrificial support to a segmented pen blank:
  1. Because one is afraid of blowout when drilling, or
  2. Because one is afraid of blowout when turning a square blank round.
My description above was for the first case. In the second, I can easily see gluing more wood (or gauze or string) to the sides to protect against a catch on the edges. One would simply turn the added material off as part of the rounding process. Either way, it's important to keep the segmented pattern centered. That's why I would turn between centers rather than using a chuck.

I hope that helps,
Eric
The second can be for drilling purposes too. Many times if you can get a tube within the blank it will add alot of strength to the blank. Sometimes just not possible untill you can trim the blank.
 

leehljp

Member Liaison
Joined
Feb 6, 2005
Messages
9,331
Location
Tunica, Mississippi,
I see two reasons to add sacrificial support to a segmented pen blank:
  1. Because one is afraid of blowout when drilling, or
  2. Because one is afraid of blowout when turning a square blank round.
My description above was for the first case. In the second, I can easily see gluing more wood (or gauze or string) to the sides to protect against a catch on the edges. One would simply turn the added material off as part of the rounding process. Either way, it's important to keep the segmented pattern centered. That's why I would turn between centers rather than using a chuck.

I hope that helps,
Eric
Eric is right on!

There is a problem with drilling which happens when one is not completely familiar and experienced in woodworking and drilling: the integrity of the blank is already compromised by its smallness and thinness. Drilling blanks is not just plain drilling! An inexperienced person does not often realize the complications.

FOR INSTANCE:

1. Take a 2x4 pine board about a foot long. Drill a 3/8 inch hole as fast as you can. NO Problem. It works!

2. Drill a hole into the end grain as far as the bit will go, and do it fast. No problem

3. Take a 3/4 inch square pine blank (same board) 5 inches long and drill the same 3/8" hole lengthwise, at moderate speed holding it with pliers. 1 or 2 of 3 times it will blow out.

QUESTION: Why does the 3/4' square blank blow out when the same pine as a 2x4 not blow out? Simple answer - the amount of wood around the hole in the 2x4 keeps the integrity of the board intact. A 3/4" blank does not have the reinforcement of a full sized board.

A 3/4" square blank of any kind can not be drilled the same as a full size board. It does not have the integrity strength. Too many people do not understand this concept. A 3/4" blank is NOT the same as a full size board. It requires different thinking and more caution.

That is why I have used CA'ed thread or gauze to cover a delicate blank. (The adding of strips on 4 sides as Ken B does - is the same in adding strength) Understanding the dynamics of a compromised blank (thinness) and the potential of a blowout and why they occur is necessary and helpful.
 
Last edited:

jrista

Member
Joined
Aug 12, 2021
Messages
2,241
Location
Colorado
Eric is right on!

There is a problem with drilling which happens when one is not completely familiar and experienced in woodworking and drilling: the integrity of the blank is already compromised by its smallness and thinness. Drilling blanks is not just plain drilling! An inexperienced person does not often realize the complications.

FOR INSTANCE:

1. Take a 2x4 pine board about a foot long. Drill a 3/8 inch hole as fast as you can. NO Problem. It works!

2. Drill a hole into the end grain as far as the bit will go, and do it fast. No problem

3. Take a 3/4 inch square pine blank (same board) 5 inches long and drill the same 3/8" hole lengthwise, at moderate speed holding it with pliers. 1 or 2 of 3 times it will blow out.

QUESTION: Why does the 3/4' square blank blow out when the same pine as a 2x4 not blow out? Simple answer - the amount of wood around the hole in the 2x4 keeps the integrity of the board intact. A 3/4" blank does not have the reinforcement of a full sized board.

A 3/4" square blank of any kind can not be drilled the same as a full size board. It does not have the integrity strength. Too many people do not understand this concept. A 3/4" blank is NOT the same as a full size board. It requires different thinking and more caution.

That is why I have used CA'ed thread or gauze to cover a delicate blank. (The adding of strips on 4 sides as Ken B does - is the same in adding strength) Understanding the dynamics of a compromised blank (thinness) and the potential of a blowout and why they occur is necessary and helpful.

Great info, Hank!

To get down to the actual forces involved, to add to the scale/size factors. When drilling, there are THREE key forces involved, at least that I've learned.

1. There is the pressure at the tip of the bit, pushing into the material.
2. There is the pressure outwards from all the material filling up the flutes, along the entire length of the bit.
3. There is the pressure outwards from the bit itself expanding due to the heat of friction.

I guess technically, the pressure from the material in the flutes is both outwards, and also angular since the bit is rotating. So #2 here could actually be both force #2 and #3, and heat expansion being #4. Anyway...these are the forces that are working to push your blank apart from the inside.

For dealing with force #1, as has been mentioned before, you can always leave your blank a bit longer than necessary (and for a segmented blank, I guess what you could do is glue on an extra piece of sacrificial wood that you would ultimately just sand or trim off during final blank prep?) This then allows you to drill as deep as necessary to drill through the part of the blank you intend to keep and t urn, without actually turning through the entire length of the blank. When the bit is drilled entirely through a blank, and exits the other side...as the material on the other side gets thinner, the pressure from you pushing the bit through the material will eventually push through that thinning material. This is generally what causes the blowout on the back side of the blank. You can also deal with this by simply being extremely careful and attentive, and slowing down your drilling, so that you cut through that final thin amount of material with less force/pressure.

Interestingly, for countering #1 in very hard and brittle materials, I have actually found that a bradpoint bit is BETTER. I know this goes against what seems to be the most intuitive sense, but it is actually BECAUSE a bradpoint cuts at the outer edge, rather than from center to edge, that it becomes easier to cut a clean hole all the way through a hard and brittle material (i.e. truestone, inlace) without blowout. The pressure is at the very tips of the front of the bit, and again with care, you cut at the extents of the hole, and any crushing or crumbling of material tends to happen in material that is being removed. The better solution is still to leave some extra length and not drill through the entire length of the blank, but in any case where that ends up not being possible, a bradpoint will usually cut a better exit hole than more traditional bits.

Finally, as with any tool-to-wood (or resin) work, there is a general rule of thumb that works well: Don't force it. Drill at a reasonable pace, don't force the bit into the wood. Just as you should let the wood draw a bowl gouge through a bowl blank at whatever rate it chooses to, which helps avoid tearout and produces a cleaner cut, don't force the bit into a pen blank. Drill at whatever pace the blank wants you to. You can generally get a sense for this...you shouldn't need much force, and the rate of the bit through harder materials will be slower than through softer materials. You should also find that, as long as you are not using too much inward pressure, material should always flow reasonably well out of the flutes. If you use too much inward pressure, the flutes will often back up very quickly, and that flow of waste material will slow or stop. That is a good sign you are trying to drill too fast. I don't drill super fast, but, at the same time, I've never spent more than 10-15 minutes drilling a blank (I've read threads in the past where people say they need as much as an hour to drill a blank...I don't think that should generally be necessary).

For dealing with force #2, this is why experienced turners will tell you to regularly clear the flutes. You don't want material to pack up in the flute. Even when that material seems to be "flowing" out on its own, as you get deeper into the blank, you still need to keep backing the bit out to clear the flutes, to minimize the pressure of that material. All that material, whatever it is (wood, resin, metals, etc.) wants to expand in every direction it can...that means back up the flute, yes, but mostly it means outward from the channel of the flute, into the wall of the very hole you are drilling. It doesn't take much for that pressure to cause problems. It is also this backup of material in the flute and the pressure from it, that can make a bit hard to extract from the drilled blank. So, keep the flutes clear!

An added technique I often use myself, is to keep some air blowing into the flutes. This creates an air pressure pocket inside the hole that does two things: It helps evacuate the waste material building up in the flutes, and it also keeps the bit cooler for much longer. It still heats up, but not as fast, and does not expand as much.

In fact, this is probably some of the problem I've had... It is not so much my bit catching at the tip, I don't think...I suspect that when a segment comes loose, it is because of that outward and radial force of the material in the flute. There is so much more surface area contact involved there, than just at the tip of the bit. It may also be that when I back out the bit to extract, maybe the force of the material in the flute is enough to pull segments apart..... Hmm...

Anyway, on to force #3, heat expansion. This happens rather quickly. Doesn't take much once more of the bit is fully within the blank for friction, from the bit on the wood, and the waste material moving through the flutes, to heat everything up. This is usually where that screech will come from. An expanding bit will start to scream at you as it expands. Usually the tip of the bit is slightly larger in diameter than the rest of the flutes, but as the bit expands, more and more of the bit will contact the inside surface of the hole, and create a screaming or screeching sound. You need to keep your bits cool. A really hot bit can even melt resin-based waste material (or even start burning wood chips), which can cause other problems. Melted resin can stick to the inside walls of the hole, and that can cause other issues. If allowed to cool, it may stick.

As mentioned before, I often use some air pressure blasted into one of the flutes to keep the bit cool, and help evacuate material. Further, when I back the bit out, I'll use that same airflow to cool the bit as well. I generally aim for a "can touch the bit with my bare finger without feeling the need to yank it back from burning" temperature in the bit, before I get back to drilling. I think using air to help cool the bit can help expedite the drilling process, despite the challenges, which may be why it usually doesn't take me terribly long to drill. I've actually been trying to figure out a way to set up some kind of multi-nozzle contraction that I could just attach to my lathe, so that when drilling blanks, I don't have to manually hold my air hose and point the nozzle. ;) Haven't figured out a design that works just yet.

Anyway...the three forces that make drilling hard. Account for them, and it should become easier.

1. Don't push too hard and let the drill move through the material at its own pace.
2. Don't let material pack up in the flutes, keep them clear and flowing.
3. Don't let the bit overheat, keep it cool to a "won't burn fingers" level.
 
Top Bottom