New to the site - a few of my firsts

Signed-In Members Don't See This Ad
See more from RLR350

RLR350

Member
Joined
Jan 4, 2015
Messages
19
Location
Florida
Hi all. I'm new to this, but thought I'd post a few first attempts at segmenting. A few mistakes, but overall satisfied.

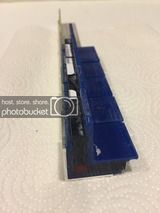
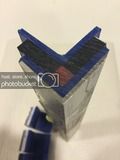
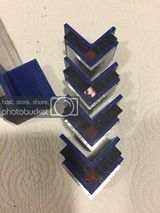
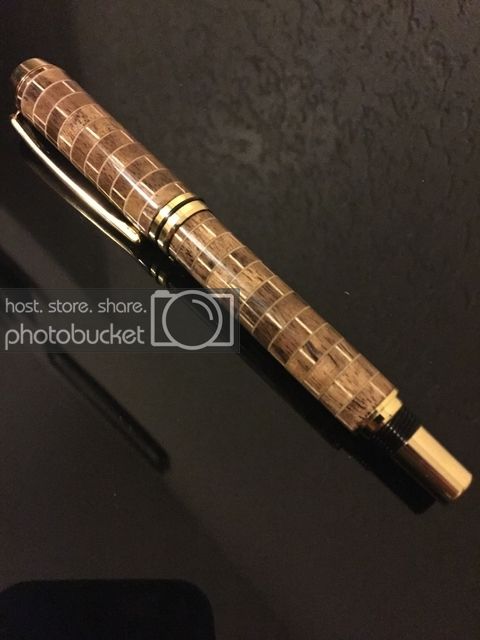
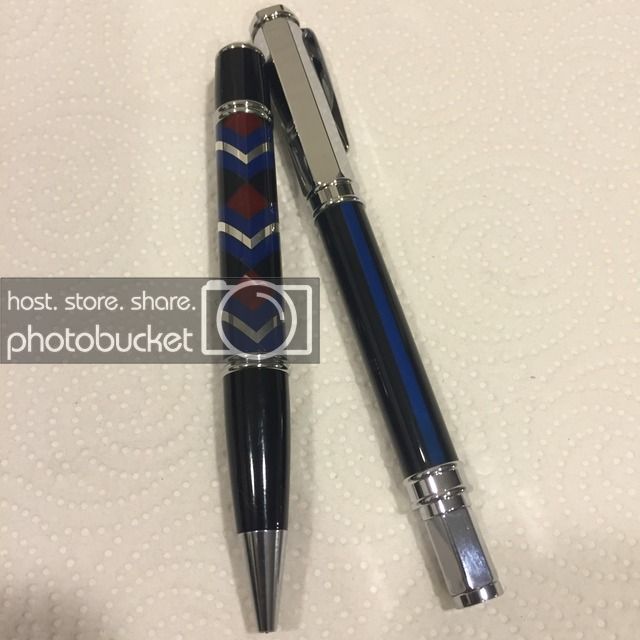
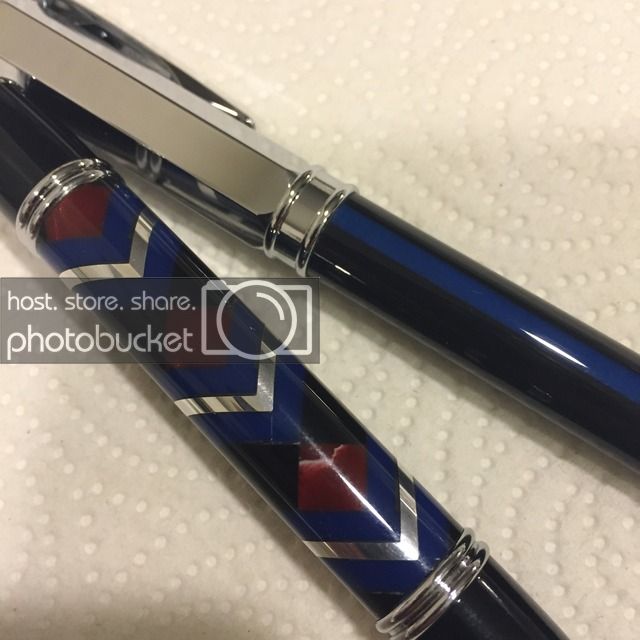
The first is a Baron with walnut and maple. The other two are a Vertex thin blue line, black acrylic blank with a 1/8" blue acrylic insert and a Gatsby Grande with a combination of red, black and blue acrylic in aluminum. The white in the red is the design of the blank, thought I cut all the white out, but it showed back up when turning. I have one more of the blanks left, so I think I'll try moving it down a little to balance the red in the center. I tried to balance the aluminum on that one.

I'll work on the photography, not one of my skills.

Baron20segemented20walnut20and20maple_zpswnv2bthz.jpg
pen%201_zpsnagansel.jpg
pen%202_zpsro5dqse4.jpg
 
Last edited:
Signed-In Members Don't See This Ad
Thanks guys. Not a professional by any means, but enjoying the hobby.

Here is a link to a tutorial for the "scales" Gatsby.

Segmented Scales Pen Blank

I used 1" angle from Home Depot for the aluminum. The blue plastic is called "sign plastic" and I ordered a bunch of 1" x 1/8" x 12" cut pieces. The black and red are just cut down acrylic blanks.

I tried a few with wood, but sanding the blank is difficult since the black residue from the aluminum gets into the wood. So, plastic solved this problem, although I may try a few with darker wood covered in CA before sanding.
 
I had a few questions on the glue up of the scales, so here are some pictures of the remaining portion of the blank just before the final glue up. I used CA for plastic to plastic joints and epoxy for metal to plastic joints.

The red diamond is two pieces at 1/4" square by 6", ripped from a red acrylic blank. The black is exactly the same thickness, 1/4" by 3/4" by six inches, also ripped from a blank (black acrylic) The blue is 1/8" thick acrylic. There is a seam in the blue pieces at the bottom of the "V". Once the final glue up was done, I ripped the "wings" so the blank was 1" square, then drilled and turned as normal.

pen%203_zpsqzgu21hi.jpg
pen%204_zpspxdqztqv.jpg
pen%205_zpsg3s5suip.jpg


(Sorry if this is not the appropriate place for instructions. Still learning the rules for the site.)
 
You're doing great !!! Thanks for the additional pictures ... I wonder why they don't enlarge when I click on them .
 
Last edited:
Welcome from Oklahoma! Excellent creativity and nice workmanship! This is a great site to learn from some really amazing pen turners!!

RossVH

2nd in 2015 BASH Simple Ballpoint Pen Contest
 
Back
Top Bottom