Modified HF Dust Collector

Signed-In Members Don't See This Ad

Dave_M

Member
Joined
Dec 10, 2005
Messages
769
Location
Clovis, CA, USA.
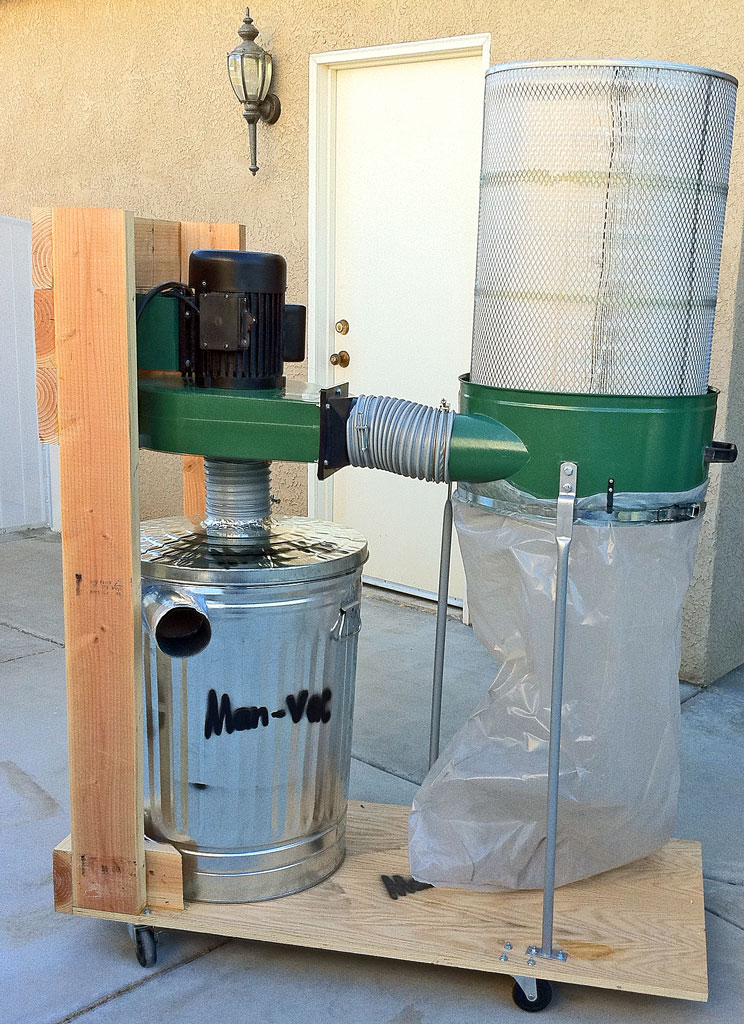
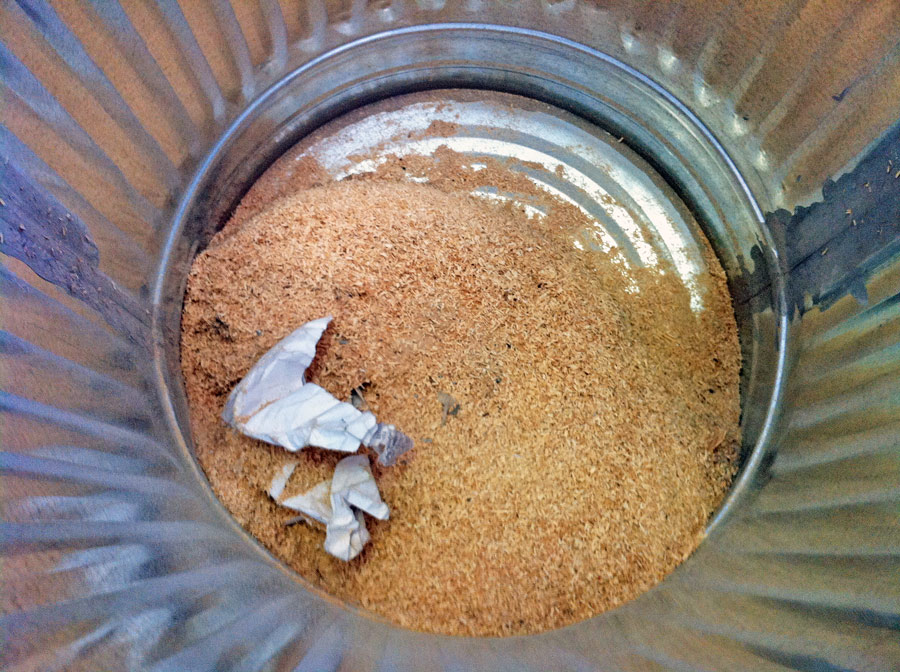
I always wanted to get around to doing this project. I wanted a chip separator and better air filtration for my HF Dust Collector. I made my version of a Thien baffle separator and ordered the Wynn nanofiber filter kit. I little more work than anticipated but well worth it.

1_IMG_0211.JPG
 
Signed-In Members Don't See This Ad
Nice work Dave. I have been following the forum on another forum also and am about to do something similar to that with my Jet 1100. Dumb question where is the exhaust (?) port. I know some vent it right outside of their shop.
 
... Dumb question where is the exhaust (?) port. I know some vent it right outside of their shop.

I'd say that's what the filter is for ...

Correct. Some people will vent the exhaust port outside the shop then into the filter. Possibly because they're using a less efficient filter and / or they want to keep the very fine dust out of their shop and out of their lungs. I'm not in a position to do that so I've added the .5 micron Wynn nanofilter to help keep the dust under control. So far the separator is catching 98+ % of my material. Very little is making its way into the filter. I haven't had the opportunity to try vacuuming up a large amount of sanding dust yet. Most of my test material was fine shavings & coarse shearing cuts from some spindle turning. Not a lot of fine sanding dust... yet.

I'm using something very similar to Phil Thien's separator lid design. Mine is a little different than any I've seen done before. The difference is minor and I seriously doubt it has an effect one way or the other. It's simply what worked best for me at the time based on my setup.

I vacuumed a small pile of lathe turning material off the floor with the exhaust port disconnected. I shined a bright light across the exhaust port while running the vacuum to highlight the dust exiting the exhaust port. Best I could see, only a very fine dusting of material was passing through the separator. I reconnected the exhaust port to the filter & collection bag and vacuumed a little over a gallon of turning trash, including a pile of ribbons from turning acrylic, and some basic garage dust. When I checked the collection bag, there wasn't enough material in it to measure.

I wish I had thought about comparing before & after separator results of the air flow. Right now I'm certain that air flow is down slightly from using the separator but I don't have a way to measure how much. When I have the time, I'll disconnect the separator and run some crude comparative tests. Vacuum strength is good, but I can tell it's not as strong as it was prior to the separator installation. There is still some tweaking to be done to balance out the amount of air flow vs. the amount of pre-filtering. I will say that when using the Wynn nanofilter, the vacuum strength is as strong as when running with no filter at all. I'm really impressed with the air flow using the Wynn filter.
 
Last edited:
Thanks Dave. My Jet has a 6" port out to the 4" Y adapter and I mwas looking at my setup vs yours. If it works and keeps your filter cleaner that is all that counts. That link is a good one but there are sure a lot of different ideas and setups to keep one guessing on which one works best.
 
Dave, thanks for the links. I could really benefit from a separator like that. Those canister filters can be a real pain to clean all the time.
 
Really, like how you redid your dust collector together!

Does your set up (wood stand) make that unit quieter? Only complaint have with my HF/Wynn set up is noise in my small shop.

Cleaning filter with shop-vac no big deal. Before changing bottom bag tap sides and top wait for dust to settle.
 
Well quieter is a relative term. Quieter... Yes, but it's still loud.

I decided to vacuum up the garage / shop today and see what I see. This is what collected in the separator can after vacuuming my garage.

1_IMG_0217.JPG


Leveling out the material fills about three inches of the separator can. I also checked the collection bag to see what passed through the separator. The collection bag had about a teaspoon of material in it so the separator is actually working very well.
 
Hi Dave;
looks like a great setup. The house I may rent, has a "finished" garage, and I will have convinced SWMBO that I will need a dust collector. (Shhhh!!!! don't tell her..) Could you take of photo of your separator lid design? Now to just decide which one to get. I'm looking at the Rikon and Jet at woodcraft. Next step is to find a HF, here and search craigs' list.
thanks for sharing.
 
I believe that having a pre-separator in-line before the vacuum is definitely worth the time and little effort it takes to make nd install. The time to clean out the pre-separator is far shorter than it is to clean the filter in many cases. The Dust Deputy is also fantastic on a smaller setup and will pay for itself in short order and will make the shop vacuum continue to work efficiently far longer than without it being there.

Also, just wait until a piece of scrap goes down the hose and impacts the impellers and cracks/breaks/unbalances one of the blades. Way more expensive to replace the impeller than to make the pre-separator.

I might suggest that those of you that use the large plastic bag to collect the debris, that you put the bag into a trash can to keep yourself from a horrendous clean-up IF by error the bag gets ripped somehow and then you turn on the vacuum. The small rip will split and EVERYTHING in the bag will suddenly be all over the shop ... DAMHIKT. You absolutely cannot get to the switch fast enough ... even if your finger is still on switch it is way to late! :eek:
 
I might suggest that those of you that use the large plastic bag to collect the debris, that you put the bag into a trash can to keep yourself from a horrendous clean-up IF by error the bag gets ripped somehow and then you turn on the vacuum. The small rip will split and EVERYTHING in the bag will suddenly be all over the shop ... DAMHIKT. You absolutely cannot get to the switch fast enough ... even if your finger is still on switch it is way to late! :eek:

Great advice Fred. I wouldn't have seen that one coming until...
 
Here you go Mark.

Here is the top of the lid with the 5" outlet installed. I couldn't find 5" anything around here so I bought a 6" x 2' section of the roll your own at the local hardware store. I just rolled it to 5" and cut it down to size with a pair of aviation snips. After cutting the tube down to size, I traced it on the lid and used my Dremel to cut out the hole. The tube is hot glued in place and is rock solid.

1024.jpg


Here is where I go in a different path. Most designs have the baffle attached to the underside of the lid. Since I used a side vacuum port instead of using an elbow through the lid, I found this design much easier for lid removal. Without the baffle, you can manipulate the lid a lot more which makes it easy to pull it off and out.


1024.jpg


View of the 4" side vacuum port. This is also hot glued into the side and it's very secure. You can use this website for printing templates to make cutting the hole & tube for the side port easier.


1024.jpg


My baffle is attached to the can itself via a strip of scrap ply running across the inside of the can keeping the baffle just below the input port.


1024.jpg


And... baffle installed. The baffle is consistent with Phil's design.


1024.jpg


So far this design is working well for me. I also found this baffle design made it very easy to make adjustments to the baffle trying to increase the efficiency.
 
Thanks for the info Dave. I am trying to get mine done. After planing about 30bf of cherry and maple to 1/4" last night the bag on the dc is full. I am wondering what the four metal bushing pieces do? Where they test heights for the baffle? Thanks again. It really helps to see it for me rather than just read it.
 
Thanks for the info Dave. I am trying to get mine done. After planing about 30bf of cherry and maple to 1/4" last night the bag on the dc is full. I am wondering what the four metal bushing pieces do? Where they test heights for the baffle? Thanks again. It really helps to see it for me rather than just read it.

What you see are the mount points for the trash can's handles. Nothing to do with the baffle. I coated those and the can's seams with silicon just to make sure everything is air tight.
 
Duh me I forgot about the outside handles.:redface: It's a good thing that I am blonde and can fall back on that fact.:biggrin:
 
Back
Top Bottom