Hey Kitless guys...can I play too??? NEW FRONT SECTION

Signed-In Members Don't See This Ad
See more from Brooks803

Brooks803

Member
Joined
Sep 13, 2009
Messages
5,632
Location
Aiken, South Carolina
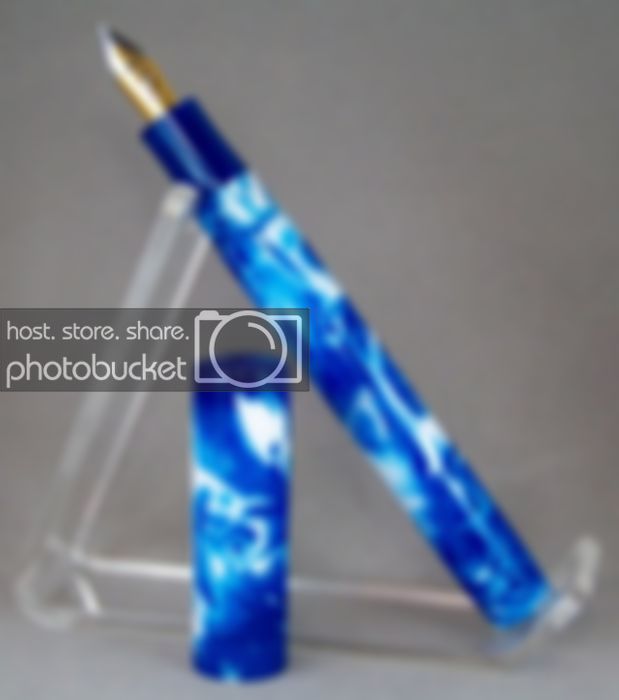
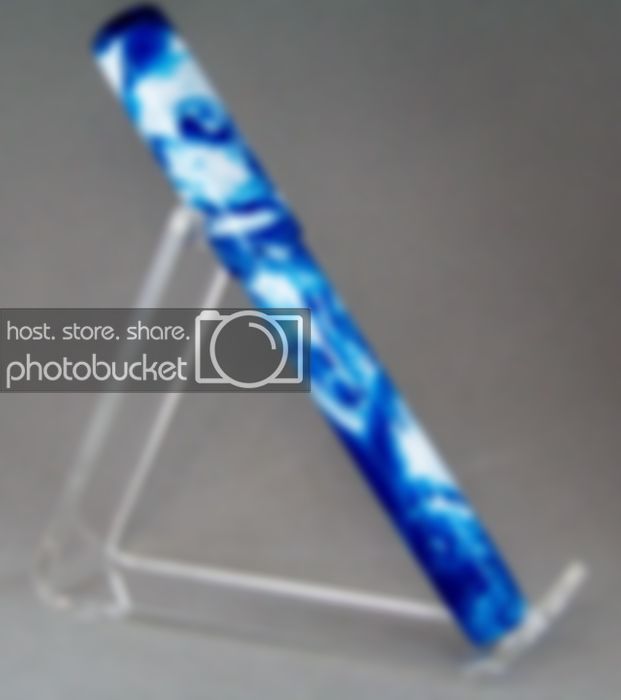
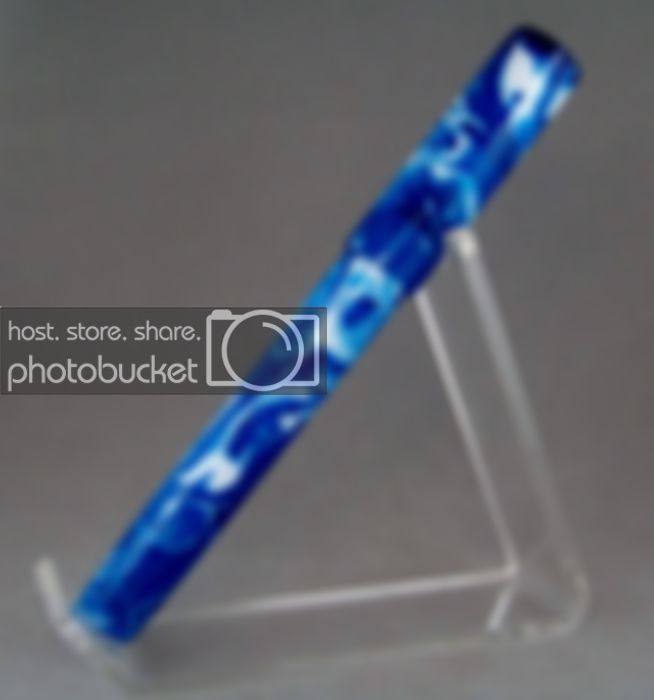
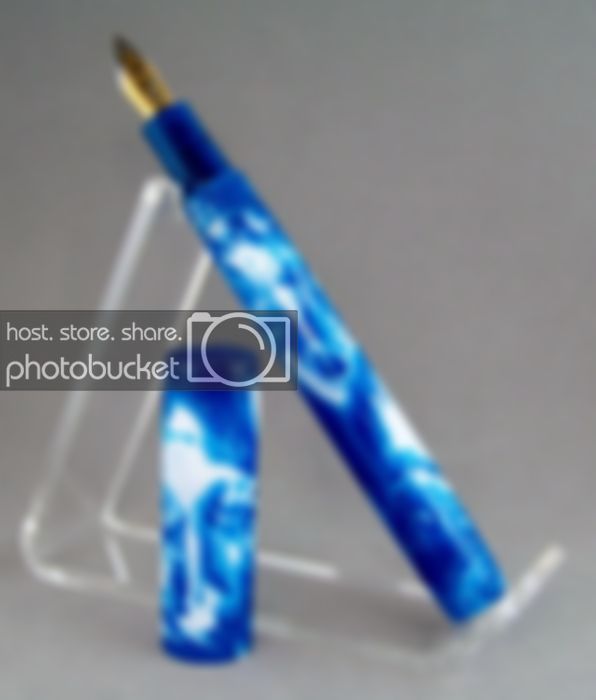
This was fun, frustrating, and mind boggling all at the same time. Here we have my 1st fully Kitless FP. I used one of my Vintage Blue blanks for the upper and lower barrels. The front section is of the same material, but without the white. The pen itself wasn't too hard to turn and thread and I got it all on the first try. I was a bit nervous bc of all I read about threading PR. But that front section...GEEZ! It took me 4 tries and 3 full blanks to get it and I'll probably try and make another bc I'm not 100% happy with this one. I do need to give a big thanks to Hans for his kitless demo on Sat. I had all the steps right, just had the order of production off and he really helped show which steps work best 1st and last. The overall length is just under 4 3/4" and it weights in at 12.4g It surely is a keeper and I'll be making a matching RB with one of those rolling writers. Thanks for looking everyone and I would love some honest feedback!
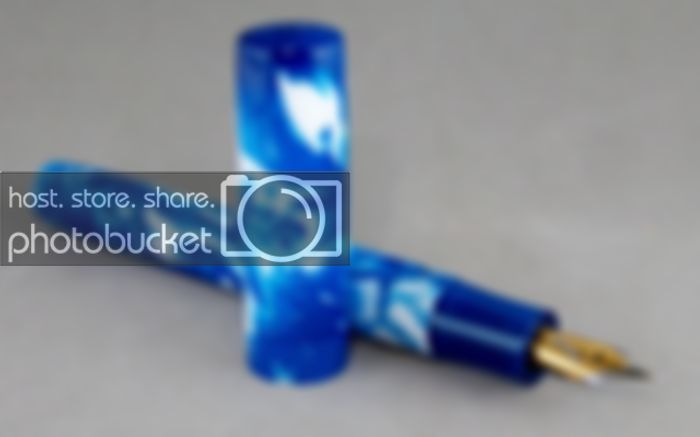
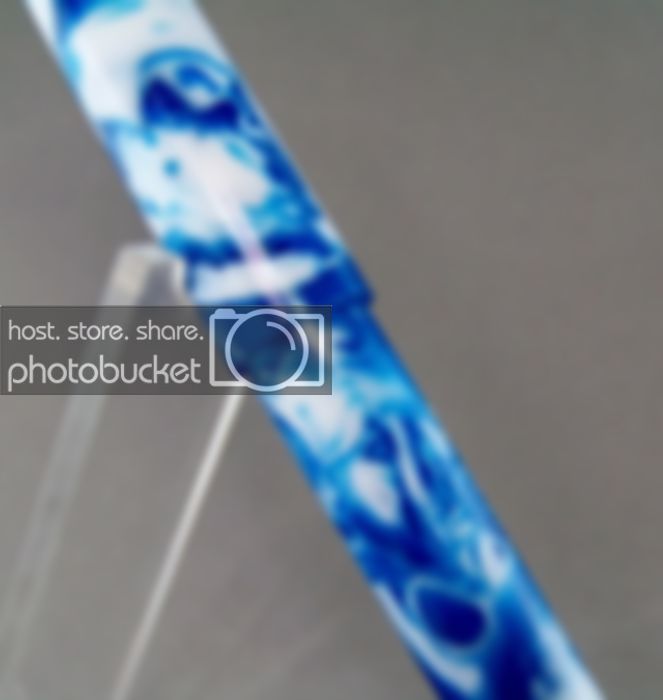
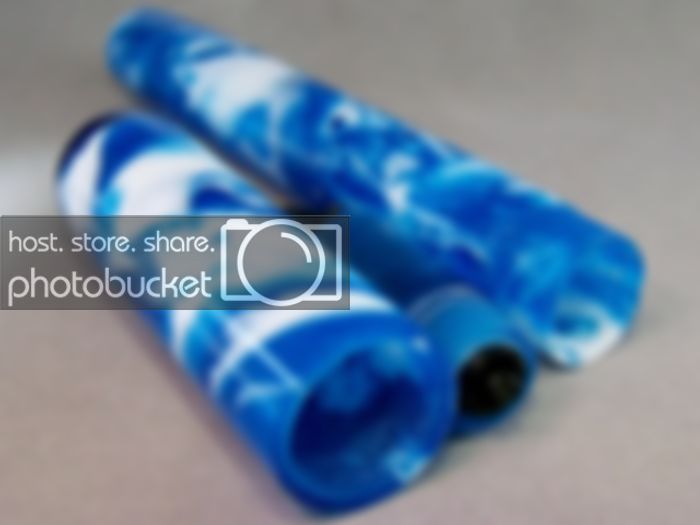
102_3140621x700-1.jpg
102_3147654x700.jpg
102_3151596x700.jpg
102_3161700x465.jpg


Couple of Closeups:

102_3144663x700.jpg
102_3153673x700.jpg


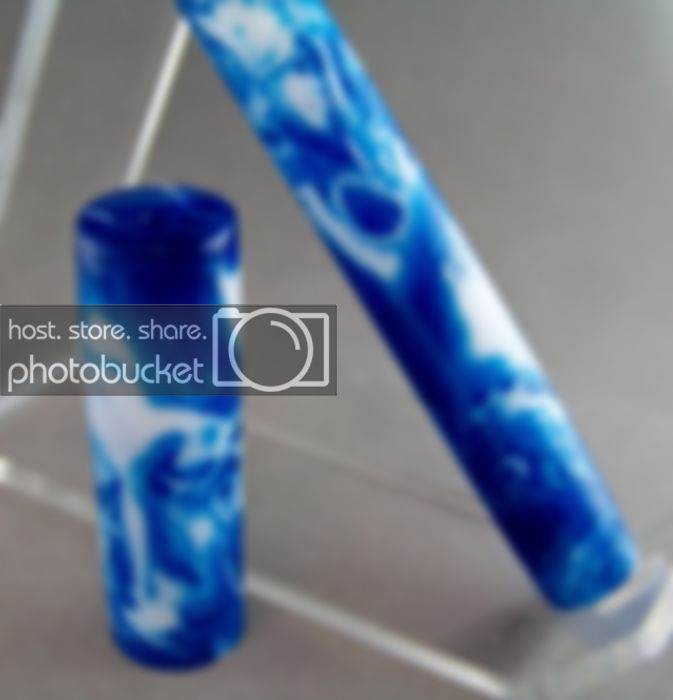
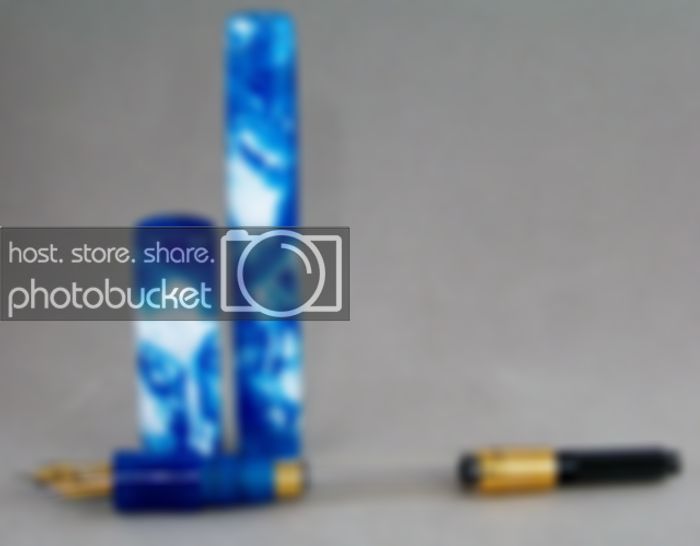
Here's all the parts/pieces:

102_3159700x525.jpg
 
Last edited:
Signed-In Members Don't See This Ad
That is SWEET! Looks fantastic!. I am glad you were able to thread the section too. Great job.

I would add that it looks like your cap could use some polishing on the edge that leads into the threads (where a centerband would go) But that might just be the white wisps coming out.
 
Last edited:
apparently YES. now if you can just find somewhere to get a decent blank :wink:
my parts for my first shot at a kitless are in the mailbox waiting for me tonight....hope I can even get in your neighborhood!
 
Very nice pen. Looks like you play kitless very well. The only thing that I personnally would like different is a little more shape to the front section. Too straight for me. But overall and for a first kitless, very well done.
I have watched Timebandit make his, and there is a lot more that goes into these than it looks like. Not an easy task.
 
Jonathon is there anything you can't do? It's like you have the midas touch. Everything you touch is golden!
 
Nice one Jonathon!

I have one of your Vintage Blue blanks in the making now. Just need to finish it.

Couple of suggestions.

1. It looks like your threaded tenons are not polished. If they are please forget this. If not. What i like to do is cut my tenons and then polish them with Micromesh before i cut the threads. This ensures that the uncut portion of the threads are polished and its harder to tell the the lower depth of the threads are not. Do this for the body and the front section.

2. For the cap, same thing. After you cut your threads in the cap, go ahead and polish up that end before you take it out of your colet, so the end is polished. Then when you turn to diameter you dont have to worry about polishing that end. And i cant tell if you did a little bevel on the inside edge of the cap, but i like to do that to. Just touch the edge of my Woodchuck to that inside edge and it cleans up the edge of the inner cap threads and looks real nice.

3. You need more shape in that front section. Look how much under diameter your front section is from your body threads. You only need it to be a fraction of an inch smaller for the body threads to mate with the cap threads. Make the outer near the threads and up near the nib end fatter and leave the middle the same diameter. This will give you a nice gentle curve in the middle and your fingers will fit in it nicely. Nice and shapely.

4. Dont stop now!!!! Keep it up! This is great for a first try. If you have trouble with grain alignment let me know and i will help you out.

Justin
 
I think the pen is beautiful. I've never turned a fp much less a kitless one so I can only be amazed at what some of you seem to effortlessly produce. And now after reading Justin and George's comments I realize there is soooooo much more for me to learn. That's what I like about this forum, honestly and the willingness to help other progress. The level of talent here is just amazing.
I'm out to the shop to practice, practice, practice.
 
Thanks for the feedback so far! Justin, those are great tips. Thank you. For those wondering what George pointed out to me is that I didn't allow any support for either an ink cartridge or converter an it'll most likely fall off with the way it is now. Luckily I was planning on redoing the front section. So now I can allow for that extra length, plus try and put a little shape on the section. I really appreciate the tips! Keep em coming.
 
Fantastic work. I agree with Jon. You just need a decent blank for next time.:eek::eek::eek::wink::rolleyes:

It's not like I have a stock of them just incase I break a bunch or anything :rolleyes::wink::tongue::biggrin:

Jonathon is there anything you can't do? It's like you have the midas touch. Everything you touch is golden!

Lol...I'm sure there is, but I'm too stubborn to allow myself to quit!
 
I would appreciate elaboration! "I didn't allow any support for either an ink cartridge or converter an it'll most likely fall off with the way it is now."

Nice pen Jonathan!
Tom
 
Sure Tom. If you look at my front section in the last picture you'll see that the feed goes all the way to the end of the section. The nipple that the cartridge or converter attaches to is basically sticking out the back. If you look at your kit sections there is a length of material past the threads that screw into the body of the pen. That extra material supports the cartridge/converter giving it a bit more grip. On mine it would just dangle there and probably detach spilling ink everywhere. It's a crucial part that I didn't think of and George was kind enough to point it out for me, so I'm thankful to him for that.
 
Very nice work Jonathan. Eyed up quite a few of the blanks you have made.. may just have to get my wallet out in the near future :)
 
Jonathan, I am so impressed! I am dying to try my hand at my first kitless.
Can I ask what sort of supplies you purchased (taps, etc) to get started?
Did you follow any sort of tutorial that you can share or send?
Thanks in advance for sharing your work. You really did a marvelous job.
John
 
Ironic! I have been thinking that my own work is inevitably headed towards the kit less end of pen turning. I was up all night with schematic diagrams and preliminary sketches swimming in my head. Now Johnathan gives us a damn fine example of a kitless pen in his debut! Really appreciate the critiques given as well, thanks all.
 
Last edited:
Very nice pen, i hope to make one someday... for feedback the only thing is i can see the threads through the blank when the cap is on.. But i have no room to talk since i havent made one. Other than that its perfect.
 
Last edited:
Georgeous,simply georgeous.
One question for you....can you not make it like the one I saw on here a couple of days ago,where the ink was poured into the bottom section with a pippette?
therefore not needing cartridges or a convertor?
 
Pen is beautiful and like others, I appreciate the comments which help us all in the long run. P.S. turned a few of your blanks this weekend and was happily surprised at how easy they were. A lot less chippy than other PR blanks I have used, not to mention fantastic colors.
 
Georgeous,simply georgeous.
One question for you....can you not make it like the one I saw on here a couple of days ago,where the ink was poured into the bottom section with a pippette?
therefore not needing cartridges or a convertor?

Beat me to it! I was thinking the very same thing after reading the comment about no support for the cartridge. Looks like a great idea to me. Also, a really nice pen for the first try. Still working on the nerve and time to try one.
 
Jonathan, that's really great. Maybe you can demo making kitless pens at the next Atlanta meeting. :)
Earl
 
Yeah, I saw the threads coming through the bottom of the cap, but I like seeing engineering, so I thought it was a pretty cool touch. Jonathon, you're really kicking some a$$ here. I like what I'm seeing so far.
 
Great pen - good job. That means you are nominated to do a demo at the next Georgia meeting!!!!!! Looking forward to it.
 
New Front Section

Alright, after several tries and a few choice words I've got a new front section. I didn't put a big swooping curve to it, instead I put a slight gentle curve to follow the lines of the blank. I learned several new things while making this one. I was even able to sand and polish the inside of the section so now it's much cleaner in apperance. The converter fits snug and holds tight. Thanks George for showing me the flaw in my earlier design! My wife has already given me the specs on what she wants for my next one :redface:

Let me know what yall think of this one:

102_3166619x700.jpg
102_3171700x437.jpg
102_3174700x546.jpg
 
This looks stunning. I still need to "tool up" for closed-end turning, let alone forging into kitless. You did a great job and I really love the blank as well!
 
Uh oh.......... another disaster! :eek:

Just kidding, it's not THAT bad! Yep, now once you figure out how much material you have to work with on the section, you can make a nice curved shape. Let's see how thin you can go! :biggrin:

As you go thinner creating curved shapes you will realize why most sections are dark or at least the same color as the feed housings :wink:!
 
Back
Top Bottom