Help needed with SKM88 clicker, I need to take it apart!

Signed-In Members Don't See This Ad

More4dan

Member
Joined
Mar 17, 2016
Messages
2,102
Location
Katy, TX
Has anyone taken apart a Schmidt SKM88 clicker either on purpose or not? And more importantly, successfully reassembled one?
I can see how to disassemble it but I have no idea what to expect once I do and to understand the odds of getting it back together.

I am working on a project where I plan to copper electroplated plate the SKM88 and I'm thinking it would go better if I take it apart first. That way I can get it cleaner and protect the inside if necessary.
Any advice would be greatly appreciated.

Thanks in advance!

Danny


Sent from my iPad using Penturners.org mobile app
 
Signed-In Members Don't See This Ad

magpens

Member
Joined
Feb 2, 2011
Messages
15,912
Location
Canada
I wish I could help you, Danny. . I have contemplated taking one apart but was advised against it by the person from whom I buy them.
I believe the internal mechanism is very simple, consisting of a pattern of milled grooves with a slider (perhaps a ball) moving in the grooves.
As you know, there is a tiny clip ring on the shaft. . It strikes me as the devil's own job to get that ring off and on again.
For larger size clip rings there are appropriate tools for handling the rings, but I have never seen any small enough to handle this size.

The '88 has a threaded outer sleeve, as you know. . The sleeve has slightly sloping sides and I want to machine it to be cylindrical.
I successfully did that on a couple of units without taking them apart, but both units were rendered non-functional in the process, even though I was extremely gentle and careful in doing the machining. . I conclude that whatever the internal mechanism, it is extremely delicate.

I also want to change the threads to a smaller diameter with different pitch. . Again, I successfully did that, being as careful/gentle as I could, but the unit failed to function reliably afterwards.

In all cases, there is no visible external damage to the units that I "played" with. . The units have the same general feel as before the "playing" but they do not reliably "stop" and "start" repeatably ... where "stop" and "start" refer to the positions of refill extension and retraction. . The shafts are all still perfectly straight ... not bent at all ... and the extent of the shaft travel is just the same as before the "playing".

In doing the machine alterations on my metal lathe, I did not grip the shafts in the chuck. . I gripped only the threaded stub, or the outer sleeve.
The gripping was done in a 4-jaw scroll chuck on my metal lathe. . Perhaps a collet chuck would be better but I do not have a collet of appropriate size.

I suspect that the internal ball (or slider) has been slightly dented or deformed ... or perhaps the grooves have been slightly deformed.

If you find a way to achieve your goal, I would greatly appreciate hearing about your methodology for disassembly and reassembly.
 
Last edited:

hokie

Member
Joined
May 29, 2017
Messages
309
Location
Falls Church, Virginia
In doing the machine alterations on my metal lathe, I did not grip the shafts in the chuck. . I gripped only the threaded stub, or the outer sleeve.
The gripping was done in a 4-jaw scroll chuck on my metal lathe. . Perhaps a collet chuck would be better but I do not have a collet of appropriate size.

When I have a small threaded part I want to machine one end of and not ruin the threads, I like to chuck up some delrin, face it, drill it and thread to fit the part. Then I know the part will turn more or less concentric and there isn't any inward pressure on the threads and thin metal walls. Just make sure to drill much deeper than the part will screw in or else it could get locked into the delrin on any shallow internal threads.

This discussion comes at a perfect time for me as I've recently been interested in turning some non-fountain kitless pens and like the idea of using a widely lauded click mechanism, but feel a bit restricted as far as style options. I've always wondered how customizable the SKM-88 is. Maybe the SKM-192 would be the better mechanism to customize? The SKM-192 appears to use its threads to attach a sleeve rather than attach to the pen and a button can slip over the "plunger" (for lack of a better term). Are the 88 and 192 even the same internally?

Edit: Maybe I should have done a few more minutes of research and I would have found this post by @magpens himself to answer most of my questions. haha
 
Last edited:

magpens

Member
Joined
Feb 2, 2011
Messages
15,912
Location
Canada
@hokie

Yessir !! . You found THE post ! . 🤓 😃

Before you design a pen using the SKM-192, you should have one of those mechanisms in-hand to refer to.
It is a very useful mechanism, but some aspects of using it do not become clear until you are actually using or at least handling it.

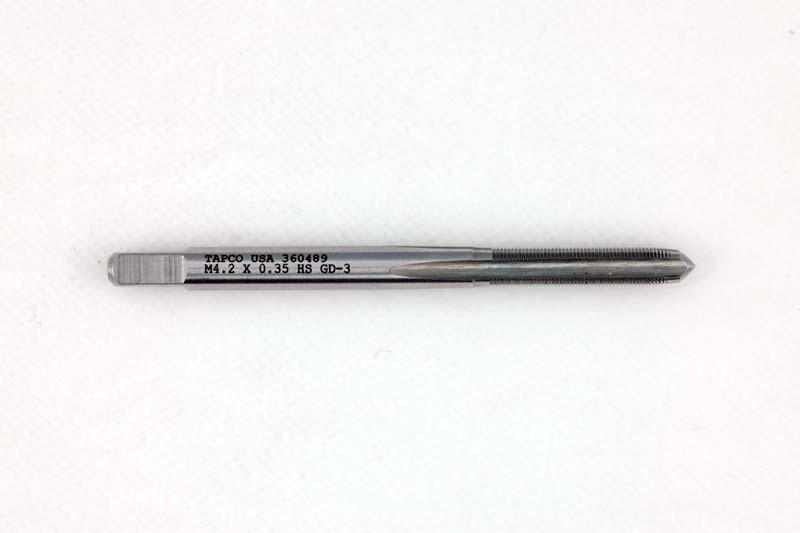
And thanks for the tip on "holding while machining" for small delicate threaded parts. . I know that technique but did not have appropriate tap.
It's on my shopping list ! . When I apply that technique, I may have better luck altering the sloping side of the '88 to a straight cylinder, but changing the thread still poses a problem, unless a collet will adequately serve to grip the outer sleeve once it is cylindrical.

Comparing the SKM-88 and SKM-192, I believe that the internal mechanisms utilize the same physical principles, but they may be dimensionally and otherwise different in some respects. . Yes, for the '192 you do have to make the actual push button (or plunger, as it is sometimes called). . A semi-flexible material, drilled a little undersize to the shaft, works as a push-on. . Or if you want a decorative button, you can drill to size, or a tad larger, and glue it on. . Bear in mind the orientation of the threads on the '192. . They are not designed for every possible use you could dream up

You alluded to customizing the '192. . Really, there is not much to customize. . It's pretty much a "work with it as it is" thing. . If you find otherwise, please let me know. . If you recall my 2020 Bash entry, I used a tapped disc for mounting the '192, the tapped disc being then held by friction in a cylindrical cavity of appropriate size. . I am not happy about that method but haven't explored other alternatives. . The challenge to using the '192 in any particular design application can boil down to the position of the threads.

As a general purpose mechanism for kitless design, the '88 initially seems more appealing, until you realize that it would be better if it were of cylindrical shape rather than with slightly tapered side. . As a cylinder, it could be easily recessed into your pen, thus improving the visual impact.
Also, if the thread O.D. were reduced by a mere 0.5 mm you could even use it on a 7 mm tube for a slimline design. . That's one of the mods I was trying to make. . I have the feeling that Schmidt made the '88 for a very specific application and not as a versatile (which it is not) stock part. . It later came to the attention of some companies like PSI and Berea, who decided to use it "as is" with not altogether satisfactory results, IMO.
And us kitless fanatics are just left out on a limb. . Would be nice to get some feedback to Schmidt, but I doubt it would go anywhere.
 

More4dan

Member
Joined
Mar 17, 2016
Messages
2,102
Location
Katy, TX
Here is a picture of the clicker, and as Mal said, you just have to remove the very small clip to take it apart. It's what's inside that worries me getting it back together.
1587618158064.jpeg
 

magpens

Member
Joined
Feb 2, 2011
Messages
15,912
Location
Canada
Danny, that is a great picture ... like all your pictures !!. I don't know how you do it so consistently !!!

That cir-clip ... getting it off is one thing ... without irreparably damaging it ... getting it back on again is another !!!

Usually a cir-clip like that has a hole on each wing-end, but that one is so small I can't see any holes for the cir-clip pliers tips to fit in.

The OD of the cir-clip is only 4.6 mm, and the shaft it is on is only 3.5 mm . . I don't see a way to work with it without wrecking it or the brass shaft.
 

darrin1200

Member
Joined
Mar 17, 2010
Messages
1,854
Location
Lyn, Ontario, Canada
As far as I remember from my tech days, this type of clip just pushes off. The trick is to hold and support the piece while you push it off with a tool or even a flat tip screw driver. Here is a couple of pictures from a watch forum where a guy made a tool to push the c-clip off a watch button. Way more delicate than ours.
09171732-FBED-4919-B15D-E2A050B9AFBA.png
FE1A4322-C2D4-4AF5-98FB-5DBDBDB1FFE8.png
 

dcameraman

Member
Joined
Apr 10, 2012
Messages
48
Location
Trail, OR
I have pulled the SKM-88 apart. The only thing inside is a tiny ball bearing. There is a groove that runs around the inside of the outer piece and another groove shaped kinda like an 'm' that is milled into the inner piece. If you set the ball bearing in the bottom of the outer groove, you can slide the inner piece back into place.
 

hokie

Member
Joined
May 29, 2017
Messages
309
Location
Falls Church, Virginia
Is there any reason to not think the 192 is more or less a stripped down 88?

I watched the PSI video on assembly of the Anvil kit which utilizes the 192.
Here it is being inserted into what I guess would be the equivalent of the threaded "sloped sides" section @magpens was trying to turn away from the 88...
1587653387575.png
1587653448618.png


Then the plunger/button is pressed onto the barbed portion of the 192...
1587653621993.png


The it's just threaded into a bushing pressed into the brass tube just as I imagine you'd do with an 88...
1587653721499.png


Fully depressed, it seems to match what @dcameraman describes about the 88...
1587653880901.png


Just thinking "out loud".
 

More4dan

Member
Joined
Mar 17, 2016
Messages
2,102
Location
Katy, TX
I have pulled the SKM-88 apart. The only thing inside is a tiny ball bearing. There is a groove that runs around the inside of the outer piece and another groove shaped kinda like an 'm' that is milled into the inner piece. If you set the ball bearing in the bottom of the outer groove, you can slide the inner piece back into place.

That is what I suspected. Thank you sir for that information! Time to make a clip removal tool and to prepare to spend 2 hours looking on the floor of my shop when I drop it. I let folks know how it works out when I post the pen I will use it for.

Danny


Sent from my iPad using Penturners.org mobile app
 

magpens

Member
Joined
Feb 2, 2011
Messages
15,912
Location
Canada
@More4dan

Please, Danny ..... try to show us some steps in the disassembly and reassembly of the '88 ..... before you incorporate it into your planned pen !!

Try to do those steps on a tray (or a box lid) so that the parts, if dropped, don't get away from you.

Your photos are superb and could provide guidance to others of us who are greatly interested in what you are about to do.

A photo of the tool you make would be of considerable interest, also. .

THANK YOU
 

stuckinohio

Member
Joined
May 3, 2015
Messages
1,695
Location
Columbus Ohio
here's a very good article by Mike Redburn on the disassembly and modification of the SKM-88.


It is easy to take apart. you don't need special pliers. the cir-clip usually just pops off with pressure from your fingernail. it is also not hard to put back on either. sometimes you can push it back on with your fingers or at the worst use a pair or needle nose pliers.
 

More4dan

Member
Joined
Mar 17, 2016
Messages
2,102
Location
Katy, TX
here's a very good article by Mike Redburn on the disassembly and modification of the SKM-88.


It is easy to take apart. you don't need special pliers. the cir-clip usually just pops off with pressure from your fingernail. it is also not hard to put back on either. sometimes you can push it back on with your fingers or at the worst use a pair or needle nose pliers.

Thanks for the information. Looks like Mike made his own version of the $2 SKM 92 mechanism. I just got some of these SKM 92 to play with, an all metal mechanism and 0.190" in diameter. So it will work in a 7mm slimline tube. You have to make your own button and finial.

It will require another specialty tap M4.2 x 0.35 that I haven't found anywhere. Time to bust out the change gears for the lathe and make one.


Danny


Sent from my iPad using Penturners.org mobile app
 

bmachin

Member
Joined
Jul 28, 2013
Messages
613
Location
Owensboro, KY
[QUOTE="More4dan, post: 2075553, member: 30613
It will require another specialty tap M4.2 x 0.35 that I haven't found anywhere. Time to bust out the change gears for the lathe and make one.
[/QUOTE]
Danny,

Just remember that a .35 mm pitch translates to about 72 tpi which means that you are going to need a tool with a very, very small nose radius. Not sure what that radius is but believe that it's close to theoretically sharp. Maybe a real machinist can offer some help.

FWIW,
Bill
 

darrin1200

Member
Joined
Mar 17, 2010
Messages
1,854
Location
Lyn, Ontario, Canada
Thanks for the information. Looks like Mike made his own version of the $2 SKM 92 mechanism. I just got some of these SKM 92 to play with, an all metal mechanism and 0.190" in diameter. So it will work in a 7mm slimline tube. You have to make your own button and finial.

It will require another specialty tap M4.2 x 0.35 that I haven't found anywhere. Time to bust out the change gears for the lathe and make one.


Danny


Sent from my iPad using Penturners.org mobile app
No need to reinvent the wheel 😁😉

Richard has them
 

More4dan

Member
Joined
Mar 17, 2016
Messages
2,102
Location
Katy, TX
I found them online, debating do I want to spend the time setting up the lathe, turning the tap out of O1, heat treating and grinding. I have a couple threading tools ground one that has a minimal nose radius for a 0.50 mm thread. Or spend $33 plus shipping and wait a couple weeks? I could just press fit it in with my arbor, or glue it in instead of threading. The button has to attached this way.


Sent from my iPhone using Penturners.org mobile app
 

darrin1200

Member
Joined
Mar 17, 2010
Messages
1,854
Location
Lyn, Ontario, Canada
I personally prefer, to keep my pens as repairable as possible. I would order the tap, and then work with your current one as needed. If it is prototype model, then glueing the parts would be a needed experiment.

Just spitballing, but have you ever tried gluing with shellac. It's very solid, removable with a little alcohol. Shellac was often used in vintage pens to hold parts together.
 

More4dan

Member
Joined
Mar 17, 2016
Messages
2,102
Location
Katy, TX
I personally prefer, to keep my pens as repairable as possible. I would order the tap, and then work with your current one as needed. If it is prototype model, then glueing the parts would be a needed experiment.

Just spitballing, but have you ever tried gluing with shellac. It's very solid, removable with a little alcohol. Shellac was often used in vintage pens to hold parts together.

Good point on making it repairable, I was thinking that starting out with an all metal mechanism would be enough, but who knows how long the customer will be using it.

I've not used shellac for glue. Will it stick you to your bench like CA? I have used Locktite, seems like a similar method.

The button has to be press fit or glued to the 92, replacing the mechanism will require removing or replacing it too.

More to think about today.

Danny


Sent from my iPad using Penturners.org mobile app
 

More4dan

Member
Joined
Mar 17, 2016
Messages
2,102
Location
Katy, TX
I've decided to use the SKM 92 for the all copper pen so I can make the button out of copper. I'm worried the copper electroplate will wear off with continued use. The clip should be okay plated.


Sent from my iPad using Penturners.org mobile app
 

howsitwork

Member
Joined
Jul 9, 2016
Messages
2,318
Location
Thirsk
Danny

the advantage of shellac over loctite is ease of removal for replacement or repair. You can remove loctite with heat and then solvents but shellac will soften and remove with alcohol. Widely used in clock making circles for this reason.

If removing the clip I stongly suggest doing it IN a magnetic tray eg
1588173495887.png
 

howsitwork

Member
Joined
Jul 9, 2016
Messages
2,318
Location
Thirsk
Still searching for the bearing race I took out of the lathe last year, hence the advice to use a magnetic tray. 😳I know it went under the lathe but.... so did quite a few other things.

Found my favourite screwdriver( lost circa 2007 ) under the saw bench last month. How it got there, who knows ????
 

More4dan

Member
Joined
Mar 17, 2016
Messages
2,102
Location
Katy, TX
Try finding #0 80 tpi screws 1/4" long on the shop floor! Magnetic bowls really do help. until I turn some steel on the lathe near by and it fills up with tiny razor shards. The picture above shows the watch guy using a small piece of clay to capture the clip, magnets and watches do not play well together.
 

More4dan

Member
Joined
Mar 17, 2016
Messages
2,102
Location
Katy, TX
I'm now on my second Finial and 4th button out of copper to try using the SKM 192 mechanism. I believe I have a working one here. It will add a couple more hours to the build time. Part of the issue is the "softness" of the copper where hole sizes don't always match the drill size and it scratches very easily making sliding surfaces highly variable.

It will however look better.

Danny


Sent from my iPhone using Penturners.org mobile app
 
Top Bottom