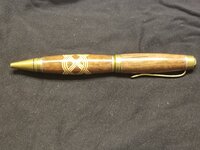
@duderubble .... Your pictured knot is pretty darn good for a first attempt !! . Your thoughts for improvement have been going through my mind.
You wonder ... "I'm thinking maybe the veneer sandwich needs to match the saw kerf exactly ... "
This "rule" has been stated often, but I am not sure it is an absolute requirement ... As I see it, it depends on how you make your knot.
A lot of methods suggest that, for successful alignment, you do not cut all the way through the blank. . Yes, the "rule" applies for this method.
But, it seems to me, if you can find another way to assure alignment (of wood grain, or whatever), you can dispense with that "rule".
You could then make your cuts go right through the blank.
You must, however, keep all inserts (eg. your veneer sandwiches) of the same thickness, and carefully re-align after each cut.
One aid to re-alignment is accurately squaring your blank cross-section and ends before doing any cuts.
If you do that, and carefully monitor the order of your cuts, then you should be able to make your inserts of "whatever" thickness.
A single veneer thickness of, say, 0.020", should be OK even with a kerf of 0.065" (my saw blade) cutting completely through.
If I am wrong on this, I would like to be informed ( ... gently ... please !! ) by anyone with corroborating reasons. . Thanks for considering.

 ).
).